
A Sweet Indulgence that Will Keep You Coming Back for More!
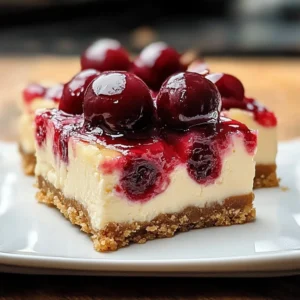
If you’re on the hunt for a dessert that beautifully marries rich creaminess with a pop of fruity flavor, look no further than these Cherry Cheesecake Bars! Imagine a luscious, creamy filling nestled on a buttery crust and topped with vibrant, sweet-tart cherry topping. Each bite is a heavenly balance of texture and taste, perfect for satisfying your sweet tooth or impressing guests at a gathering. Did you know that cheesecake bars are a fantastic way to enjoy the classic cheesecake experience without the need for a springform pan? Yes, and that’s just one of the reasons they’re a hit in kitchens everywhere! They’re also quick to prepare, making them an excellent option for busy families. Compared to cookies or cupcakes, these Cherry Cheesecake Bars stand tall, illuminating any dessert table with elegance. So, grab your baking essentials and get ready for a sweet adventure that you won’t want to miss!
What are Cherry Cheesecake Bars?
You might be wondering why these delicious treats are called Cherry Cheesecake Bars. Are they bars? Are they cheesecakes? Well, yes and yes! This inventive dessert combines the velvety goodness of cheesecake with a convenient bar format that’s simple to slice and serve. Think of them as the versatile cousin of traditional cheesecake, but with fruity flair! It’s like your favorite cheesecake decided to throw on a chic outfit for a picnic! As the old saying goes, “The way to a man’s heart is through his stomach” – and trust me, Cherry Cheesecake Bars are sure to win hearts in no time! So why not grab your apron and experience this delightful twist for yourself?
Why You’ll Love These Cherry Cheesecake Bars
Cherry Cheesecake Bars are more than just a pretty face; this dessert delivers a trifecta of reasons why it deserves a spot in your recipe rotation! First, the main highlight of the dish is its creamy cheesecake filling topped splendidly with a glaze of cherry sweetness. Imagine sinking your fork into the smooth, velvety filling as the tartness of the cherries bursts in your mouth. Second, making these bars at home is a budget-friendly option compared to splurging on an upscale dessert at a bakery. You get all the amazing taste without the extravagant price! Lastly, their versatility shines through with toppings—you can swap cherries for blueberries or even fresh strawberries, making it a delightful dessert for any season. If you love this recipe, don’t forget to check out our classic cheesecake recipe, as it provides an equally scrumptious experience!
How to Make Cherry Cheesecake Bars
Quick Overview
Creating these delightful Cherry Cheesecake Bars is not only easy, but it also comes together in about 40 minutes! Your taste buds will thank you for this rich, decadent treat, which features a buttery crust, fluffy cheesecake filling, and a delightful cherry topping. With such straightforward steps, even beginner bakers can feel like pros in the kitchen!
Key Ingredients for Cherry Cheesecake Bars
- Crust:
- 1 ½ cups graham cracker crumbs
- ½ cup unsalted butter, melted
- ¼ cup sugar
- Cheesecake Filling:
- 16 oz cream cheese, softened
- ¾ cup sugar
- 1 tsp vanilla extract
- 3 large eggs
- Cherry Topping:
- 1 can (21 oz) cherry pie filling
Step-by-Step Instructions:
- Prepare the Crust: Preheat your oven to 325°F (163°C). In a mixing bowl, combine graham cracker crumbs, melted butter, and sugar. Mix until well blended. Press the mixture evenly into the bottom of a greased 9×13 inch baking dish. Bake for about 10 minutes and then allow to cool slightly.
- Make the Cheesecake Filling: In a large mixing bowl, beat the softened cream cheese with an electric mixer until smooth. Add in the sugar and vanilla extract, mixing until combined. Add the eggs one at a time, beating after each addition until fully incorporated.
- Combine and Bake: Pour the cheesecake filling over the cooled crust, smoothing it with a spatula. Bake for about 25-30 minutes or until the edges are set but the center is still slightly jiggly.
- Add the Cherry Topping: Remove from the oven and let it cool slightly. Spread the cherry pie filling evenly over the top. Let the bars cool completely at room temperature before refrigerating for at least 2 hours.
- Serve and Enjoy: Once chilled, slice the bars into squares and serve! Enjoy your delicious homemade Cherry Cheesecake Bars.
What to Serve Cherry Cheesecake Bars With
These delightful Cherry Cheesecake Bars lend themselves to a variety of pairings! Serve them with a dollop of freshly whipped cream for added decadence. A side of vanilla ice cream can complement the tart cherries beautifully, while a rich cup of coffee or herbal tea makes the perfect beverage to balance the sweetness. Another delightful idea is to enjoy them alongside some fresh fruit for a light and refreshing accompaniment. Whatever you choose, these bars will surely shine as the star of your dessert spread!
Top Tips for Perfecting Cherry Cheesecake Bars
To ensure your Cherry Cheesecake Bars turn out perfect every time, here are some handy tips:
- Proper Mixing: Make sure there are no lumps in your cream cheese before adding other ingredients for a silky texture.
- Don’t Overbake: Keep an eye on the cheesecake filling as it bakes; over-baking can lead to a dry texture. It should be set around the edges and slightly jiggly in the center.
- Let Them Chill: Allow the bars to chill in the fridge for several hours before slicing—as tempting as it may be to dive right in, the flavors meld beautifully when they have time to sit.
- Experiment with Toppings: This recipe is versatile; feel free to try different fruit toppings or even a chocolate drizzle for a creative twist!
Storing and Reheating Tips
Storing these Cherry Cheesecake Bars is simple! Place them in an airtight container and keep them in the refrigerator, where they’ll stay fresh for up to 5 days. For longer storage, you can freeze the bars—just make sure they are well wrapped in plastic wrap and then placed in a freezer-safe container. They can be frozen for up to three months. To enjoy frozen bars, simply let them thaw in the refrigerator overnight, and they’ll be good to go!
Indulge in the creamy sweetness of Cherry Cheesecake Bars today, and watch as they become a new family favorite! Happy baking!

A Sweet Indulgence that Will Keep You Coming Back for More!
Ingredients
Method
- Prepare the Crust: Preheat your oven to 325°F (163°C). In a mixing bowl, combine graham cracker crumbs, melted butter, and sugar. Mix until well blended. Press the mixture evenly into the bottom of a greased 9x13 inch baking dish. Bake for about 10 minutes and then allow to cool slightly.
- Make the Cheesecake Filling: In a large mixing bowl, beat the softened cream cheese with an electric mixer until smooth. Add in the sugar and vanilla extract, mixing until combined. Add the eggs one at a time, beating after each addition until fully incorporated.
- Combine and Bake: Pour the cheesecake filling over the cooled crust, smoothing it with a spatula. Bake for about 25-30 minutes or until the edges are set but the center is still slightly jiggly.
- Add the Cherry Topping: Remove from the oven and let it cool slightly. Spread the cherry pie filling evenly over the top. Let the bars cool completely at room temperature before refrigerating for at least 2 hours.
- Serve and Enjoy: Once chilled, slice the bars into squares and serve! Enjoy your delicious homemade Cherry Cheesecake Bars.
Leave a Reply