
Are you ready to elevate your snack game to a whole new level? Stuffed Fried Pickles are here to tantalize your taste buds with their crispy exterior, creamy filling, and zesty flavors! Picture this: you’ve just bitten into a perfectly fried pickle, the crunch echoing around you as the warm, gooey cheese spills out. It’s a delightful experience that combines textures—from the satisfying crunch of the breading to the creaminess of the cheese. Fun fact: did you know that fried pickles are believed to have originated in the Southern United States? They’ve since become a popular appetizer at family gatherings and sports events alike.
Making Stuffed Fried Pickles is surprisingly simple, which makes them perfect for impressing your guests without spending all day in the kitchen. If you loved our Cheesy Stuffed Jalapeños, you’re going to adore this recipe too! With just a handful of ingredients, you can create a dish that’s not only a crowd-pleaser but also a gem of comfort food. Let’s dive into this flavor-packed adventure!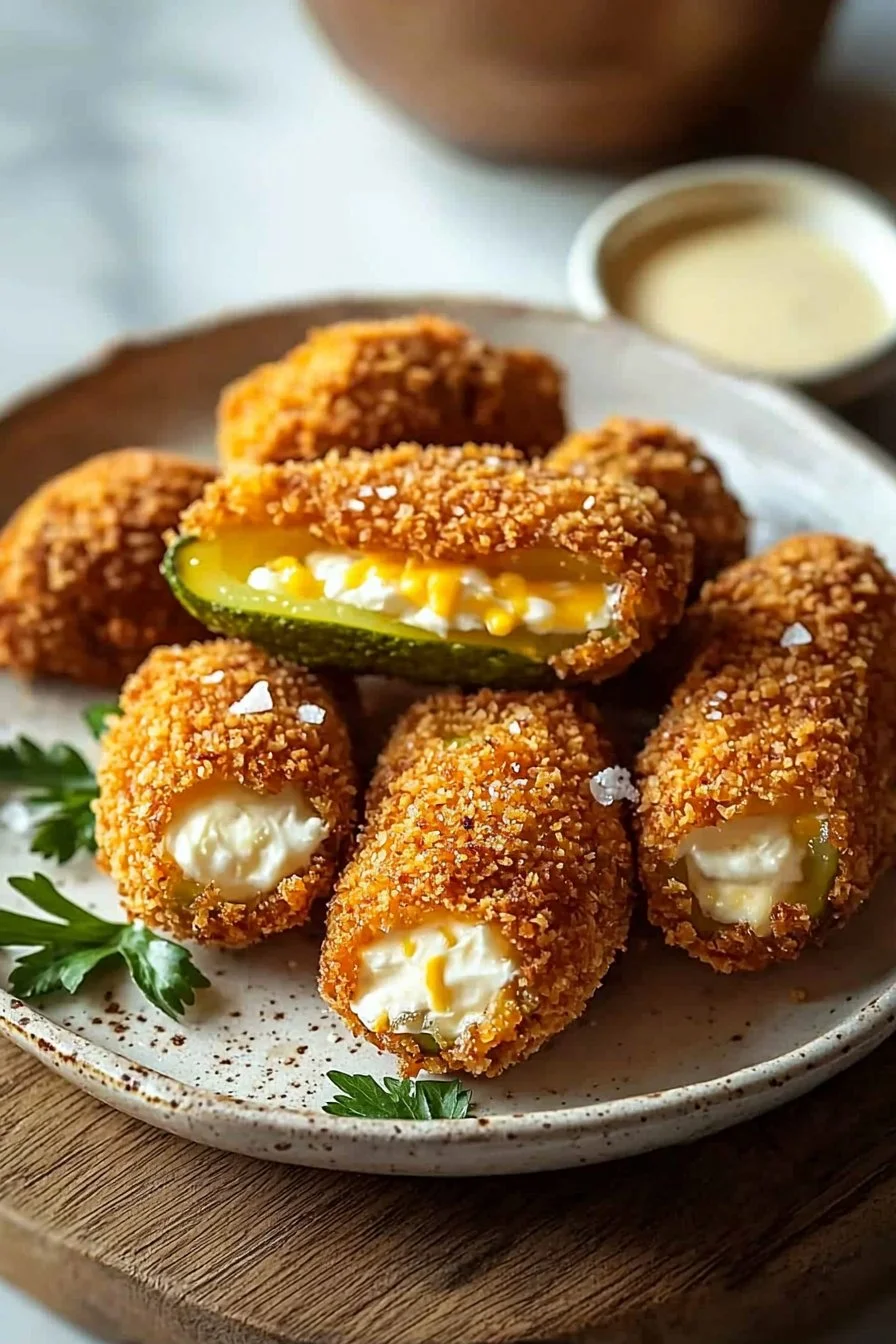
What are Stuffed Fried Pickles?
So, what exactly are Stuffed Fried Pickles? Imagine tangy pickles filled with a creamy concoction of cheese and spices, all wrapped up in a crispy layer of breading and deep-fried to perfection. It’s a name that makes you ponder—who thought of stuffing a pickle, and why not sooner? Perhaps the person just wanted to ensure that “the way to a man’s heart is through his stomach” rings true! Can you just picture a family sitting around the table, laughter echoing as memories are created over these delicious little bites? Seriously, if you haven’t tried these yet, what are you waiting for? Get in that kitchen!
Why You’ll Love This Stuffed Fried Pickles
There are countless reasons to adore this Stuffed Fried Pickles recipe. First and foremost, it’s a standout dish that will steal the show during your next family gathering or cozy winter evening at home. Secondly, making these savory delights at home can save you money compared to buying them at a restaurant, while offering endless customization options! You can experiment with spices and cheeses to make the dish uniquely yours.
Now, let’s not forget those delicious toppings! From a spicy ranch dip to a zesty marinara, the options are limitless. Just think about how these crispy wonders could rival classic mozzarella sticks in their appeal. Are you ready to make scrumptious memories with Stuffed Fried Pickles?
How to Make Stuffed Fried Pickles
Quick Overview
These delightful bites are not only easy to make, but they also offer a satisfying crunch with every bite. With a preparation time of just 30 minutes, you’ll not only have a tasty snack ready but you’ll also enjoy the process of cooking. Gather your ingredients, and let’s get started!
Ingredients for Stuffed Fried Pickles
To make your Stuffed Fried Pickles, you’ll need the following ingredients:
- 1 jar of dill pickles (whole or spears, as preferred)
- 4 oz cream cheese, softened
- 1 cup shredded cheddar cheese
- 1 cup breading (you can use flour, breadcrumbs, or cornmeal)
- 1 egg, beaten
- Oil for frying (canola or vegetable oil work great)
- Spices (optional, such as garlic powder or paprika for an extra kick)
Step-by-Step Instructions
- Prep the Pickles: Start by draining the jar of pickles and pat them dry with a paper towel. If you opt for whole pickles, slice them in half lengthwise and scoop out a bit of the inner flesh for more stuffing space.
- Make the Filling: In a mixing bowl, combine softened cream cheese and shredded cheddar cheese. Feel free to add in spices like garlic powder or paprika for an added flavor boost.
- Stuff the Pickles: Using a small spoon or a piping bag, carefully fill each pickle with the cheese mixture. Be generous but make sure not to overfill!
- Prepare for Frying: Set up your breading station with the beaten egg in one bowl and the breading in another. Dip each stuffed pickle into the egg mixture, ensuring it’s thoroughly coated, then roll it in the breading until fully covered.
- Heat the Oil: In a deep frying pan, heat about 2-3 inches of oil over medium heat until it reaches 350°F (175°C).
- Fry the Pickles: When the oil is hot, carefully place the breaded pickles in the oil, a few at a time to avoid overcrowding. Fry them for 2-3 minutes on each side, or until golden brown and crispy.
- Drain and Serve: Use a slotted spoon to transfer the fried pickles to a plate lined with paper towels to drain any excess oil. Serve hot with your favorite dipping sauce!
Top Tips for Perfecting Stuffed Fried Pickles
- Substitutions: If you’re looking for substitutions, try using different types of cheese like pepper jack or mozzarella for a fun twist. You can even use gluten-free breadcrumbs if needed!
- Timing: Make sure the oil is hot enough before frying; this helps achieve that perfect crispy texture rather than a soggy coating.
- Avoiding Common Mistakes: Ensure you dry the pickles thoroughly before breading to avoid excess moisture, which can lead to a soggy result.
Storing and Reheating Tips
If you happen to have any leftovers (though we can’t imagine there will be!), let the Stuffed Fried Pickles cool completely before storing them in an airtight container in the refrigerator. They can last for about 2-3 days. For reheating, place them on a baking sheet in a preheated oven at 350°F (175°C) for about 10-15 minutes to restore that wonderful crunch.
Now that you have all the insider tips and tricks, it’s time to gather your family and friends, make these Stuffed Fried Pickles, and enjoy the delightful crunch intertwined with creamy goodness. Prepare for compliments and cravings that will have everyone asking for seconds! What are you waiting for? Dive in and enjoy!
Stuffed Fried Pickles
Ingredients
Method
- Drain the jar of pickles and pat them dry with a paper towel. If using whole pickles, slice them in half lengthwise and scoop out a bit of the inner flesh for more stuffing space.
- In a mixing bowl, combine softened cream cheese and shredded cheddar cheese. Feel free to add in spices like garlic powder or paprika for an added flavor boost.
- Using a small spoon or a piping bag, carefully fill each pickle with the cheese mixture. Be generous but make sure not to overfill!
- Set up your breading station with the beaten egg in one bowl and the breading in another. Dip each stuffed pickle into the egg mixture, ensuring it’s thoroughly coated, then roll it in the breading until fully covered.
- In a deep frying pan, heat about 2-3 inches of oil over medium heat until it reaches 350°F (175°C).
- When the oil is hot, carefully place the breaded pickles in the oil, a few at a time to avoid overcrowding. Fry them for 2-3 minutes on each side, or until golden brown and crispy.
- Use a slotted spoon to transfer the fried pickles to a plate lined with paper towels to drain any excess oil. Serve hot with your favorite dipping sauce.
Leave a Reply