
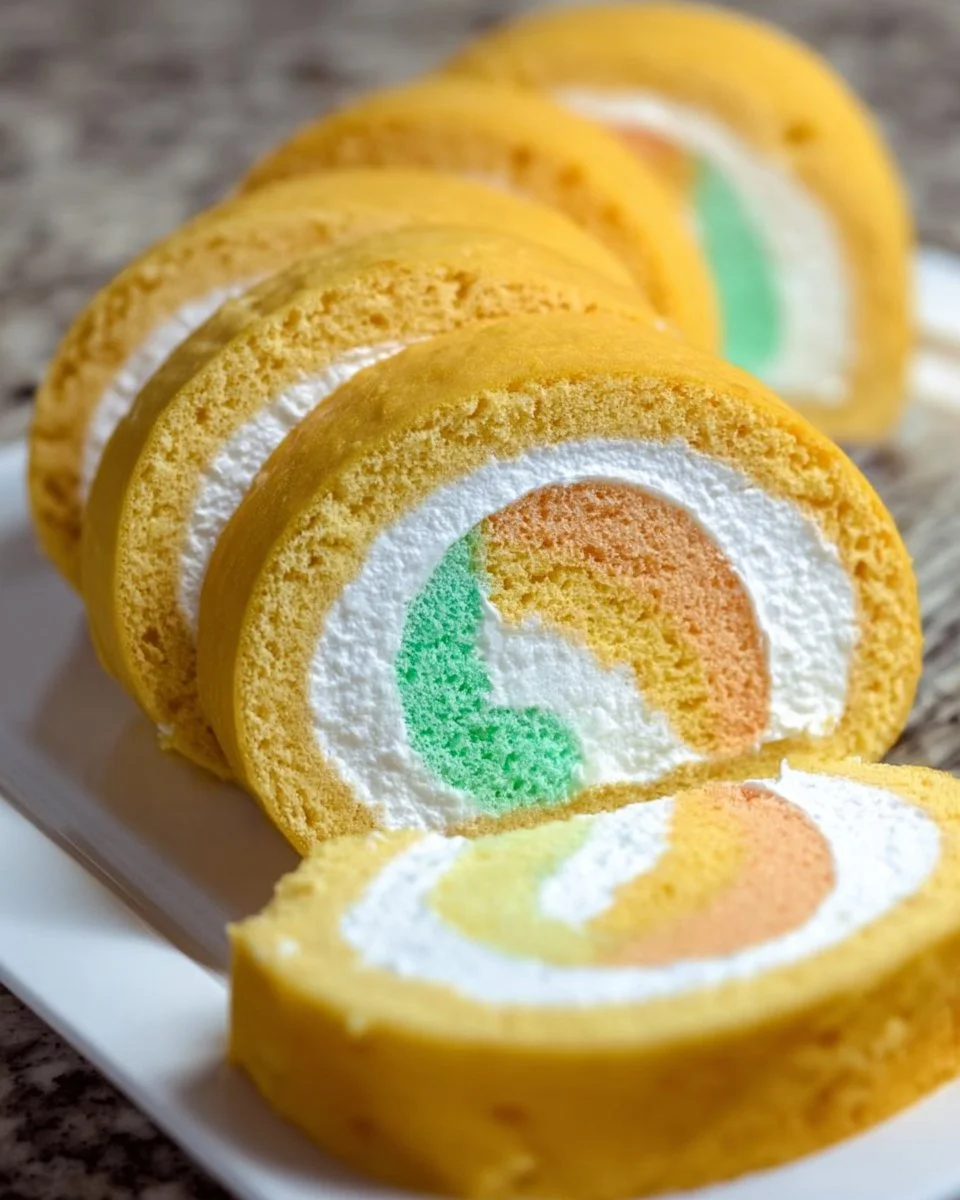
The Spring Cake Roll is a delightful dessert that will have your taste buds dancing! With its light, airy sponge cake wrapped around a rich filling, this treat is the perfect way to bring a touch of sweetness to any family gathering. Imagine the moment you slice into this beautiful roll, revealing its colorful filling and fluffy texture. A fun fact: the origins of cake rolls date back centuries, showing that this delicate dessert has stood the test of time!
It’s special not just because of its incredible taste but also due to its remarkable simplicity. You can whip this dessert up in no time—perfect for spontaneous celebrations or cozy winter evenings at home. Compared to more elaborate desserts, like a multi-layered cake, the Spring Cake Roll offers a lighter option that’s just as delicious and visually appealing. So grab your apron and let’s embark on this delightful baking adventure!
What is a Spring Cake Roll?
You might be wondering, why is it called a Spring Cake Roll? Is it because it’s light enough to float like a spring breeze? Or maybe because it’s as fresh as a blooming flower? Whatever the reason, one thing is for sure: the Spring Cake Roll is the way to a man’s heart through his stomach! Picture this: a fluffy sponge cake filled with luscious whipped cream, rolled to perfection, and dusted with powdered sugar. It truly is a dessert that beckons you to take a bite! Invite your family and friends to share in the fun, and watch as they fall in love with this delightful treat.
Why You’ll Love This Spring Cake Roll
First and foremost, the Spring Cake Roll is a dessert that brings the best of both worlds—visual appeal and delectable flavor. The fluffy, soft sponge cake pairs beautifully with a rich filling, creating a delightful experience with every bite. Plus, compared to other desserts like layered cakes or tarts, making this cake roll is incredibly cost-effective. Imagine treating everyone to a homemade dessert without breaking the bank—it’s possible with this recipe!
Now let’s talk about toppings! Whether you fancy a classic whipped cream, fresh fruit, or a drizzle of chocolate, the Spring Cake Roll can be customized to fit any palate. It’s a versatile recipe that can easily adapt to the flavors your family loves best. Why not give it a try? You won’t regret it!
How to Make Spring Cake Roll
Quick Overview
The Spring Cake Roll is an easy and satisfying dessert that’s perfect to impress your guests or treat your family. With its light, fluffy texture and rich flavor, you’ll find it hard to resist more than one slice. Preparation time? Just about 20 minutes! Let’s dive into what you need to create this delightful dessert!
Ingredients
- 4 large eggs
- 1 cup granulated sugar
- 1 cup all-purpose flour
- 1/4 cup unsweetened cocoa powder
- 1/2 teaspoon baking powder
- 1/4 teaspoon salt
- 1 teaspoon vanilla extract
- 1 cup whipped cream or buttercream (for filling)
- Powdered sugar (for dusting)
Note: Always ensure your ingredients are halal-compliant, particularly with fillings and decorations.
Step-by-Step Instructions
- Preheat the Oven: Start by preheating your oven to 375°F (190°C). A well-tempered oven is critical to achieving that beautiful cake roll.
- Prepare the Baking Sheet: Line a 15×10 inch baking pan with parchment paper, leaving an overhang on the sides for easy removal later.
- Mix the Batter:
- In a mixing bowl, beat the eggs and sugar together until it becomes light and fluffy—this serves as the base for our airy sponge.
- Gradually fold in the flour, cocoa powder, baking powder, and salt, being careful not to deflate your whipped eggs. Gently add the vanilla extract for an added layer of flavor.
- Spread the Mixture: Pour the cake batter into the prepared pan and spread it out evenly with a spatula.
- Bake: Place the pan in the oven and bake for 12-15 minutes, or until the cake springs back when lightly touched.
- Roll the Cake: Once baked, immediately invert the cake onto a clean kitchen towel dusted with powdered sugar. Gently remove the parchment paper and roll the cake up with the towel, starting from one of the short sides. Let it cool completely.
- Fill and Serve: Unroll the cake, spread your whipped cream or buttercream filling over it, and then roll it back up without the towel. Dust with powdered sugar before slicing and enjoy!
Top Tips for Perfecting Spring Cake Roll
- Substitutions: You can easily substitute the whipped cream for a dairy-free alternative to cater to dietary restrictions without compromising on taste.
- Timing is Everything: Ensure that your oven is preheated beforehand; this will guarantee a smooth baking process and prevent potential mishaps.
- Avoiding Common Mistakes: The most crucial part of this recipe is the folding technique. Be gentle when incorporating the flour mix to retain the airiness required for your cake roll.
Storing and Reheating Tips
To keep your Spring Cake Roll fresh, store it in an airtight container in the refrigerator. It can last for about 3-4 days, although it’s best enjoyed fresh. If you want to prepare it in advance, you can freeze the unfilled cake roll by wrapping it tightly in plastic wrap, where it can stay good for about a month. Reheat by letting it sit at room temperature before filling, maintaining that delightful texture.
Now that you have all the details, it’s time to roll up your sleeves and create this mouthwatering Spring Cake Roll! With its charming appearance and delicious flavors, it’s sure to become a new family favorite. Happy baking!

Spring Cake Roll
Ingredients
Method
- Preheat your oven to 375°F (190°C).
- Line a 15×10 inch baking pan with parchment paper, leaving an overhang on the sides.
- In a mixing bowl, beat the eggs and sugar together until light and fluffy.
- Gradually fold in the flour, cocoa powder, baking powder, and salt, then gently add the vanilla extract.
- Pour the batter into the prepared pan and spread it out evenly.
- Bake for 12-15 minutes, or until the cake springs back when lightly touched.
- Invert the cake onto a clean kitchen towel dusted with powdered sugar and gently remove the parchment paper.
- Roll the cake up with the towel starting from one of the short sides and let it cool completely.
- Unroll the cake, spread your filling over it, and then roll it back up without the towel.
- Dust with powdered sugar before slicing and enjoy!
Leave a Reply