
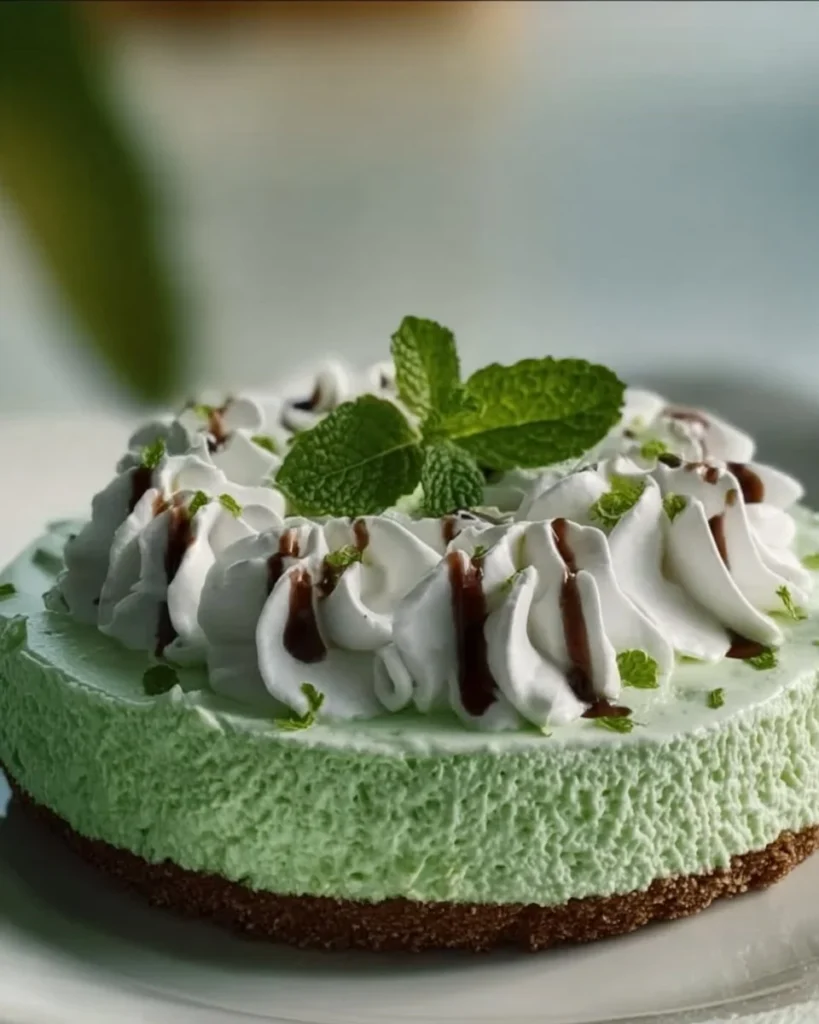
If you’re looking for a treat that’s both refreshing and indulgent, then look no further than this No Bake Mint Dessert! Picture this: a creamy, light filling with a cool burst of mint, nestled atop a crunchy layer of chocolate cookie crust. It’s the perfect combination of texture and flavor, a delightful bite that dances on your palate. Legend has it that the way to a man’s heart is through his stomach, and this dessert could easily win over even the toughest critics. Whether it’s a family gathering or a cozy winter evening at home, this quick and easy dessert will leave everyone asking for seconds!
What makes this No Bake Mint Dessert truly special is its simplicity. With just a handful of ingredients, you can whip up a dish that rivals those fancy cakes you see on food blogs. Just imagine impressing your loved ones with something that rivals our popular no-bake cheesecake or even our chocolate mousse recipes! Trust me; they won’t believe how effortlessly incredible this dessert is. Ready to dive in and impress? Let’s get started!

What is No Bake Mint Dessert?
Have you ever tried to figure out how this deliciously minty dessert got its name? I mean, “No Bake Mint Dessert” is pretty straightforward, right? It doesn’t exactly roll off the tongue like “Crème Brûlée”, but hey—no judgments here! I love how this dish brings back memories of family gatherings where laughter and delicious treats filled the air. Picture this: children giggling as they sneak in spoonfuls while adults debate how to garnish it. When you think about it, isn’t it true that the way to a man’s heart is through his stomach? And I bet this dessert could be the ticket! So, gather your loved ones, and let’s create something delightful together!
Why You’ll Love This No Bake Mint Dessert
This No Bake Mint Dessert is not just another dessert; it’s the star of the show! The layered textures offer a satisfying crunch with every bite, while the minty filling brings a cool, refreshing flavor that’s perfect for any occasion. Plus, making it at home is a fantastic way to save money. Instead of splurging on expensive desserts at cafes, you can whip this up in no time and keep the cash in your pocket!
And let’s talk about toppings—who doesn’t love a little extra goodness? You can garnish it with whipped cream, chocolate shavings, or even fresh mint leaves for that added flair. Each addition enhances the flavor, not unlike how our classic chocolate chip cookies provide a comforting texture with each chewy bite. Trust me, after trying this, you’ll want to keep it at the top of your dessert rotation!
How to Make No Bake Mint Dessert
Quick Overview
This No Bake Mint Dessert is incredibly easy to prepare, making it an ideal choice for beginners and seasoned bakers alike. With its velvety, smooth filling and crunchy base, you’ll be savoring the contrasting textures in every bite. The total preparation time is roughly 20 minutes—perfect for those evenings when you need a quick yet satisfying dessert!
Ingredients
Here’s everything you’ll need to make this delightful No Bake Mint Dessert:
- 1 cup of crushed chocolate cookies
- 1/2 cup of melted butter
- 8 oz cream cheese, softened
- 1 cup powdered sugar
- 2 cups whipped cream
- 1 tsp peppermint extract
- Green food coloring (optional)
- Chocolate shavings for garnish
Note: Make sure that all ingredients are Halal-compliant to ensure the dessert adheres to dietary restrictions.
Step-by-Step Instructions
- Prepare the Crust: In a mixing bowl, combine the crushed chocolate cookies and melted butter. Stir until the crumbs are coated, then press the mixture into the bottom of an 8-inch square baking dish. Use the back of a spoon to flatten it evenly and create a solid base.
- Make the Filling: In another bowl, beat the softened cream cheese until smooth. Gradually add the powdered sugar and beat until creamy. Stir in the peppermint extract and a few drops of green food coloring, if desired.
- Fold in the Whipped Cream: Gently fold in the whipped cream until just combined. Aim for a light, airy texture to keep the filling fluffy.
- Layer the Filling: Spread the filling evenly over the prepared crust, smoothing it out with a spatula.
- Chill: Refrigerate the dessert for at least 4 hours, or until set. This will help the flavors meld together beautifully.
- Serve & Garnish: Before serving, sprinkle chocolate shavings on top for that extra touch of decadence. Cut into squares and enjoy!
Top Tips for Perfecting No Bake Mint Dessert
- Substitutions: If you’re looking for a lighter version, consider using Greek yogurt instead of cream cheese. This will lend a tangy flavor without compromising creamy goodness!
- Timing: Be patient! Allowing the dessert to chill is crucial for setting the layers and enhancing the flavors. Give it at least 4 hours in the fridge, or even overnight for a more pronounced minty taste.
- Common Mistakes: Ensure your cream cheese is softened before mixing. If it’s too cold, you risk lumps in your filling. Use a hand mixer for smooth results every time!
Storing and Reheating Tips
Once fully set, this No Bake Mint Dessert can be stored in the refrigerator for up to 5 days. If you decide to make it in advance for a family gathering, it can also be frozen for up to 2 months. Just be sure to cover it well to prevent freezer burn. When you’re ready to serve, thaw it in the refrigerator overnight to maintain its texture and flavor.
Enjoy every creamy, minty bite of this No Bake Mint Dessert, and watch how it brings warmth and joy to your next family gathering. Share your creations and tag us; we can’t wait to see how yours turns out!
No Bake Mint Dessert
Ingredients
Method
- In a mixing bowl, combine the crushed chocolate cookies and melted butter. Stir until the crumbs are coated, then press the mixture into the bottom of an 8-inch square baking dish.
- In another bowl, beat the softened cream cheese until smooth. Gradually add the powdered sugar and beat until creamy. Stir in the peppermint extract and a few drops of green food coloring, if desired.
- Gently fold in the whipped cream until just combined for a light, airy texture.
- Spread the filling evenly over the prepared crust, smoothing it out with a spatula.
- Refrigerate the dessert for at least 4 hours, or until set.
- Before serving, sprinkle chocolate shavings on top, cut into squares, and enjoy!
Leave a Reply