
Homemade Watermelon Mochi
There’s something uniquely delightful about biting into a piece of Homemade Watermelon Mochi. Imagine a soft, chewy exterior bursting with the sweet essence of fresh watermelon. Not only is this treat a feast for the eyes with its vibrant colors, but it’s also a playful addition to family gatherings. The first time I made this, I was skeptical but curious. Little did I know that mochi, traditionally a Japanese confection, could be elevated with such a refreshing fruit twist! It’s simple enough for the kids to help out, making it perfect for a fun weekend project. If you’ve enjoyed my other dessert recipes, like the Avocado Chocolate Mousse, you just might fall in love with this unique take on mochi. So, grab your aprons and let’s roll up our sleeves!

What is Homemade Watermelon Mochi?
So, what exactly is this delightful concoction called Homemade Watermelon Mochi? Is it a fruit? A dessert? Or perhaps a magical creation from the land of culinary wonders? While the name might have you scratching your head, there’s nothing confusing about its charm. Essentially, it’s a soft, chewy rice cake that wraps around a homemade watermelon filling. And here’s a fun story: I once tried serving it to friends without explaining what it was – their faces lit up when they took their first bite! Indeed, they say the way to a man’s heart is through his stomach, and if that’s true, I surely made a few converts that day! Ready to impress your family and friends? Let’s dive into making your own delicious batch!
Why You’ll Love This Homemade Watermelon Mochi
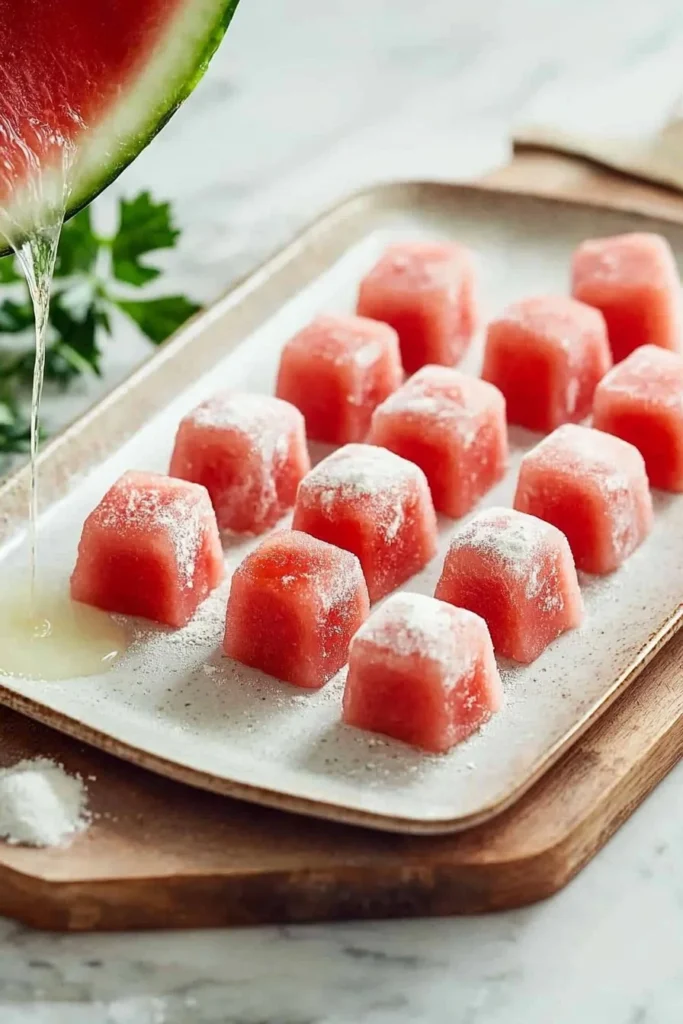
There are a few compelling reasons to whip up some Homemade Watermelon Mochi in your kitchen. For starters, this dish’s primary highlight is its unique flavor profile and delightful texture. The sweetness of the watermelon shines through the chewy exterior, making each bite a delightful surprise. Preparing this treat at home can also be a significant cost-saver compared to purchasing similar confections from specialty stores. Plus, let’s talk toppings! Consider dusting with a light layer of cornstarch for that authentic mochi experience or even sprinkling in some coconut flakes for added flair. If you’ve tried traditional mochi before, you’ll find this variant refreshingly different. So, gather your ingredients and let’s get started on this delicious journey!
How to Make Homemade Watermelon Mochi
Quick Overview
Making Homemade Watermelon Mochi is easy and rewarding. In just a little over an hour, you can create this delightful dessert that’s both visually stunning and remarkably appetizing. You’ll love the combination of the chewy texture and the burst of watermelon flavor that makes every bite a refreshing experience.
Ingredients
To get started on your Homemade Watermelon Mochi, you will need:
- 1 cup glutinous rice flour
- 1/4 cup sugar
- 3/4 cup water
- 1 cup watermelon puree
- Cornstarch (for dusting)
- Watermelon cubes (for filling)
Make sure your ingredients are Halal-friendly—you won’t find any pork-based or alcoholic products here!
Step-by-Step Instructions
- Prepare the Watermelon Puree: Start by blending fresh watermelon chunks until you have a smooth puree. This should yield about 1 cup. Keep it aside.
- Mix Dry and Wet Ingredients: In a bowl, combine 1 cup of glutinous rice flour and 1/4 cup of sugar. In a separate bowl, combine 3/4 cup of water with the watermelon puree. Gradually mix the wet ingredients into the dry ones, stirring until smooth.
- Steam the Mixture: Pour the mochi mixture into a heatproof bowl. Prepare a steamer over boiling water and steam the mixture for about 20 minutes, stirring occasionally.
- Cool and Shape the Mochi: Once the mochi is sticky and translucent, remove it from the steam and allow it to cool slightly. Dust a clean surface with cornstarch, place the mochi on it, and knead gently. Cut into squares.
- Fill with Watermelon: Take each square and place a small watermelon cube in the center. Pinch the edges together to seal.
- Serve: Your Homemade Watermelon Mochi is ready! Dust with more cornstarch before serving, and you can even chill in the fridge for about 15 minutes for a refreshing treat.
Top Tips for Perfecting Homemade Watermelon Mochi
- Substitutions: If you’re looking to change things up, consider using other fruit purees, such as mango or strawberry, while keeping the basic mochi recipe intact.
- Timing is Key: Make sure to not over-steam the mochi, as this can affect its texture. Stick to the suggested time and keep an eye on it!
- Avoiding Mistakes: A common issue is sticky mochi. Make sure to dust your hands and surfaces with cornstarch to avoid sticking when working with the mochi mixture.
Storing and Reheating Tips
Homemade Watermelon Mochi is best enjoyed fresh, but you can store it in the refrigerator for up to three days. To maintain its freshness, wrap each piece individually in plastic wrap. If you want to freeze it, place it in an airtight container, where it can last for about a month. When you’re ready to eat, simply let it thaw in the refrigerator or at room temperature to retain its texture.
With these tips and tricks, you’re all set to enjoy your delicious Homemade Watermelon Mochi, perfect for family gatherings or simply indulging as a sweet treat on a warm day! Don’t wait—let’s get cooking!
Homemade Watermelon Mochi
Ingredients
Method
- Blend fresh watermelon chunks until you have a smooth puree. This should yield about 1 cup.
- In a bowl, combine 1 cup of glutinous rice flour and 1/4 cup of sugar.
- In a separate bowl, mix 3/4 cup of water with the watermelon puree, then gradually add this mixture to the dry ingredients, stirring until smooth.
- Pour the mochi mixture into a heatproof bowl. Prepare a steamer over boiling water and steam the mixture for about 20 minutes, stirring occasionally.
- Once the mochi is sticky and translucent, remove it from the steam and allow it to cool slightly.
- Dust a clean surface with cornstarch, place the mochi on it, and knead gently.
- Cut the mochi into squares and place a small watermelon cube in the center of each square.
- Pinch the edges together to seal the mochi.
- Dust the mochi with more cornstarch before serving, and chill in the fridge for about 15 minutes for a refreshing treat.
Leave a Reply