
There’s something extraordinary about the aroma of freshly baked bread wafting through the home, a fragrance that instantly warms the heart and draws loved ones to the kitchen. Imagine breaking into a loaf of Gluten Free No Knead Bread, where each slice features a crispy crust and a wonderfully soft interior, making it perfect for any meal or gathering. This recipe doesn’t just deliver on texture; it shines in flavor too. I remember the first time I tried making bread—I had flour everywhere and wasn’t quite sure what I was doing. But this no-knead version made me feel like a gourmet chef in my own kitchen! If you’re looking for simplicity without sacrificing taste, this recipe is for you. It’s as approachable as my beloved homemade Pumpkin Bread, minus the fuss!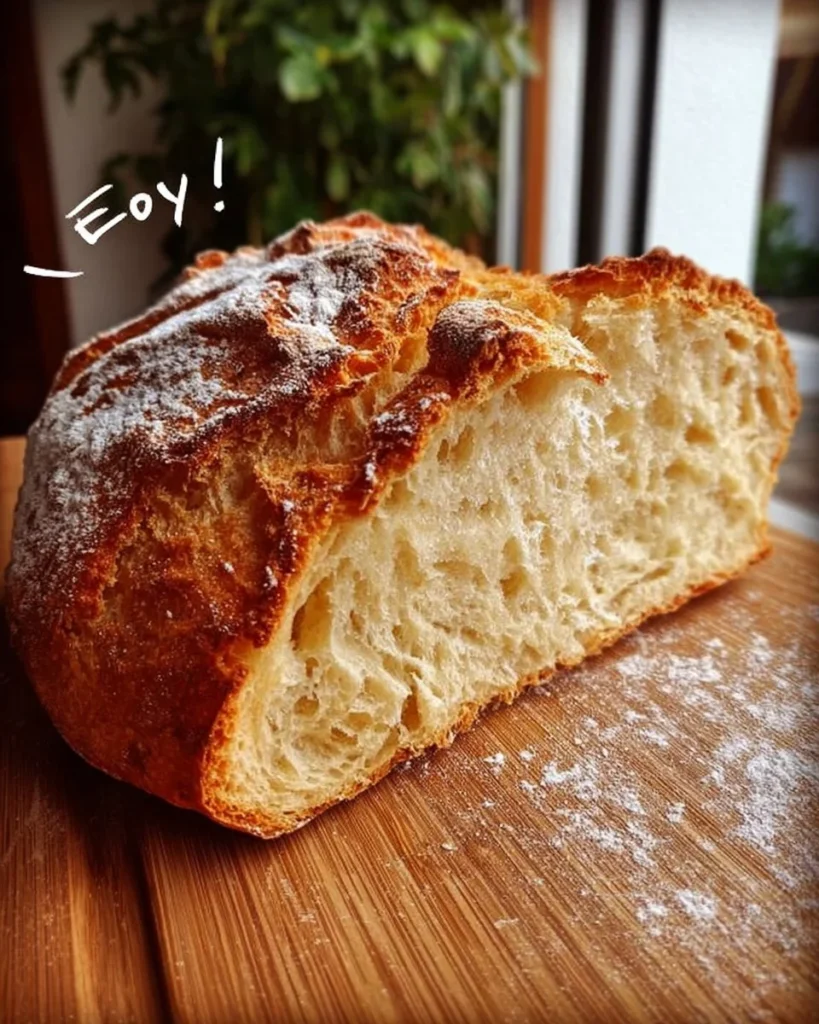
What is Gluten Free No Knead Bread?
Where did this quirky name come from? It’s really just a delightful way to say you can whip up a delicious loaf without any of the arm workouts required by traditional kneading. Do you ever feel like the way to a man’s heart is through his stomach? This bread will definitely help you with that! Picture this: an easy, fuss-free baking experience that leaves you with a beautiful artisan loaf to impress your family. So, are you ready to dive into this easy-to-follow gluten-free adventure?
Why You’ll Love This Gluten Free No Knead Bread
One of the standout attributes of Gluten Free No Knead Bread is how it makes a fantastic main dish highlight. Whether serving it alongside a hearty soup or as the base for mouthwatering sandwiches, it elevates any meal with its crispy exterior and soft, flavorful interior. Plus, making it at home is a money-saving decision—why buy that overpriced gluten-free bread when you can bake it fresh? What’s more, the possibilities for toppings are endless! Whether you slather it with olive oil, garlic, or your favorite spreads, every bite bursts with comfort. Just imagine it compared to those overly processed store-bought options; nothing quite beats fresh bread. So why not try your hand at this easy recipe?
How to Make Gluten Free No Knead Bread
Quick Overview
Making Gluten Free No Knead Bread is as easy as mixing a handful of ingredients and letting time do the work. This recipe results in a crusty exterior that gives way to a tender, flavorful center, allowing for that satisfying bread experience without a complicated process. Plus, you only need about 2 hours total to have a loaf fresh out of the oven, including inactive rising time!
Key Ingredients for Gluten Free No Knead Bread
Here’s what you’ll need to get your gluten-free bread baking started:
- 3 cups gluten-free all-purpose flour
- 1 ½ teaspoons salt
- 1 teaspoon instant dry yeast
- 1 ½ cups warm water (110°F)
- 1 tablespoon olive oil (for greasing the bowl)
Make sure your flour is specifically labeled gluten-free to avoid any cross-contamination.
Step-by-Step Instructions
- Mix the Dry Ingredients: In a large mixing bowl, whisk together the gluten-free flour, salt, and instant dry yeast until fully combined.
- Add Water: Gradually pour in the warm water while stirring to combine until a wet, sticky dough forms. Do not worry about kneading this; the dough will look different than traditional bread dough. (Perhaps a little lumpy, but that’s perfectly okay!)
- Let it Rise: Cover the bowl with plastic wrap or a clean kitchen towel and let the dough rise in a warm spot for about 1 to 2 hours, or until it has doubled in size.
- Shape and Preheat: Once risen, use a spatula to gently shape the dough into a round loaf. Place it on a piece of parchment paper, cover with a towel, and allow it to rest for 30 minutes while you preheat your oven to 450°F (230°C).
- Bake: Transfer the loaf with the parchment paper into a preheated Dutch oven or any oven-safe pot with a lid. Bake covered for 30 minutes, then uncover and bake for an additional 15-20 minutes until golden brown.
- Cool: Remove from the oven and let it cool on a wire rack before slicing (if you can resist—it’s tempting).
Top Tips for Perfecting Gluten Free No Knead Bread
- Flour Choice: A quality gluten-free all-purpose flour is essential. If you can, choose one with xanthan gum included for better structure.
- Timing: Don’t rush the rising process! Allowing the dough to rise fully plays a crucial role in achieving that light and airy texture.
- Customize: Feel free to experiment with flavor by adding herbs, garlic powder, or even cheese to the dough, just ensure all ingredients are halal-friendly!
- Avoid Mistakes: Common errors include using too much or too little water. Stick to the measurements, and if the dough seems too dry, add a tablespoon of water at a time.
Storing and Reheating Tips
Store any leftover Gluten Free No Knead Bread in an airtight container at room temperature for up to 2 days. To extend its life, consider freezing the bread. Slice it first, then wrap it in plastic wrap followed by aluminum foil before placing it in the freezer. It can last up to a month! To reheat, simply pop the slices in a toaster for a quick warm-up or place the whole loaf in the oven at 350°F (175°C) for about 10-15 minutes until warmed through.
In essence, baking is one of life’s great joys, and making Gluten Free No Knead Bread effortlessly transforms your kitchen into a cozy, inviting space! Ready to give it a whirl? Your family will appreciate this delicious addition to dinner, and you might even find a new favorite recipe!
Gluten Free No Knead Bread
Ingredients
Method
- In a large mixing bowl, whisk together the gluten-free flour, salt, and instant dry yeast until fully combined.
- Gradually pour in the warm water while stirring to combine until a wet, sticky dough forms. The dough may appear lumpy, which is normal.
- Cover the bowl with plastic wrap or a clean kitchen towel and let the dough rise in a warm spot for about 1 to 2 hours, or until it has doubled in size.
- Once risen, use a spatula to gently shape the dough into a round loaf. Place it on a piece of parchment paper, cover with a towel, and allow it to rest for 30 minutes.
- Preheat your oven to 450°F (230°C).
- Transfer the loaf with the parchment paper into a preheated Dutch oven or any oven-safe pot with a lid. Bake covered for 30 minutes, then uncover and bake for an additional 15-20 minutes until golden brown.
- Remove from the oven and let it cool on a wire rack before slicing.
Leave a Reply