
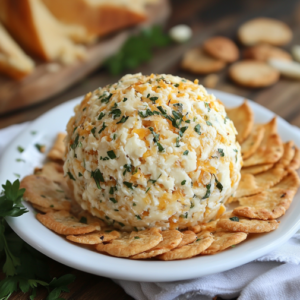
Garlic Cheddar Cheese Ball is a savory, creamy, and flavorful appetizer that’s perfect for parties, gatherings, or just as a snack. With a blend of sharp cheddar cheese, creamy cream cheese, and garlic, this cheese ball is a crowd-pleaser that’s easy to make and even easier to devour.
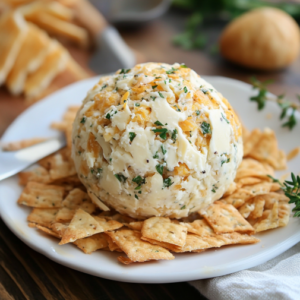
Coated in chopped nuts for a bit of crunch, this cheese ball is both decadent and delightful, and it’s a guaranteed hit at your next event!
Kitchen Equipment Needed
- Mixing bowl
- Electric mixer or hand mixer
- Plastic wrap or parchment paper
- Serving platter
Ingredients Overview
- Cheddar cheese: The sharp cheddar cheese adds a tangy and rich flavor to the cheese ball.
- Cream cheese: Provides the smooth, creamy base for the cheese ball.
- Garlic: Adds an aromatic and savory flavor that enhances the overall taste of the cheese ball.
- Nuts: A coating of chopped nuts, like pecans or walnuts, adds texture and flavor contrast.
Ingredients
For the Cheese Ball
- 8 oz cream cheese, softened
- 1 1/2 cups sharp cheddar cheese, shredded
- 1/4 cup grated Parmesan cheese
- 2 tablespoons sour cream
- 2 cloves garlic, minced
- 1 teaspoon Worcestershire sauce
- 1/2 teaspoon onion powder
- Salt and pepper, to taste
For the Coating
- 1/2 cup chopped nuts (such as pecans, walnuts, or almonds)
- 1 tablespoon fresh parsley (optional, for garnish)
Directions
- Prepare the Cheese Ball Mixture
In a large mixing bowl, combine the softened cream cheese, shredded sharp cheddar, Parmesan cheese, sour cream, minced garlic, Worcestershire sauce, onion powder, salt, and pepper. Use an electric mixer or hand mixer to beat the ingredients together until smooth and creamy. - Form the Cheese Ball
Once the mixture is well-combined, use your hands to shape the mixture into a ball. If the mixture is too sticky, you can refrigerate it for 20-30 minutes to firm up before shaping. - Coat the Cheese Ball
Spread the chopped nuts onto a sheet of parchment paper or a clean surface. Roll the cheese ball in the chopped nuts until it’s fully coated, pressing gently to help the nuts stick. If you like, you can garnish the cheese ball with a sprinkle of fresh parsley for extra color and freshness. - Chill
Place the cheese ball on a serving platter and refrigerate for at least 1 hour, or until ready to serve. Chilling the cheese ball allows the flavors to meld together and helps it hold its shape. - Serve
Serve the cheese ball with crackers, sliced baguette, or fresh vegetables for dipping. Enjoy!
Prep Time
10 minutes
Chill Time
1 hour
Total Time
1 hour 10 minutes
Nutrition (per serving, ~8 servings)
- Calories: ~200
- Fat: ~18g
- Carbohydrates: ~3g
- Protein: ~6g
Expert Tips
- Customize the Flavor: Feel free to add other seasonings or ingredients like chopped green onions, diced bell peppers, or a pinch of cayenne pepper for an extra kick.
- Make Ahead: This cheese ball can be made a day in advance, making it a great option for parties and gatherings.
- Gluten-Free: Serve the cheese ball with gluten-free crackers or vegetable slices like cucumber, carrots, or celery for a gluten-free option.
FAQs
Can I use a different cheese?
Yes! You can experiment with different cheeses like gouda, mozzarella, or a smoked cheese for a unique twist on the classic flavor.
Can I freeze this cheese ball?
Yes, you can freeze the cheese ball before coating it with nuts. Wrap it tightly in plastic wrap and aluminum foil and freeze for up to 1-2 months. Thaw in the refrigerator overnight before serving and coat with nuts when ready.
How long can I store leftovers?
Leftover cheese ball can be stored in an airtight container in the refrigerator for up to 3-4 days.
Storing & Freezing
- Storing: Keep leftovers in an airtight container in the refrigerator for up to 3-4 days.
- Freezing: Freeze the uncoated cheese ball for up to 1-2 months. Coat with nuts after thawing.
Substitutions & Variations
- Low-Carb Version: Skip the nuts and serve the cheese ball with low-carb crackers or vegetable dippers.
- Spicy Version: Add chopped jalapeños or a dash of hot sauce to the cheese ball mixture for a spicy kick.
- Vegan Option: Substitute the cream cheese with a dairy-free alternative and use a plant-based shredded cheese.

Garlic Cheddar Cheese Ball Recipe
Ingredients
Equipment
Method
- **Prepare the Cheese Ball Mixture**
- In a large mixing bowl, combine the softened cream cheese, shredded sharp cheddar, Parmesan cheese, sour cream, minced garlic, Worcestershire sauce, onion powder, salt, and pepper. Use an electric mixer or hand mixer to beat the ingredients together until smooth and creamy.
- **Form the Cheese Ball**
- Once the mixture is well-combined, use your hands to shape the mixture into a ball. If the mixture is too sticky, you can refrigerate it for 20-30 minutes to firm up before shaping.
- **Coat the Cheese Ball**
- Spread the chopped nuts onto a sheet of parchment paper or a clean surface. Roll the cheese ball in the chopped nuts until it’s fully coated, pressing gently to help the nuts stick. If you like, you can garnish the cheese ball with a sprinkle of fresh parsley for extra color and freshness.
- **Chill**
- Place the cheese ball on a serving platter and refrigerate for at least 1 hour, or until ready to serve. Chilling the cheese ball allows the flavors to meld together and helps it hold its shape.
- **Serve**
- Serve the cheese ball with crackers, sliced baguette, or fresh vegetables for dipping. Enjoy!
Leave a Reply