
Kale chips are the perfect snack for anyone looking to swap out unhealthy munchies for something crispy, flavorful, and downright delicious! What started as a trendy health food has become a mainstay in kitchen cabinets across the globe. You might be wondering, how can leafy greens become a crunchy, satisfying snack that both adults and kids will eagerly munch on? Let me tell you – it’s all in the preparation, and it’s incredibly easy! In just about 20 minutes, you can enjoy your very own batch of kale chips, making them a quick and reliable option for busy families.
Plus, making kale chips at home saves you money while allowing you to create your own perfect flavor profile. Maybe you love a sprinkle of sea salt or perhaps a zesty kick of lemon—whatever your preference, you have full control! If you’ve enjoyed other veggie snacks like roasted chickpeas or sweet potato fries from our blog, you’ll definitely want to give these crispy delights a shot. Ready to turn those leafy greens into a delightful crunch? Let’s get started!
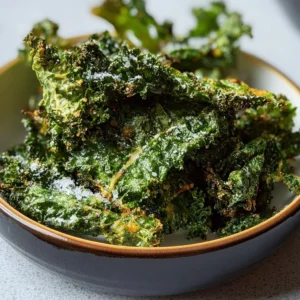
What Are Crispy Homemade Kale Chips?
So, have you ever found yourself staring at a bunch of leafy greens wondering, “What on earth am I going to do with this?” Well, kale chips are the answer! You could say they’re like a magic transformation—a Papercut from a boring vegetable into a crunchy delight! The name “kale chips” might sound a bit fancy for a snack that’s just a tad artful, but that’s the charm, isn’t it? After all, as the saying goes, “The way to a man’s heart is through his stomach,” and perhaps crispy kale chips might just create a few new fans in your circle! So why not grab a bunch of kale and give it a whirl? I bet you’ll be whipping up batches of these seasoned greens in no time!
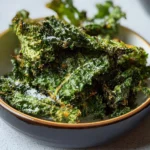
Why You’ll Love This Crispy Homemade Kale Chips
This recipe shines with three delightful aspects that will have you reaching for the kale in no time. First and foremost, the highlight is the irresistible crunch! With each bite, you experience a satisfying, crispy texture paired with a rich, earthy flavor that’s completely addictive. Secondly, making these crunchy treats at home is a wallet-friendly choice. Instead of reaching for the overpriced store-bought bags loaded with preservatives, you can whip up a fresh, healthier version that warms the heart (and the tummy)! Lastly, the versatility is simply unmatched. You can experiment with a variety of toppings, whether it’s sea salt, garlic powder, or even some zesty nutritional yeast for that cheesy flavor. If you’ve enjoyed our homemade sweet potato chips, you’ll love the range of flavors you can explore with kale chips. So, if you’re ready to munch on something that’s both delicious and nutritious, roll up your sleeves and let’s dive in!
How to Make Crispy Homemade Kale Chips
Quick Overview
Creating these kale chips is a breeze! All it takes is a handful of ingredients, a little bit of oil, and some seasoning to elevate your snacking game. With a prep time of just around 10 minutes and a cooking time of about 10 minutes, you can have a tasty, guilt-free snack ready in less than half an hour.
Key Ingredients for Crispy Homemade Kale Chips
- 1 large bunch of kale (any variety)
- 1 tablespoon of olive oil (or any high-quality oil of your choice)
- 1 teaspoon of sea salt (adjust to taste)
- Optional seasonings (garlic powder, nutritional yeast, chili flakes, etc.)
Step-by-Step Instructions
- Preheat Your Oven: Start by preheating your oven to 350°F (175°C).
- Prepare the Kale: Rinse the kale leaves thoroughly under cool water. After washing, completely dry them using a salad spinner or paper towels. (Make sure they’re dry; excess moisture won’t allow them to crisp up!).
- Tear into Pieces: Tear the kale into bite-sized pieces, removing the thick stems.
- Massage the Oil: In a large bowl, drizzle olive oil over the kale. Use your hands to gently massage the oil into the leaves, ensuring they’re evenly coated.
- Season: Sprinkle sea salt and any additional seasonings of your choice over the kale, and toss again to distribute the flavors.
- Arrange on a Baking Sheet: Spread the seasoned kale in a single layer on a baking sheet, making sure not to overcrowd the pan.
- Bake: Place the baking sheet in the oven and bake for about 10-12 minutes or until the edges turn crispy. Keep an eye on them to prevent burning!
- Cool and Enjoy: Remove them from the oven and let them cool slightly before serving.
What to Serve Crispy Homemade Kale Chips With
These crispy kale chips work wonderfully as a standalone snack, but you can also elevate the experience with creative pairings! Consider serving them alongside a refreshing dip, like homemade hummus or guacamole. They also make for an excellent side dish to accompany hearty soups and salads—a crunchy contrast to soft textures. If you’re feeling adventurous, these kale chips can be crumbled over pasta dishes to add a delightful crunch!
Top Tips for Perfecting Crispy Homemade Kale Chips
To ensure your kale chips are perfectly crispy every time, here are some handy tips:
- Don’t Overcrowd: Make sure to spread the kale in a single layer on your baking sheet; overcrowding will lead to steaming rather than crisping.
- Season Judiciously: A little salt goes a long way! Start with less; you can always add more after they bake.
- Experiment with Flavors: Feel free to mix up spices and toppings. Whether you’re in the mood for spicy, savory, or cheesy flavors, the options are limitless.
- Watch Closely: Oven temperatures vary, so keep an eye on your kale chips during the last few minutes of baking. They can go from perfectly crispy to burnt in a flash!
Storing and Reheating Tips
Leftover kale chips are best enjoyed freshly made for optimal crunch. However, if you have extras, store them in an airtight container at room temperature for up to 2-3 days. Keep in mind that they may lose their crispness over time. If you prefer to enjoy them later, consider reheating them in a preheated oven at 300°F (150°C) for a few minutes to regain some crunch. Also, kale chips can be made ahead of time and seasoned before baking, letting you enjoy the fun part at a later time.
Get ready to impress your family and friends with your culinary skills, and enjoy these delightful crispy homemade kale chips as soon as possible!
Crispy Homemade Kale Chips
Ingredients
Method
- Preheat your oven to 350°F (175°C).
- Rinse the kale leaves thoroughly under cool water and dry completely using a salad spinner or paper towels.
- Tear the kale into bite-sized pieces, removing the thick stems.
- Drizzle olive oil over the kale in a large bowl and massage it into the leaves to ensure they’re evenly coated.
- Sprinkle sea salt and any additional seasonings over the kale and toss again to distribute the flavors.
- Spread the seasoned kale in a single layer on a baking sheet, making sure not to overcrowd the pan.
- Bake in the preheated oven for about 10-12 minutes or until the edges turn crispy, keeping an eye on them to prevent burning.
- Remove from the oven and let them cool slightly before serving.
Leave a Reply