
Cheesy Dynamite Chicken Buns
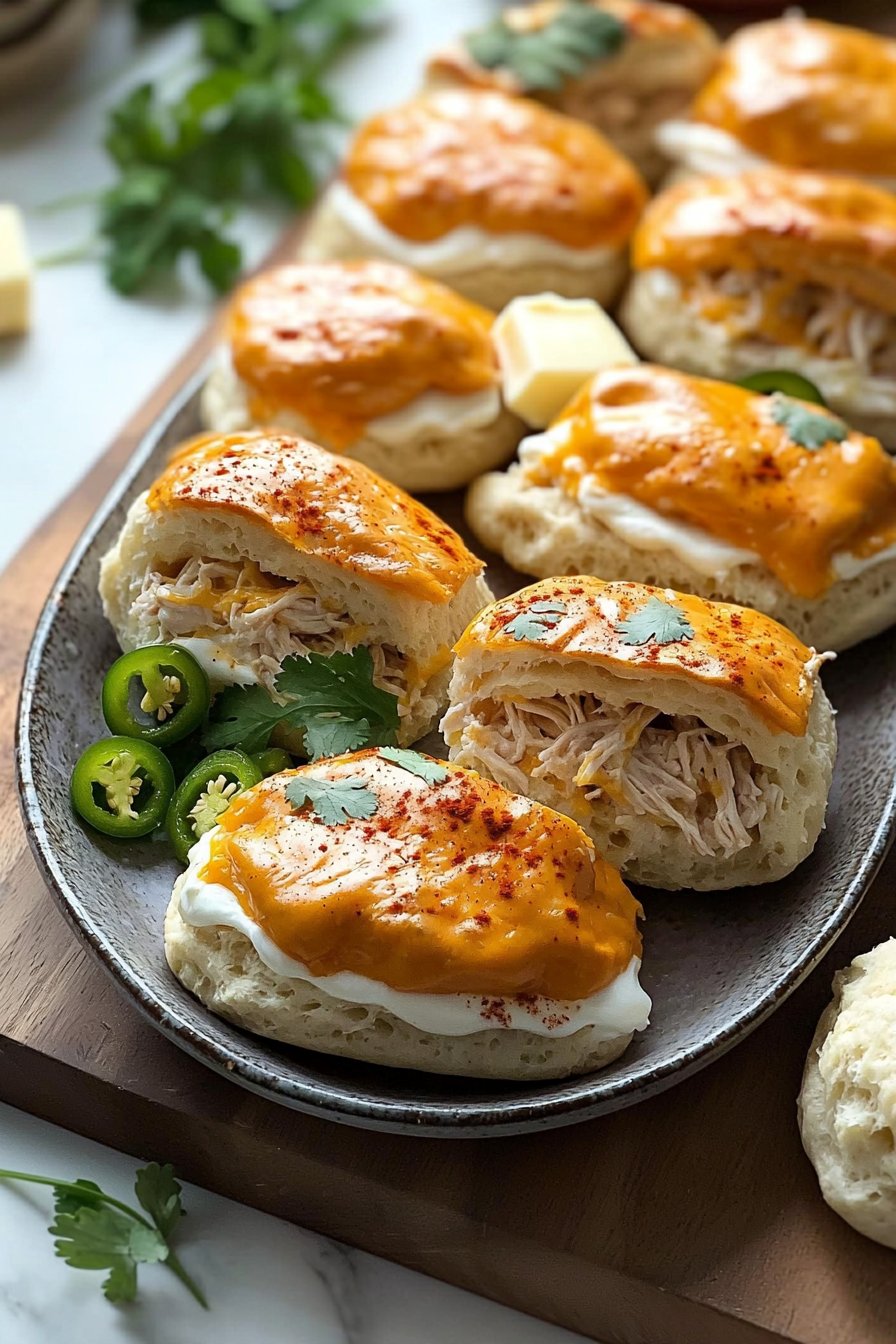
If you’re craving a deliciously crispy, savory treat that will have your family asking for seconds, look no further than these Cheesy Dynamite Chicken Buns! Picture a golden-brown biscuit crust encasing a creamy, cheesy delight bursting with flavor—sounds tempting, right? This recipe is a crowd-pleaser that combines the rich flavors of chicken, cream cheese, and cheddar, making it perfect for family gatherings or cozy winter evenings.
Did you know that these delightful buns are reminiscent of other popular comfort foods, like cheesy stuffed bread? They offer that same beloved vibe but with a tasty chicken twist. Plus, they are incredibly simple to whip up, making them a staple in any home cook’s repertoire. So grab your apron, and let’s dive into the world of Cheesy Dynamite Chicken Buns!
What are Cheesy Dynamite Chicken Buns?
Cheesy Dynamite Chicken Buns may sound like a dish out of a gourmet restaurant, but the truth is they are as approachable as they come! You might wonder where the name originates—could it be because they create an explosion of flavor with every bite? Or maybe because they bring everyone together for a comforting meal? Either way, one thing is for sure: the way to a man’s heart is through his stomach, and these buns will surely win over everyone at the table.
Ready to get your baking game on? Let’s make these delightful buns together and watch them disappear in a flash!
Why You’ll Love These Cheesy Dynamite Chicken Buns
These Cheesy Dynamite Chicken Buns are more than just a tasty main dish; they bring friends and family together, transforming any meal into a joyous occasion. Imagine biting into that flaky golden crust, releasing a melty, cheesy, chicken-filled interior—pure bliss for any palate!
Another stellar benefit of making these at home is the cost-saving factor. When you create a dish like this, you save money while also knowing exactly what goes into your family’s food. Plus, feel free to customize them with flavorful toppings like fresh herbs or spicy sauces to make each batch uniquely yours! Compared to other comforting dishes, like pizza, these buns are an excellent option when you want something equally delicious yet different. Ready to make your own?
How to Make Cheesy Dynamite Chicken Buns
Quick Overview
Making Cheesy Dynamite Chicken Buns is easy and super satisfying. With a texture that’s both crispy on the outside and soft on the inside, plus a creamy, cheesy filling that you won’t be able to resist, this dish is a must-try! Prep time is quick, clocking in at around 15 minutes, with a cooking time of 20 minutes, making it a fantastic option for busy weeknights.
Ingredients
- 2 cups cooked shredded chicken
- 1 cup cream cheese, softened
- 1 cup shredded cheddar cheese
- 1/2 cup diced jalapeños (optional)
- 1 teaspoon garlic powder
- 1 teaspoon onion powder
- 1 package refrigerated biscuit dough
- 2 tablespoons butter, melted
- 1 teaspoon paprika
These ingredients come together to create an unforgettable flavor explosion. Please ensure that all ingredients are Halal-compliant to accommodate everyone enjoying your meals.
Step-by-Step Instructions
-
Preheat your Oven: Start by preheating your oven to 375°F (190°C). This is an essential step to getting those buns perfectly golden and crispy.
-
Prepare the Filling: In a mixing bowl, combine the cooked shredded chicken, softened cream cheese, shredded cheddar cheese, diced jalapeños (if using), garlic powder, and onion powder. Mix well until fully incorporated.
-
Shape the Buns: Open the package of biscuit dough and separate the individual biscuits. Flatten each biscuit slightly, then place a generous spoonful of the chicken mixture in the center.
-
Seal the Buns: Carefully fold the dough over the filling and pinch the edges to seal. Make sure no filling escapes—this is where the flavor is!
-
Brush with Butter: Place the sealed buns on a baking sheet lined with parchment paper. Brush the melted butter on top of each bun and sprinkle with paprika for added flavor.
-
Bake: Bake the buns in your preheated oven for about 20 minutes or until they are golden brown.
-
Cool and Serve: Allow the buns to cool slightly before serving. Enjoy them warm for the best flavor!
Top Tips for Perfecting Cheesy Dynamite Chicken Buns
-
Flavor Substitutions: Feel free to use different cheeses like mozzarella or Monterey Jack for a twist on flavor. You can also incorporate leftover vegetables you might have on hand for extra nourishment.
-
Timing is Key: Keep an eye on the buns while they bake to avoid over-browning. Every oven is slightly different!
-
Avoiding Common Mistakes: Ensure that the biscuit dough is sealed well to prevent any cheese from leaking out during baking.
Storing and Reheating Tips
To keep your Cheesy Dynamite Chicken Buns fresh, store any leftovers in an airtight container in the refrigerator for up to three days. If you’d like, you can also freeze them for longer-term storage—just ensure they are wrapped tightly to prevent freezer burn.
When it’s time to reheat, place them in a preheated oven at 350°F (175°C) for about 10-15 minutes, or until heated through. This will help maintain that lovely texture and melt the cheese perfectly again!
These Cheesy Dynamite Chicken Buns are bound to be a hit at your next family gathering, offering both delightful flavor and simple preparation. So, roll up your sleeves and get into the kitchen—your taste buds are in for a treat!
Frequently Asked Questions
Can I make these ahead of time?
Absolutely! You can prepare the filling and assemble the buns in advance. Just store them in the refrigerator and bake them when you’re ready to serve.
Are these buns suitable for freezing?
Yes! They freeze well. Just ensure they are cool before placing them in an airtight container or freeze bag.
By following this easy recipe, you’ll not only be satisfying those cravings but also impressing your guests with a delightful homemade dish. Happy cooking!

Cheesy Dynamite Chicken Buns
Ingredients
Method
- Preheat your oven to 375°F (190°C).
- In a mixing bowl, combine the cooked shredded chicken, softened cream cheese, shredded cheddar cheese, diced jalapeños (if using), garlic powder, and onion powder. Mix well until fully incorporated.
- Open the package of biscuit dough and separate the individual biscuits. Flatten each biscuit slightly, then place a generous spoonful of the chicken mixture in the center.
- Carefully fold the dough over the filling and pinch the edges to seal, making sure no filling escapes.
- Place the sealed buns on a baking sheet lined with parchment paper. Brush the melted butter on top of each bun and sprinkle with paprika.
- Bake the buns in your preheated oven for about 20 minutes or until they are golden brown.
- Allow the buns to cool slightly before serving. Enjoy them warm.
Leave a Reply