
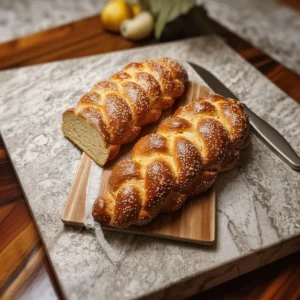
Nothing quite matches the aroma of freshly baked bread wafting through your kitchen, and Bakery Style Challah takes that experience to a whole new level! This soft, slightly sweet, and beautifully braided bread has a charming history that makes it a perfect addition to your family’s mealtime rituals. Traditionally enjoyed on Jewish holidays, this delightful bread can easily become a weekly staple, appearing alongside cozy dinners or weekend breakfasts.
What makes this challah so special is its simplicity and versatility. With just a handful of ingredients and a quick prep time, you can have this golden beauty rising in your oven before you know it! Just imagine pulling warm slices from the oven, perfect for slathering with butter or using in a French toast recipe. If you’ve enjoyed easy and fun recipes like Pancakes or Banana Bread from our blog, you’re in for a treat with this one! So roll up your sleeves and let’s dive into the world of Bakery Style Challah, where every bite promises to bring a smile to your face and warmth to your heart.
What is Bakery Style Challah?
Now, let’s talk about the whimsical name, Bakery Style Challah! You’ve probably heard the saying, “the way to a man’s heart is through his stomach,” and that definitely applies here; after one taste of this bread, your loved ones will be begging for more. The name “challah” comes from the Hebrew word used for “loaf,” and it’s often braided into a beautiful shape. But why is it called “bakery style”? Well, it’s perfectly crafted to resemble the artisanal loaves you’d find in a bakery, making everyone feel like they took home a little piece of heaven. So if you’re ready to bake your very own heavenly loaf, let’s explore this delicious recipe together!
Why You’ll Love This Bakery Style Challah:
There are many reasons why Bakery Style Challah will win over your heart and taste buds. First and foremost is its irresistible texture; each bite is soft and slightly chewy, creating a satisfying experience whether enjoyed fresh out of the oven or toasted for breakfast. The cost-saving benefit is remarkable too—making this delightful bread at home not only saves you money, but it also allows you to enjoy a wholesome treat without the preservatives found in store-bought versions.
And the versatility? Incredible! Whether you’re using it for a classic challah French toast, sandwiches, or even just with butter and jam, this bread shines in every application. If you’re a fan of fluffy dinner rolls, then you’ll adore this recipe as well. So why wait? Grab your apron and let’s make some Bakery Style Challah!
How to Make Bakery Style Challah:
Quick Overview
Bakery Style Challah is surprisingly easy to make! It requires minimal preparation time while delivering maximum flavor. The dough comes together quickly, and it only takes about 90 minutes from start to finish to have this glorious loaf on the table! A rich and eggy base ensures that every piece is as delightful as can be.
Key Ingredients for Bakery Style Challah:
- 4 cups all-purpose flour
- 1 cup warm water (about 110°F)
- 1/4 cup granulated sugar
- 2 1/4 teaspoons (1 packet) instant yeast
- 1/4 cup vegetable oil
- 2 large eggs
- 1 teaspoon salt
- 1 egg wash (1 egg beaten with 1 tablespoon of water for brushing)
Step-by-Step Instructions:
- Prepare the Dough: In a large bowl, combine warm water, sugar, and instant yeast. Allow it to sit for 5-10 minutes until foamy.
- Combine Ingredients: Add oil, eggs, and salt to the yeast mixture, mixing well. Gradually add in flour, one cup at a time, until a sticky dough forms.
- Knead the Dough: On a floured surface, knead the dough for about 5-7 minutes until smooth and elastic. You may add a little more flour if necessary.
- First Rise: Place the dough in a greased bowl, cover with a damp cloth, and let it rise in a warm spot until doubled in size, approximately 1 hour.
- Shape the Challah: After rising, punch down the dough and divide it into three equal portions. Roll each section into a long rope, then braid the three ropes together to form a loaf.
- Second Rise: Place the braided loaf on a baking sheet lined with parchment paper. Cover with a cloth and allow it to rise for another 30 minutes. Meanwhile, preheat your oven to 375°F (190°C).
- Egg Wash: Brush the loaf with the egg wash for a shiny golden finish.
- Bake: Bake for about 25-30 minutes, or until golden brown on top and hollow sounding when tapped. Cool before slicing and enjoying!
What to Serve Bakery Style Challah With:
Bakery Style Challah pairs well with a variety of delightful dishes! Whether you’re serving it with homemade butters, spreads, or dips, it’s sure to impress. Try it with warm honey, cream cheese, or even as a side to rich soups and stews. For a fun breakfast, make some fluffy French toast topped with fresh fruits and maple syrup. If you’re hosting brunch, serve bakery-style challah alongside savory omelets for an unforgettable meal. The options are endless!
Top Tips for Perfecting Bakery Style Challah:
- Flour Measurement: For best results, measure your flour accurately—too much can make the dough dry.
- Knead Gently: Do not rush the kneading process; a well-kneaded dough leads to a soft and airy loaf.
- Get Creative: Consider adding flavors into the dough—zest from citrus fruits or spices like cinnamon can elevate it further!
- Check Doneness: If you’re unsure whether the bread is fully baked, use an instant-read thermometer; it should register around 190°F (88°C) in the center.
Storing and Reheating Tips:
To keep your Bakery Style Challah fresh, store it in an airtight container or plastic bag at room temperature for up to 3 days. If you need to keep it longer, consider wrapping it tightly in plastic wrap and freezing for up to 3 months. When you’re ready to enjoy, simply thaw it at room temperature or pop it into your oven at 350°F (175°C) for about 10 minutes to warm and revive that fresh-baked taste. Enjoy every last crumb of your wonderful homemade challah!

Bakery Style Challah
Ingredients
Method
- In a large bowl, combine warm water, sugar, and instant yeast. Allow it to sit for 5-10 minutes until foamy.
- Add oil, eggs, and salt to the yeast mixture, mixing well. Gradually add in flour, one cup at a time, until a sticky dough forms.
- On a floured surface, knead the dough for about 5-7 minutes until smooth and elastic. You may add a little more flour if necessary.
- Place the dough in a greased bowl, cover with a damp cloth, and let it rise in a warm spot until doubled in size, approximately 1 hour.
- After rising, punch down the dough and divide it into three equal portions. Roll each section into a long rope, then braid the three ropes together to form a loaf.
- Place the braided loaf on a baking sheet lined with parchment paper. Cover with a cloth and allow it to rise for another 30 minutes. Meanwhile, preheat your oven to 375°F (190°C).
- Brush the loaf with the egg wash for a shiny golden finish.
- Bake for about 25-30 minutes, or until golden brown on top and hollow sounding when tapped. Cool before slicing and enjoying!
Leave a Reply