
Burnt Basque Cheesecake: A Delightful Dessert Experience
If you’ve ever dreamed of a dessert that possesses both an elegant charm and a cozy, rustic feel, let me introduce you to the Burnt Basque Cheesecake. With its creamy interior and a perfectly charred crust, this divine treat is the epitome of culinary comfort. Its irresistible creamy texture, paired with the deep flavors that come from a short baking time, is enough to make anyone swoon. This dessert has a story; it’s not just a cheesecake—it’s a celebration of simplicity. I remember the first time I baked it for my family during a chilly evening gathering. The moment we sliced into it, the rich aroma filled the air, bringing smiles all around the table.
Unlike traditional cheesecakes that may take hours to set, this one comes together quickly, making it an ideal choice for both novice bakers and seasoned pros. Plus, if you enjoy my other recipes, like the classic New York cheesecake, you’ll find that the Burnt Basque variant offers a fun twist that is sure to impress your loved ones!
What is Burnt Basque Cheesecake?
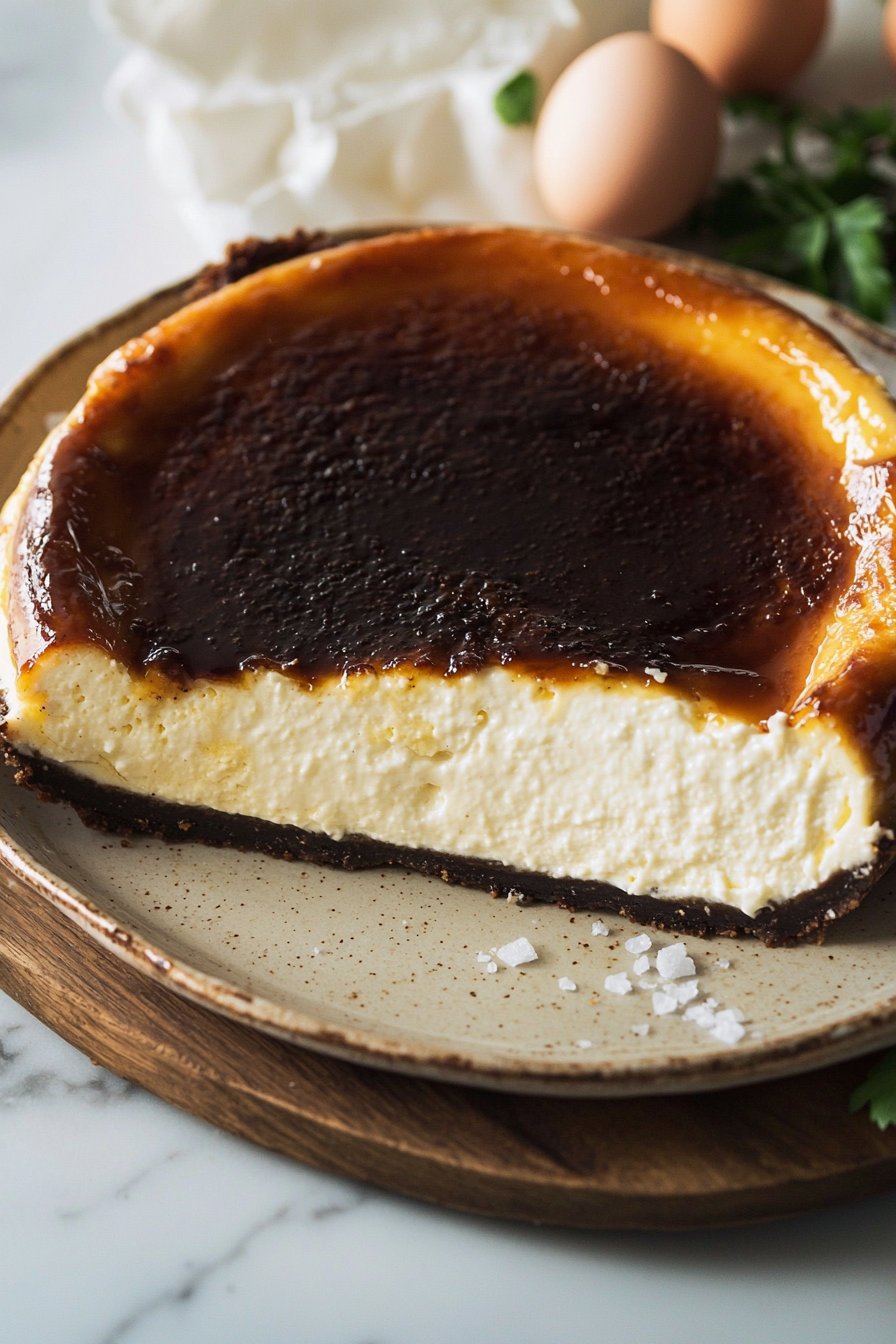
So, you might be wondering why it’s called “burnt.” Is there a peculiar fire involved? Is it a dessert that went a little too close to the oven? Well, not exactly! The Burnt Basque Cheesecake hails from the Basque region of Spain, characterized by its unique, caramelized top and creamy inside. Picture this: the way to a man’s heart is through his stomach, and this cheesecake might just be the key! Its slightly charred exterior offers a delightful contrast to the soft, luscious interior, bringing a playful complexity to every bite. Have I piqued your curiosity? If you haven’t tried it yet, what are you waiting for?
Why You’ll Love This Burnt Basque Cheesecake
Now, let’s dive into the reasons you’ll fall head over heels for this Burnt Basque Cheesecake. First and foremost, its main highlight. Imagine a dessert that features a luxurious, velvety texture, melting on your tongue and leaving a hint of sweetness behind. With each bite, it’s like a warm hug from grandma on a winter night. Plus, one of the best parts about making this cheesecake at home is the cost-saving benefits. Why pay for a slice at a fancy restaurant when you can whip up a whole cheesecake for a fraction of the price?
Topping off your Burnt Basque Cheesecake with fresh fruits or a drizzle of honey transforms it into a flavor explosion that is sure to tantalize your taste buds. If you’re a fan of a classic cheesecake but want something a bit more adventurous, then the Burnt Basque Cheesecake is calling your name! Try making it this weekend and indulge your family in a delightful dessert adventure.
How to Make Burnt Basque Cheesecake
Quick Overview
The beauty of Burnt Basque Cheesecake lies in its simplicity—this scrumptious cheesecake can be prepared in under an hour! You’ll appreciate how quickly it comes together, allowing you to bask in the glorious aroma wafting from your oven. The creamy, almost mousse-like interior contrasts beautifully with its charred crust, promising an enticing experience in every bite.
Ingredients
For this amazing Burnt Basque Cheesecake, you will need:
- 2 cups cream cheese (softened)
- 1 cup heavy cream
- 3/4 cup sugar
- 3 large eggs
- 1/4 cup all-purpose flour
- 1 teaspoon vanilla extract
- 1/4 teaspoon salt
Make sure your cream cheese is at room temperature—this helps to achieve the smoothest texture!
Step-by-Step Instructions
- Preparation:
- Preheat your oven to 400°F (200°C). Line a springform pan with parchment paper, making sure it covers the sides as well. This is key to achieving the signature burnt look!
- Mix Cream Cheese and Sugar:
- In a large mixing bowl, beat the softened cream cheese and sugar together until it becomes smooth and creamy. This will take about 2-3 minutes.
- Add Eggs:
- Add the eggs one at a time, mixing well after each addition to ensure they’re fully incorporated.
- Incorporate Heavy Cream:
- Pour in the heavy cream and blend until combined.
- Add Dry Ingredients:
- Sift in the flour, vanilla extract, and salt. Mix on low speed until just combined—overmixing can lead to cracks!
- Bake:
- Pour the mixture into the prepared springform pan and bake for approximately 25 to 30 minutes. The top should be a deep golden color, while the center remains slightly jiggly.
- Cool:
- Let the cheesecake cool in the pan for about 15-20 minutes before transferring it to the refrigerator. Chill for at least 2 hours before serving.
Top Tips for Perfecting Burnt Basque Cheesecake
- Don’t Overmix: When adding the flour and eggs, mix on low speed to avoid incorporating too much air, which can cause cracks.
- Adjust Baking Time: Ovens vary, so keep an eye on your cheesecake to make sure it doesn’t burn too much!
- Flavor Variations: Want to spice things up? You can substitute vanilla extract with lemon or orange zest for a refreshing twist!
Storing and Reheating Tips
Once your Burnt Basque Cheesecake is cooled, cover it with plastic wrap and refrigerate. It will keep well for up to 5 days. If you want to make it ahead of time, you can freeze it. Place it in an airtight container and it will maintain its quality for up to 2 months. When you are ready to serve, let it thaw in the refrigerator overnight.
To reheat, place individual slices in the microwave for about 10-15 seconds—which ensures that you enjoy the cheesecake at its best consistency without compromising its delightful texture.
Now that you have everything you need to whip up an exquisite Burnt Basque Cheesecake, gather your ingredients and get started! This delightful dessert is sure to be the highlight of any gathering, and I promise you, your taste buds will thank you! Enjoy!

Burnt Basque Cheesecake
Ingredients
Method
- Preheat your oven to 400°F (200°C) and line a springform pan with parchment paper.
- In a large mixing bowl, beat the softened cream cheese and sugar together until smooth and creamy, about 2-3 minutes.
- Add the eggs one at a time, mixing well after each addition.
- Pour in the heavy cream and blend until combined.
- Sift in the flour, vanilla extract, and salt, mixing on low speed until just combined.
- Pour the mixture into the prepared springform pan and bake for approximately 25-30 minutes.
- The top should be a deep golden color while the center remains slightly jiggly.
- Let the cheesecake cool in the pan for about 15-20 minutes before transferring it to the refrigerator.
- Chill for at least 2 hours before serving.
Leave a Reply