
No Churn Cherry Cheesecake Ice Cream: A Delight in Every Spoonful
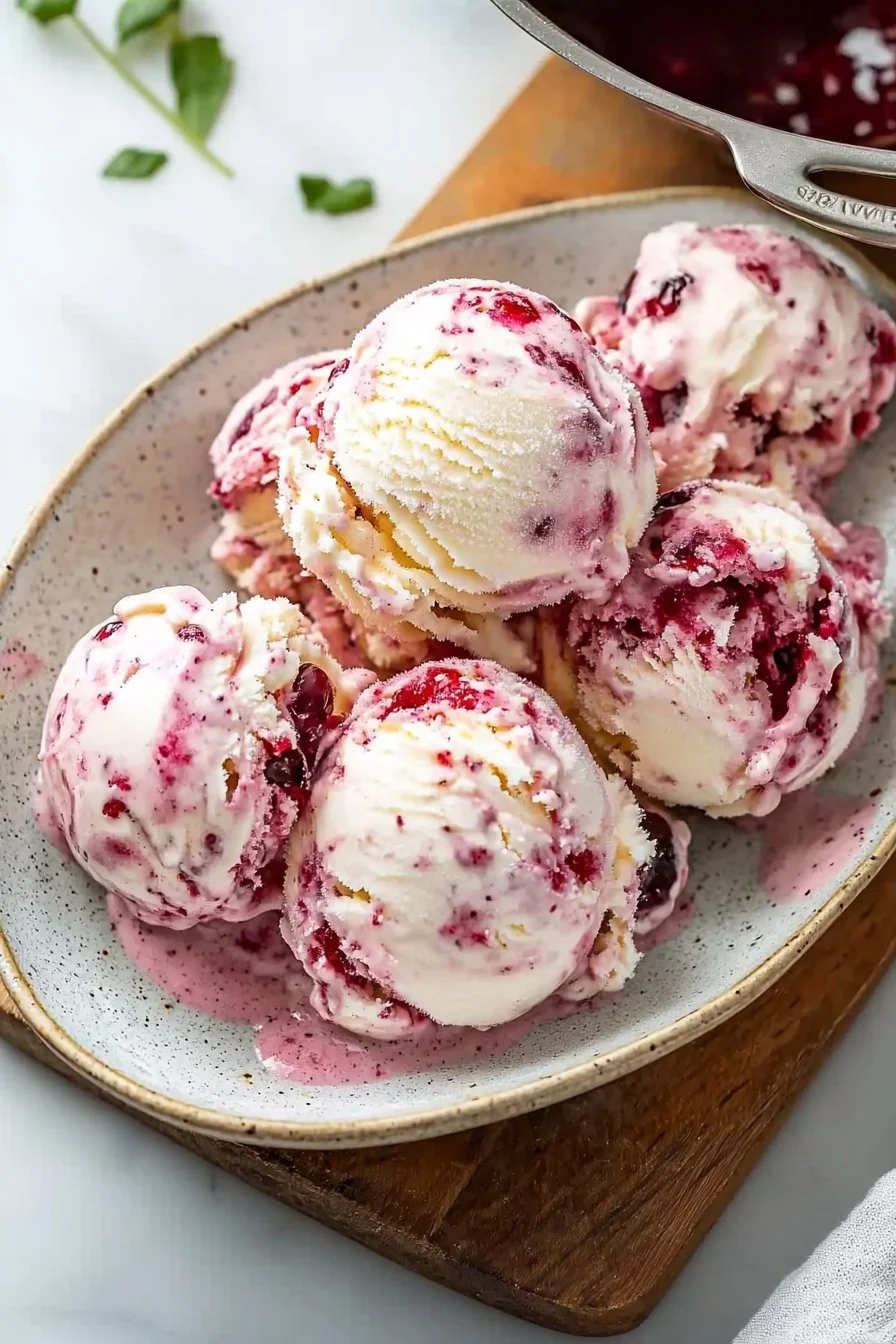
If you’re on the hunt for an indulgent yet deceptively simple dessert, look no further! No Churn Cherry Cheesecake Ice Cream is here to steal the spotlight at your next family gathering. Imagine sinking your spoon into a creamy, luscious base infused with tangy cream cheese and swirled with rich cherry pie filling. The combination of textures—smooth creaminess with bursts of tart cherries—is truly irresistible. Plus, there’s no need for an ice cream machine, making it a breeze to whip up on a whim.
Did you know that ice cream has been enjoyed since ancient times? It’s a fun fact that makes every scoop a bite of history! Compared to my classic Vanilla Bean Ice Cream recipe, this No Churn Cherry Cheesecake Ice Cream offers a burst of fruity flavor that’s perfect for warm summer evenings, celebratory gatherings, or curling up on the couch with a good movie. It’s sure to become a staple in your dessert repertoire!
What is No Churn Cherry Cheesecake Ice Cream?
So, what exactly is this delightful concoction? No Churn Cherry Cheesecake Ice Cream is a creamy frozen treat that combines the luscious flavors of cheesecake with the fruity goodness of cherries, all without the need for an ice cream maker. But hold on—did you ever wonder how it gets that name? It sounds fancy, doesn’t it? It’s like the traditional cheesecake decided to take a vacation and show up as a cool, refreshing ice cream instead! After all, they say that the way to a man’s heart is through his stomach, and this dessert will surely make hearts flutter. Are you ready to dive into this creamy wonder? Let’s get started!
Why You’ll Love This No Churn Cherry Cheesecake Ice Cream
There are many reasons why No Churn Cherry Cheesecake Ice Cream will steal your dessert-loving heart. First and foremost, its creamy texture and tangy flavor stand out beautifully, elevating it to a dessert experience like no other. Just picture biting into the smoothness of the cream while getting that delightful burst of sweet cherries—pure bliss!
Furthermore, making this ice cream at home not only saves you trips to the store but also cuts costs in the long run. Store-bought desserts can add up, but by whipping up this heavenly creation, you’ll pocket some savings while impressing your loved ones. Top it off with whipped cream or sprinkle of chopped nuts, and you have a masterpiece that rivals any frozen dessert shop.
And let’s not forget—for dessert lovers, this ice cream brings the joy of your favorite cheesecake into an exciting new form that you’ll want to savor over and over again. Are you ready to treat yourself?
How to Make No Churn Cherry Cheesecake Ice Cream
Quick Overview
Getting started with No Churn Cherry Cheesecake Ice Cream is simple; the hardest part is waiting for it to freeze! In just about 15 minutes of prep time, you’ll mix together the dreamy ingredients, and then a few hours later—voilà! You’ll have a one-of-a-kind dessert that delights your taste buds. Imagine the rich flavors melding into perfect harmony as they freeze, creating a texture so silky you’ll have trouble sharing.
Ingredients
- 2 cups heavy cream
- 8 oz cream cheese, softened
- 1 cup sweetened condensed milk
- 1 cup cherry pie filling
- 1 teaspoon vanilla extract
- 1/4 cup powdered sugar (optional, to taste)
These ingredients are simple and easy to find! Make sure your cream cheese is softened for the creamiest blend, and don’t skip the cherry pie filling—it’s the star of the show!
Step-by-Step Instructions
- Beat the Cream Cheese: In a large mixing bowl, beat the softened cream cheese until smooth and creamy. This will ensure there are no lumps in your ice cream.
- Add Sweetened Condensed Milk and Vanilla: Slowly pour in the sweetened condensed milk and vanilla extract, mixing well until fully incorporated.
- Whip the Cream: In another bowl, whip the heavy cream until soft peaks form. This will give your ice cream a light, airy texture.
- Combine Mixtures: Gently fold the whipped cream into the cream cheese mixture. Use a spatula to combine until smooth, being careful not to deflate the whipped cream.
- Add Cherry Pie Filling: Gently swirl in the cherry pie filling to create beautiful marbled stripes of cherry within your ice cream base.
- Pour and Freeze: Transfer the mixture to an airtight container and smooth the top. Cover it tightly and freeze for at least 4-6 hours, or until completely firm.
- Serve and Enjoy: Scoop out your luscious No Churn Cherry Cheesecake Ice Cream and enjoy it with your favorite toppings!
Top Tips for Perfecting No Churn Cherry Cheesecake Ice Cream
To make the best No Churn Cherry Cheesecake Ice Cream, here are some helpful top tips:
- Use Cold Utensils: Ensure your mixing bowls and beaters are cold. It helps the cream whip up more easily.
- Taste as You Go: Since everyone has unique preferences, feel free to adjust the sweetness by adding a little more powdered sugar if desired.
- Substitutions: For those looking to customize, try adding in crushed graham crackers for a crust-like crunch or swap the cherry pie filling for strawberries or blueberries if you’re feeling adventurous.
- Avoid Overmixing: When folding the whipped cream into the mixture, be gentle; overmixing can lead to a denser ice cream.
Storing and Reheating Tips
Once your No Churn Cherry Cheesecake Ice Cream is made, you can enjoy it right away or store it for later. Keep it in an airtight container to prevent freezer burn. It can last up to two weeks in the freezer—if it lasts that long! Simply scoop out what you need and return the rest to the freezer immediately.
Reheating is simple—no need! Ice cream should maintain a smooth texture when frozen. However, if you find it too hard to scoop, let it sit at room temperature for about 5-10 minutes before serving.
In conclusion, this No Churn Cherry Cheesecake Ice Cream is a creamy, dreamy dessert that brings the flavors of cheesecake and cherry pie together in one delightful treat. Perfect for family gatherings or a simple summer evening, this recipe deserves a spot in your recipe collection! Try it today, and you’re sure to create lasting memories with every scoop. Enjoy!
FAQ
Q: Can I add other fruits beside cherries?
Absolutely! Feel free to substitute the cherry pie filling with any other fruit filling or purée to suit your taste.
Q: Is there a way to make it dairy-free?
You can substitute the heavy cream and cream cheese with coconut cream and dairy-free cream cheese alternatives.
Q: How do I get my ice cream to be softer right out of the freezer?
Always let your ice cream sit out for a few minutes before scooping to achieve that perfect texture!

No Churn Cherry Cheesecake Ice Cream
Ingredients
Method
- In a large mixing bowl, beat the softened cream cheese until smooth and creamy.
- Slowly pour in the sweetened condensed milk and vanilla extract, mixing well until fully incorporated.
- In another bowl, whip the heavy cream until soft peaks form.
- Gently fold the whipped cream into the cream cheese mixture until smooth.
- Gently swirl in the cherry pie filling to create marbled stripes.
- Transfer the mixture to an airtight container and freeze for at least 4-6 hours, or until completely firm.
- Scoop out the ice cream and enjoy with your favorite toppings.
Leave a Reply