
Candy Board
When it comes to satisfying that sweet tooth, nothing beats the delightful charm of a Candy Board! Picture a beautifully arranged platter filled with a mosaic of colors and flavors — think crunchy nuts, chewy gummy candies, and rich chocolate delights. This show-stopping treat isn’t just a feast for the eyes; it offers a fantastic mix of textures that will make each bite an experience to remember. I remember the first time I made a Candy Board for a family gathering; it vanished within minutes, leaving a trail of happy faces! This easy-to-assemble treat stands out for its simplicity, making it perfect for both casual get-togethers and festive occasions. Similar to my popular Trail Mix recipe, the Candy Board is versatile and family-friendly, guaranteeing you’ll create a hit at the next gathering.
What is a Candy Board?
Ah, the Candy Board: a name that might leave you chuckling! Is it made of candy? Or is it a board made from candies? Who knows? Maybe it’s a metaphor about love — after all, they say the way to a man’s heart is through his stomach. Imagine sitting around with loved ones, sharing your favorite treats, and indulging in laughter. With endless options for ingredients, the Candy Board invites everyone to join in the fun. So why not grab your favorite candies and create your own masterpiece?
Why You’ll Love This Candy Board
What’s not to love about a Candy Board? It brilliantly incorporates sweet and savory elements, elevating any family gathering with flair. With the rising costs of dining out, creating a Candy Board at home has never seemed more appealing; it’s an economical way to spoil your loved ones without breaking the bank. Imagine crunchy pretzels, colorful gummy bears, and rich chocolate squares filling your platter while aromatic nuts provide a satisfying crunch! It’s like the resident dessert table at your cousin’s wedding, but you have the control over what makes the cut. So gather your ingredients and get ready to impress—your Candy Board awaits!
How to Make a Candy Board
Quick Overview
Creating a Candy Board is as easy as pie, or should we say, as easy as candy! With minimal preparation time, this dish offers a delightful blend of flavors that will satisfy both kids and adults alike. You can whip up this beautiful board in just about 30 minutes, and it’ll leave you with a satisfying mix of crunchy, chewy, and creamy textures that melt in your mouth. Let’s dive into the ingredients and instructions!
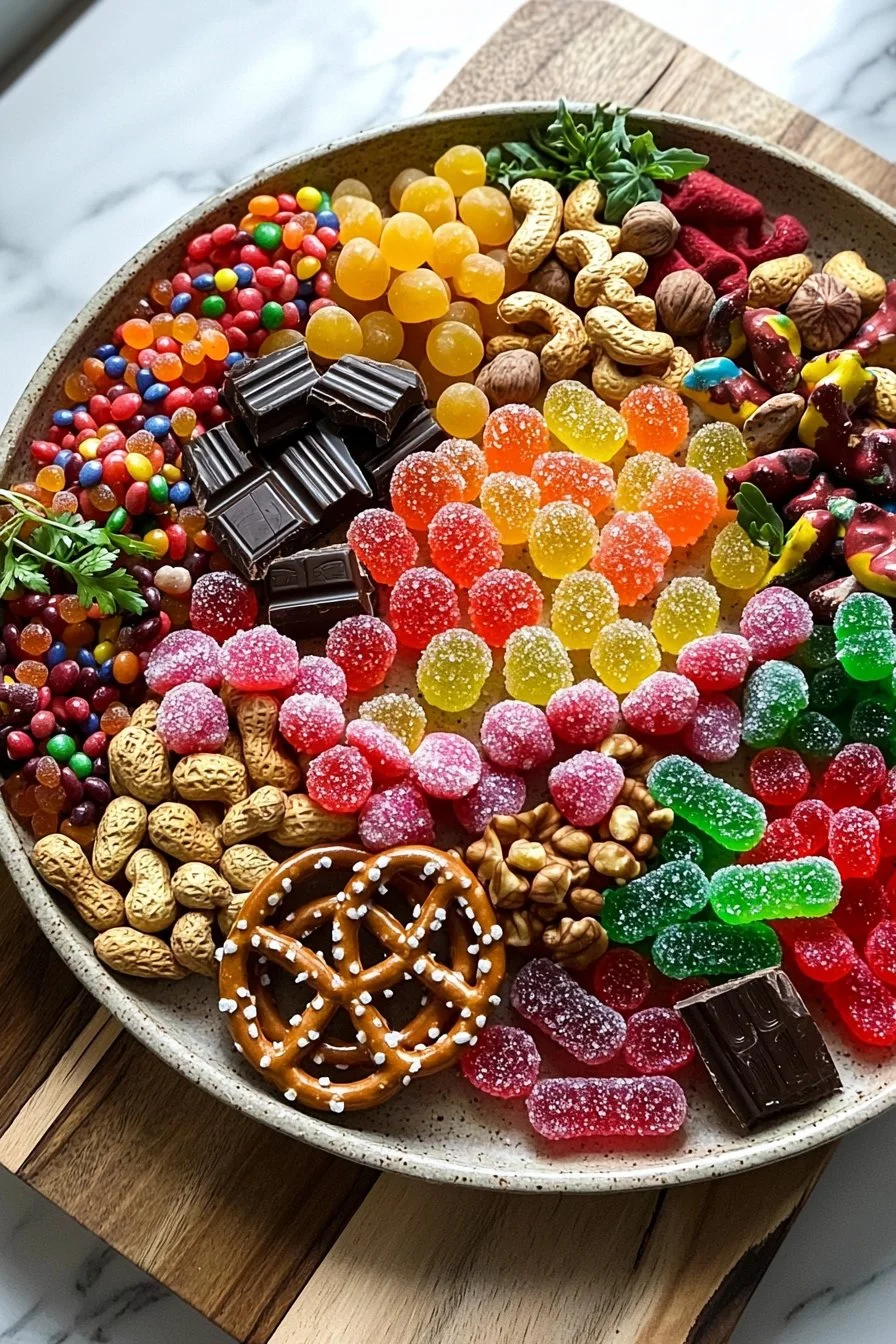
Candy, Chocolate, Nuts, Fruits, Gummy Candies, Pretzels for Candy Board
Ingredients:
- 1 cup assorted chocolate (milk, dark, or white)
- 1 cup gummy candies (like gummy bears or worms)
- 1 cup mixed nuts (almonds, cashews, or walnuts)
- 1 cup pretzels (regular or chocolate-covered)
- 1 cup dried fruits (like apricots or raisins)
- 1 cup caramel (soft chewy or chocolate)
- Optional: decorative sprinkles for that extra flair
Step-by-Step Instructions
- Prepare Your Board: Start by selecting a clean wooden board or large platter.
- Layout Arrangement: Gently place your chosen items (chocolate, gummy candies, nuts, etc.) in separate sections on the board. You can arrange them in a pattern or simply scatter them for a more casual vibe.
- Height and Layers: For added visual appeal, create height by stacking some items, like pretzels or soft caramel pieces.
- Finishing Touch: If you’re using any sprinkles, sprinkle them atop your top layer for a colorful finish.
- Chill (Optional): If you like your chocolates a little firmer, place the board in the fridge for about 10-15 minutes before serving.
And voilà—your Candy Board is ready to dazzle your family and friends!
Top Tips for Perfecting Your Candy Board
- Personalize It: Feel free to swap out or add any of your favorite candies or nuts based on seasonal availability or personal preference. Just ensure they are Halal-friendly!
- Timing is Key: Prepare your Candy Board just before serving to keep it fresh and inviting.
- Watch for Melting: If using chocolate in warm conditions, keep an eye that it doesn’t soften too much—this will keep your presentation looking stunning!
Storing and Reheating Tips
If you find any leftovers—though we doubt it!—store individual components separately. Keep chocolates in a cool, dry place, while gummy candies and fruits can generally be stored together. If there are any nuts left, seal them in an airtight container to maintain their crunch. Most components can last about a week if properly sealed, but note that their freshness will start to fade over time.
Now that you have all the tips and tricks to create a stunning Candy Board, it’s your turn! Gather your favorite sweets and make this delightful treat that will surely impress. Enjoy the sweet smiles and laughter at your next family gathering!
FAQ
- Can I make a Candy Board in advance?
While you can prep some elements ahead of time, it’s best to assemble the board no more than a couple of hours before serving to keep it looking fresh. - What’s a good alternative for nuts?
If you or your guests have nut allergies, try using seeds like pumpkin or sunflower seeds instead—they provide a crunchy texture and are just as tasty! - Can I use fresh fruit?
Absolutely! Fresh fruits can be a colorful addition. Just be mindful that they should be added last for presentation.
Now let’s get started on your own beautiful Candy Board!

Candy Board
Ingredients
Method
- Start by selecting a clean wooden board or large platter.
- Gently place your chosen items (chocolate, gummy candies, nuts, etc.) in separate sections on the board. You can arrange them in a pattern or simply scatter them for a more casual vibe.
- For added visual appeal, create height by stacking some items, like pretzels or soft caramel pieces.
- If you’re using any sprinkles, sprinkle them atop your top layer for a colorful finish.
- If you like your chocolates a little firmer, place the board in the fridge for about 10-15 minutes before serving.
Leave a Reply