
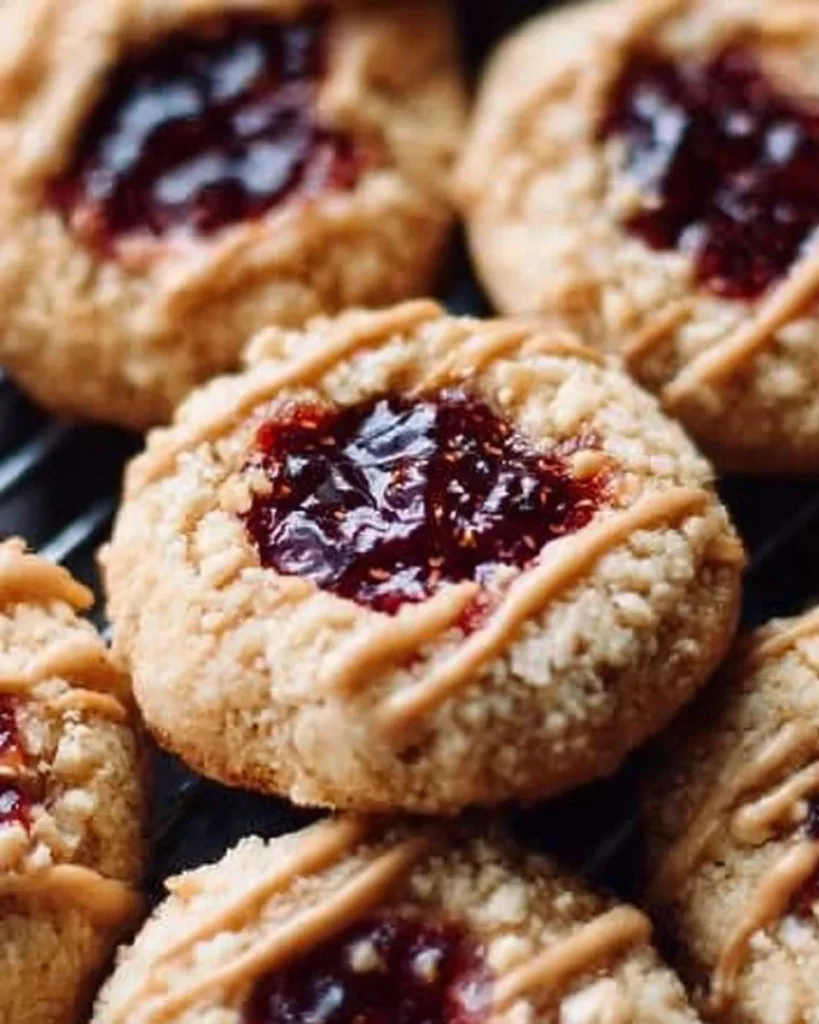
Who can resist the delightful combination of creamy peanut butter and sweet, sticky jam? The crisp yet tender texture of Peanut Butter Jam Thumbprints makes them an irresistible treat for all ages. Picture this: a cup of warm tea on a cozy winter evening, a plate of these thumbprints beside you, and the subtle crunch as you bite into one. It’s pure bliss!
This recipe has a warmth that transcends generations, often made by mothers and grandmothers for family gatherings. Fun fact: these delightful cookies might have borrowed their name from the traditional method of pressing a thumb into dough, but they’ve become a staple in kitchens around the world. Compared to my popular chocolate chip cookie recipe, these thumbprints take simplicity to a whole new level—deliciously easy and perfect for sharing. So let’s roll up our sleeves and bake some memories!
What are Peanut Butter Jam Thumbprints?
Ah, Peanut Butter Jam Thumbprints! Isn’t the name just as mouthwatering as the cookies themselves? I often wonder how they got this playful name. Did someone accidentally poke their thumb into a cookie and think, “Hey, this looks like a great idea?” It’s like the culinary equivalent of stumbling into a fantastic secret! Remember the saying, “The way to a man’s heart is through his stomach”? Well, these little delights might just be the golden ticket to anyone’s heart! So why not gather your loved ones in the kitchen, roll up your sleeves, and create these delicious thumbprints? We promise, the joy will be just as sweet as the treat!
Why You’ll Love These Peanut Butter Jam Thumbprints
There are countless reasons to endear yourself to Peanut Butter Jam Thumbprints. First, their rich, nutty flavor and sweet jams will have your taste buds dancing with joy. Second, whipping up a batch saves you money and time compared to buying store-bought cookies—you get to enjoy fresh cookies with a homemade touch while saving a few bucks! Lastly, the delicious jam filling adds a vibrant splash of flavor that sets these thumbprints apart from other cookies. Think of them as crunchy, jam-filled cousins of a traditional peanut butter cookie! Don’t wait another moment; make a batch for your next family gathering and enjoy the delightful aromas wafting through your home.
How to Make Peanut Butter Jam Thumbprints
Quick Overview
Making Peanut Butter Jam Thumbprints is simpler than you might think! With a delightful peanut butter base and a burst of your favorite jam, these cookies strike a perfect balance between crunchy and chewy. The preparation time is just around 15 minutes, with baking taking about 10-12 minutes. Isn’t that easy? Let’s jump in!
Ingredients
For your Peanut Butter Jam Thumbprints, gather the following ingredients:
- 1 cup peanut butter
- 1/2 cup granulated sugar
- 1/2 cup brown sugar
- 1 egg
- 1 teaspoon vanilla extract
- 1 cup of your favorite jam (any flavor)
- 1 cup all-purpose flour
- 1/2 teaspoon baking soda
- 1/4 teaspoon salt
This simple list of ingredients ensures you won’t have to run out for anything extravagant, keeping it both approachable and budget-friendly!
Step-by-Step Instructions
- Preheat the Oven: Start by preheating your oven to 350°F (175°C) and line a baking sheet with parchment paper.
- Mix Wet Ingredients: In a large mixing bowl, combine the peanut butter, granulated sugar, brown sugar, egg, and vanilla extract. Use a hand mixer or a whisk to blend until smooth and creamy.
- Combine Dry Ingredients: In a separate bowl, whisk together the flour, baking soda, and salt. Gradually add this to the peanut butter mixture, mixing until just combined.
- Shape the Cookies: Use a tablespoon or cookie scoop to portion out the dough. Roll each piece into a ball and place it on the prepared baking sheet. Make an indention in each ball with your thumb, creating a little well for the jam.
- Fill with Jam: Spoon about a teaspoon of jam into each thumbprint, ensuring you don’t overfill.
- Bake: Pop the baking sheet into your preheated oven and bake for 10-12 minutes, until the edges are golden.
- Cool and Enjoy: Let the cookies cool on the baking sheet for a few minutes before transferring them to a wire rack.
Top Tips for Perfecting Peanut Butter Jam Thumbprints
- Variations: Feel free to experiment with nut butters like almond or sunflower seed for different flavors.
- Timing: Ensure not to overbake the cookies. They should remain slightly soft in the center to achieve that perfect chewy texture.
- Avoiding Cracks: If your cookies crack while baking, consider chilling the dough for about 30 minutes before rolling them into balls—that’s a handy trick!
Storing and Reheating Tips
To keep your Peanut Butter Jam Thumbprints fresh, store them in an airtight container at room temperature for up to 5 days. For longer storage, these cookies freeze beautifully! Simply place them in a freezer-safe bag, separating layers with parchment paper to prevent sticking. They can last for up to 3 months in the freezer.
When you’re ready to enjoy, just pull a few out and let them thaw at room temperature. If you prefer warm cookies, you can microwave them for about 10-15 seconds to revive their freshly baked goodness.
Now, go ahead and share your baking adventures with Peanut Butter Jam Thumbprints! Happy baking, and enjoy each bite as it fills your home with delightful aromas and warm memories!

FAQ
- Can I substitute the peanut butter?
Absolutely! Use almond or sunflower seed butter for nut-free options. - What kind of jam works best?
From strawberry to raspberry or even grape, the choices are endless! Choose your favorite flavor for a personalized touch. - Can I make these cookies gluten-free?
Yes! Swap the all-purpose flour with a gluten-free flour blend. - What if I want to add chocolate?
Chunks of chocolate can be added to the dough for a delicious twist on flavor.
Get ready to impress friends and family with this fuss-free dessert that’s sure to win hearts!
Peanut Butter Jam Thumbprints
Ingredients
Method
- Preheat your oven to 350°F (175°C) and line a baking sheet with parchment paper.
- In a large mixing bowl, combine the peanut butter, granulated sugar, brown sugar, egg, and vanilla extract. Blend until smooth and creamy.
- In a separate bowl, whisk together the flour, baking soda, and salt. Gradually add this to the peanut butter mixture, mixing until just combined.
- Use a tablespoon or cookie scoop to portion out the dough. Roll each piece into a ball and place it on the prepared baking sheet. Make an indention in each ball with your thumb.
- Spoon about a teaspoon of jam into each thumbprint, ensuring you don’t overfill.
- Bake for 10-12 minutes, until the edges are golden.
- Let the cookies cool on the baking sheet for a few minutes before transferring them to a wire rack.
Leave a Reply