
Few things evoke the warmth of family gatherings quite like the smell of Homemade Apple Pie Filling wafting through the house. Imagine biting into a perfectly flaky crust, which gives way to tender, spiced apples bursting with flavor. When those first crispy bites hit your taste buds, it’s as if fall has arrived in all its glorious apple-picking majesty. Did you know that the first recipe for apple pie dates back to the 14th century? It’s a testament to how timeless and beloved this dessert is across generations.
But what truly makes Homemade Apple Pie Filling special is how simple it is to make—perfect for those chilly evenings when you want to surprise your loved ones with a heartwarming treat. This delightful filling stands neck and neck with other crowd-pleasers like chocolate chip cookies, proving that the way to a family’s heart is through their stomachs. So let’s dive in and discover how you can easily whip up this classic filling that will have everyone asking for a second helping!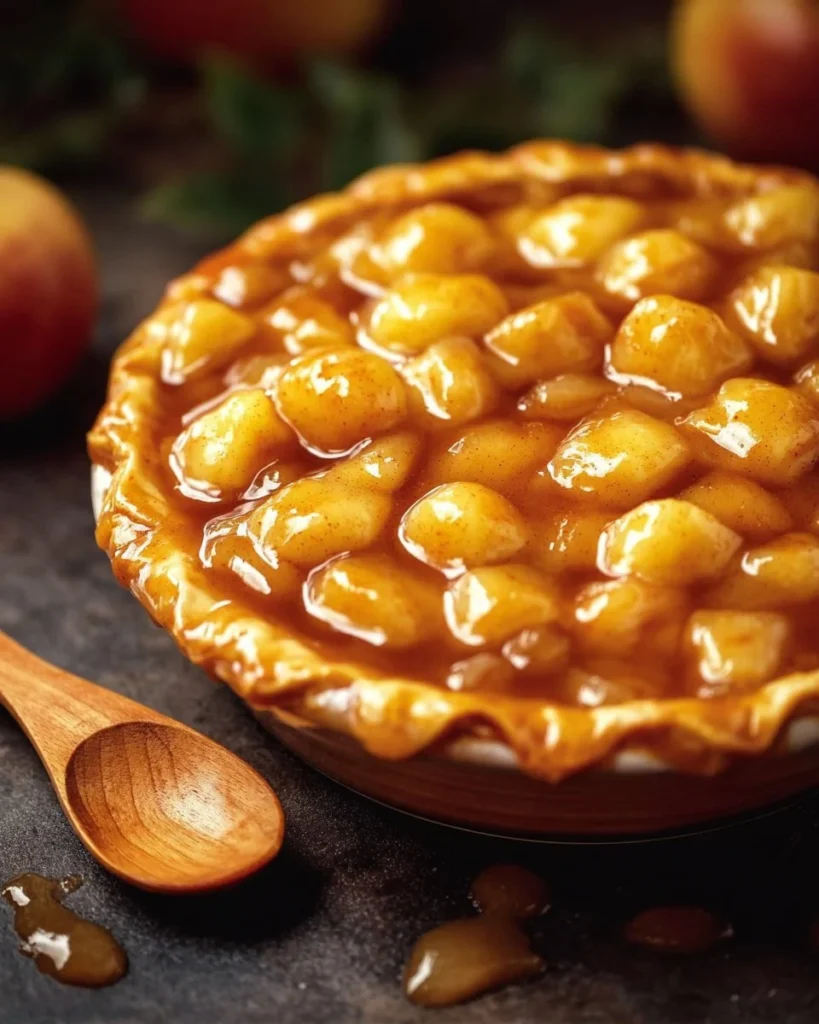
What is Homemade Apple Pie Filling?
So, what exactly is Homemade Apple Pie Filling? It’s like a cozy hug for your taste buds, made of sliced apples and warm spices enveloped in a sweet sauce. But did you ever wonder how we came to call this delicious concoction “filling”? Shouldn’t it be more like “apple goodness”? Or perhaps “slices of happiness”? Whatever the name, it’s undeniable that a good apple pie starts with a stellar filling! After all, it’s often said that the way to a man’s heart is through his stomach, and with this filling, you’ll have sweethearts of all ages swooning. Ready to dive into your apple adventures? I know I am!
Why You’ll Love This Homemade Apple Pie Filling
This Homemade Apple Pie Filling is not just for the pie enthusiasts; it’s a game changer for anyone wanting to elevate their dessert game. Homemade means you know exactly what goes into your dish, allowing you to whip up a filling that’s bursting with flavor and lacking those pesky preservatives found in store-bought varieties. Imagine juicy slices of apples nicely coated with cinnamon and nutmeg, creating an irresistible aroma that puts even the most exquisite desserts to shame!
And let’s not forget about the cost-saving aspect; making your filling at home is not only economical but rewarding, too. Plus, you can customize it just the way you like, whether you want a tart kick or a sweeter option. Drizzle it on pancakes or serve it with a dollop of whipped cream on a chilly winter evening, and you’ll understand the magic of this versatile filling. So, are you ready to create your very own slice of warmth?
How to Make Homemade Apple Pie Filling
Quick Overview
Making your own Homemade Apple Pie Filling is easy and rewarding, even for beginner cooks! You’ll be amazed by the explosion of flavors from tender apples, warm spices, and the sweetness that binds it all. Preparation takes only about 15 minutes, with cooking time of around 20 minutes. You’ll have a delicious filling ready to go into your favorite pie crust or as a topping for endless desserts.
Key Ingredients for Homemade Apple Pie Filling
- Apples: 6 cups, peeled, cored, and sliced (Granny Smith or Honeycrisp work beautifully)
- Granulated Sugar: 1 cup (adjust to taste)
- Brown Sugar: ½ cup for added depth
- Cinnamon: 2 teaspoons (feel free to add more for extra warmth)
- Nutmeg: ¼ teaspoon (a little goes a long way)
- Lemon Juice: 2 tablespoons (to keep the apples fresh and zesty)
- Cornstarch: 2 tablespoons (for thickening)
- Salt: ¼ teaspoon (to enhance flavors)
Step-by-Step Instructions
- Prep the Apples: Begin by peeling, coring, and slicing your apples into even-sized pieces. This helps them cook uniformly.
- Combine Dry Ingredients: In a large mixing bowl, whisk together the granulated sugar, brown sugar, cinnamon, nutmeg, cornstarch, and salt until well blended.
- Add Apples: Toss the sliced apples into the bowl and drizzle with lemon juice. Mix until the apples are evenly coated with the sugar and spice mixture.
- Cook on Stovetop: Transfer the apple mixture to a large saucepan over medium heat. Stir occasionally and let it cook for about 10 minutes, or until the apples start to soften and release their juices.
- Thicken the Filling: Continue to stir for an additional 5-10 minutes. The filling will thicken, coating the apples in a delicious syrup. When ready, remove from heat and let it cool before using.
- Use or Store: You can use this filling immediately in your favorite pie or refrigerate it in an airtight container for later use.
Top Tips for Perfecting Homemade Apple Pie Filling
- Apples Matter: Choose a mix of tart and sweet apples for a more complex flavor—like Granny Smith and Fuji!
- Timing: Don’t overcook the apples initially; you want them to retain some structure for that perfect pie bite.
- Experiment with Spices: Feel free to incorporate allspice or even ginger to give your filling a unique twist.
- Avoid Mushy Apples: If your filling is a bit too watery, let it simmer for a few extra minutes. Alternatively, you can adjust the cornstarch for a thicker consistency.
Storing and Reheating Tips
To store your Homemade Apple Pie Filling, simply place it in an airtight container. It will last in the refrigerator for about 5-7 days. For longer storage, you can freeze it for up to three months. Just be sure to let it cool completely before freezing.
When you’re ready to use your filling, thaw it overnight in the refrigerator. Reheat it gently on the stovetop over low heat or in the microwave until warmed through. This will help you retain that perfect texture and flavor that makes this filling so remarkable.
Now that you have a comprehensive guide on making your own Homemade Apple Pie Filling, you’re all set to impress your family. Pair it with your favorite crust and enjoy the flavors of home!
Homemade Apple Pie Filling
Ingredients
Method
- Begin by peeling, coring, and slicing your apples into even-sized pieces for uniform cooking.
- In a large mixing bowl, whisk together the granulated sugar, brown sugar, cinnamon, nutmeg, cornstarch, and salt until well blended.
- Toss the sliced apples into the bowl and drizzle with lemon juice. Mix until the apples are evenly coated with the sugar and spice mixture.
- Transfer the apple mixture to a large saucepan over medium heat. Stir occasionally and let it cook for about 10 minutes, or until the apples start to soften and release their juices.
- Continue to stir for an additional 5-10 minutes until the filling thickens, coating the apples in a delicious syrup. Remove from heat and let it cool before using.
- You can use this filling immediately in your favorite pie or refrigerate it in an airtight container for later use.
Leave a Reply