
Welcome to the spookiest corner of the kitchen where delicious meets whimsical! If you’ve ever wondered how to unite sweetness and creativity in one delightful bite, let me introduce you to the Oreo Witch Hat Snack Idea! This fun treat is not only crispy but also packs a punch of flavors that evoke the joy of family gatherings on chilly evenings. Imagine biting into a delightful chocolatey Oreo that transforms into a witch’s hat, sending your taste buds on a fantastical adventure.
This snack idea is perfect for any occasion when you want to bring a bit of magic into your life. It’s easy to make and even easier to love—a hallmark that parallels my popular chocolate chip cookie recipe, which has become a family favorite for many. So, let’s dive into this enchanting experience together!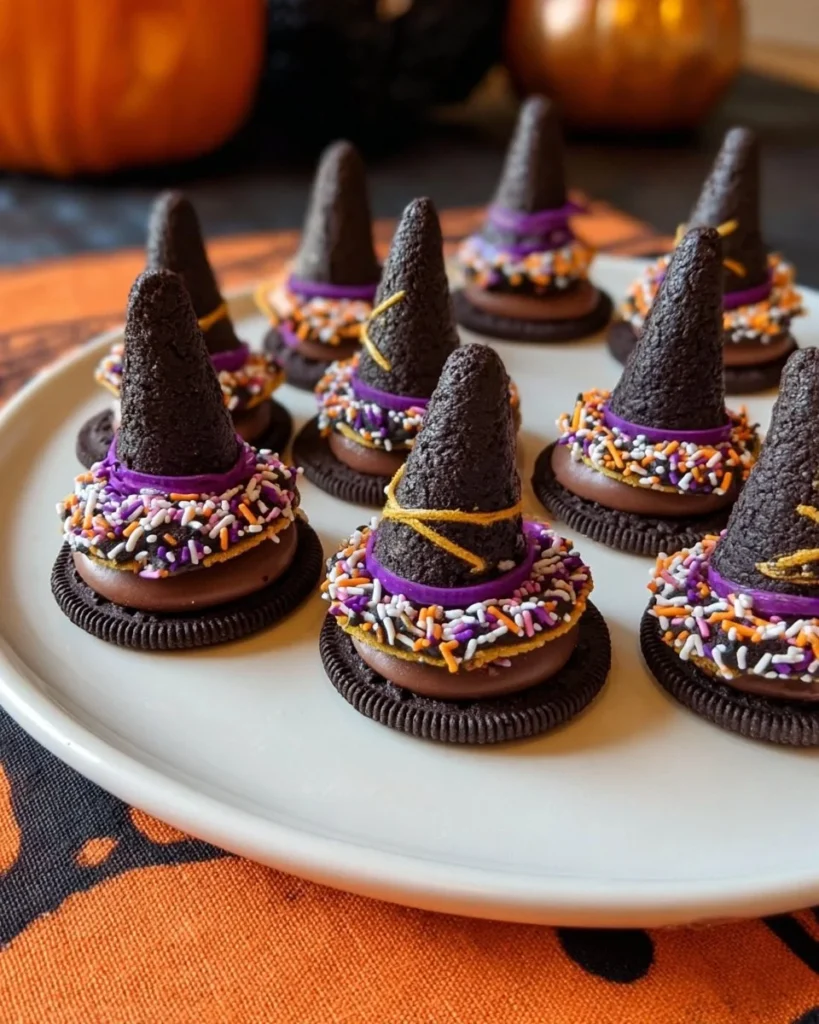
What is the Oreo Witch Hat Snack Idea?
So, what exactly is this quirky creation known as the Oreo Witch Hat Snack Idea? It’s a delightful combination of classic Oreos and playful decorations, perfect for gatherings, movie nights, or school parties! You might be wondering, did they conjure up the name in a witch’s cauldron? The real story is probably less magical and more about the fun kids have while assembling them. After all, “the way to a man’s heart is through his stomach,” and these treats will surely capture everyone’s affection! Why not whip up a batch this weekend and feel the enchantment in every bite?
Why You’ll Love This Oreo Witch Hat Snack Idea
In a world where desserts can often feel overwhelming, the Oreo Witch Hat Snack Idea shines brightly, bringing delightful simplicity to the table. Not only does this treat capture the essence of family gatherings with its festive appearance, but it also brings significant cost-saving benefits of cooking at home. Imagine the satisfaction of creating something scrumptious that rivals your favorite store-bought sweets without breaking the bank!
Each munch into these crunchy, chocolatey hats conjures up moments of childhood joy, reminding us of other treats like chocolate-covered pretzels. The clever shape and fun toppings add flair to your snacks and make for an eye-catching centerpiece. So, gather your family, and let’s get cooking—you’re going to love every moment of creating these magical bites!
How to Make the Oreo Witch Hat Snack Idea
Quick Overview
What makes the Oreo Witch Hat Snack Idea so appealing? It’s the delightful ease of preparation! These treats come together in no time, making them perfect for everyone, whether you’re a novice in the kitchen or a seasoned chef. With the creamy center of Oreos paired with a sprinkle of creativity, you’re guaranteed to create something that not only looks stunning but tastes delightful!
Preparation Time: Approximately 15 minutes
Key Ingredients for Oreo Witch Hat Snack Idea
Here’s what you will need to conjure up these delicious creations:
- 16 Oreo cookies (classic or double stuff)
- 1 cup of semi-sweet chocolate chips
- 1 cup of candy corn
- 16 candy melts (black or purple, according to your preference)
- Edible glitter or sprinkles (optional, for added magic)
Note: Ensure that all ingredients are Halal-certified for compliance with your dietary needs!
Step-by-Step Instructions
Now that you have your ingredients ready, let’s dive into making the Oreo Witch Hat Snack Idea! Follow these simple steps, and you’ll be enjoying these delightful treats in no time:
- Melt the Chocolate: Begin by melting the semi-sweet chocolate chips in a microwave-safe bowl. Microwave in 30-second intervals, stirring in between, until smooth and creamy.
- Assemble the Hats: Carefully dip the top of each Oreo into the melted chocolate, ensuring it is fully coated. This step adds that extra layer of flavor that will keep everyone coming back for more!
- Attach the Candy Corn: While the chocolate is still wet, gently place a piece of candy corn on top of the Oreo. The pointy end should face upwards—voila, your witch’s hat is forming!
- Decorate with Candy Melts: Melt the candy melts according to the package instructions. Once melted, use a piping bag or a small plastic bag with a corner snipped off to drizzle the melted candy over the top of the candy corn.
- Sprinkle Magic: If desired, sprinkle some edible glitter or colorful sprinkles on top to give your witch hats a dazzling finish.
- Let them Set: Place your assembled Oreo Witch Hats on a parchment-lined tray and let them cool for about 10-15 minutes, or until the chocolate and candy melts have set.
Top Tips for Perfecting Oreo Witch Hat Snack Idea
Here are a few pro tips to help you make the most out of your Oreo Witch Hat Snack Idea:
- Substitutions: Instead of using candy corn, you can try jelly beans or similar candies if you prefer. Just ensure that the alternatives are Halal-friendly.
- Timing: Give yourself about 30 minutes for cooling time, especially if you’re working in a warm kitchen. This will help the chocolate to set nicely!
- Avoid Common Mistakes: Be careful not to get the Oreos too wet while dipping. You can also refrigerate the melted chocolate for a few minutes if it seems too thin to start with.
Storing and Reheating Tips
If you manage to have leftovers from your Oreo Witch Hat Snack Idea (which is unlikely because they’re so tempting!), you can store them in an airtight container in the refrigerator. They’ll stay fresh for about 3-5 days.
For best results, avoid reheating these snacks. Enjoy them cold or at room temperature to maintain their delightful texture and flavor!
Now that you have all the tips and tricks, it’s time to gather your families and create some fun moments with the Oreo Witch Hat Snack Idea! Who says cooking can’t be both magical and tasty? Happy snacking!
Oreo Witch Hat Snack
Ingredients
Method
- Melt the Chocolate: Begin by melting the semi-sweet chocolate chips in a microwave-safe bowl. Microwave in 30-second intervals, stirring in between, until smooth and creamy.
- Assemble the Hats: Carefully dip the top of each Oreo into the melted chocolate, ensuring it is fully coated.
- Attach the Candy Corn: While the chocolate is still wet, gently place a piece of candy corn on top of the Oreo with the pointy end facing upwards.
- Decorate with Candy Melts: Melt the candy melts according to the package instructions. Use a piping bag to drizzle the melted candy over the top of the candy corn.
- Sprinkle Magic: If desired, sprinkle some edible glitter or colorful sprinkles on top.
- Let them Set: Place your assembled Oreo Witch Hats on a parchment-lined tray and let them cool for about 10-15 minutes.
Leave a Reply