
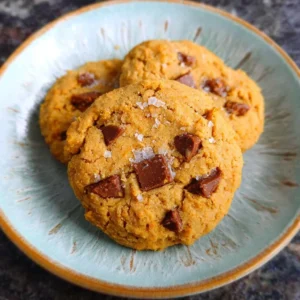
A Delightfully Nutty Treat: Chickpea Cookies
Have you ever thought about turning chickpeas into cookies? If you haven’t, you’re in for a delicious surprise! Chickpea cookies are not only nutty and delightful, but they’re also an excellent gluten-free alternative to your favorite sweet treats. It’s the kind of recipe that turns heads because you won’t believe how quickly you can whip up a batch of these delicious cookies! With a unique texture that mimics traditional cookies, these little bites of goodness are both healthy and satisfying of regular dessert cravings.
Did you know that chickpeas are often called garbanzo beans? This humble legume packs a punch with protein and fiber, making it perfect for a guilt-free snack! If you’ve tried other nut-based cookies or even oatmeal cookies, you’ll appreciate the twist that chickpea cookies bring to your cookie jar. Imagine enjoying a delicious homemade cookie that not only tastes great but is also nutritious! So, grab your mixing bowl and get excited to create these amazing chickpea cookies that will be a hit with your family and friends.
What are Chickpea Cookies?
Chickpea cookies are a delightful and healthy twist on traditional cookies that replace flour with mashed chickpeas. Intrigued? You should be! These cookies not only satisfy your sweet tooth but also come packed with the nutritional benefits of chickpeas. You might even wonder, “How can a cookie made from legumes be so delicious?” Well, just like a classic saying goes: “The way to a man’s heart is through his stomach,” these cookies will win over hearts in no time! Best of all, they’re simple to make and perfect for both kids and adults who are looking to treat themselves without the guilt. Why not give it a try? You’ll be surprised at how good they are!
Why You’ll Love These Chickpea Cookies
There are countless reasons to love chickpea cookies, but let’s focus on three key aspects that will leave you itching to make them at home. First off, the main highlight of these cookies is their unique flavor combination. The nuttiness of chickpeas blended with the sweetness of oats creates a delightful contrast that will make your taste buds dance!
Secondly, making chickpea cookies at home is incredibly cost-effective. With pantry staples as your primary ingredients, you won’t break the bank. Plus, you get to skip the preservatives often found in store-bought cookies. Lastly, the toppings and additional ingredients you can add truly set these cookies apart! Think chocolate chips, nuts, or dried fruit — the possibilities are endless!
If you love a good cookie recipe, you might also want to check out our Oatmeal Raisin Cookies, which bring a classic touch to your dessert table. Now that your mouth is watering, let’s jump into making these flexible, flavorful chickpea cookies!
How to Make Chickpea Cookies
Quick Overview
Making chickpea cookies is a breeze! In just about 25 minutes, you can have a delicious batch of treats ready to enjoy. The entire process is straightforward, making it perfect for both novice bakers and seasoned pros. With a blend of wholesome ingredients and rich flavors, it’s a simple recipe bursting with goodness.
Key Ingredients for Chickpea Cookies
To make these delightful cookies, you’ll need the following ingredients:
- 1 can (15 oz) chickpeas, drained and rinsed
- ½ cup peanut butter or almond butter
- ½ cup honey or maple syrup
- 1 tsp vanilla extract
- ¼ tsp baking soda
- ½ cup oats
- Optional: ½ cup chocolate chips, nuts, or dried fruit
Step-by-Step Instructions:
- Preheat the Oven: Preheat your oven to 350°F (175°C) and line a baking sheet with parchment paper.
- Prepare the Chickpeas: In a large mixing bowl, mash the drained and rinsed chickpeas with a fork or potato masher until smooth.
- Mix Ingredients: Add peanut butter (or almond butter), honey (or maple syrup), vanilla extract, and baking soda. Stir until well combined.
- Add Oats: Fold in the oats and any optional toppings like chocolate chips, nuts, or dried fruit.
- Form Cookies: Use a tablespoon to scoop out the dough and form small balls. Place them on the prepared baking sheet, flattening them slightly.
- Bake: Bake for about 10-12 minutes or until golden brown. Remove from the oven and allow to cool for a few minutes before transferring to a wire rack.
- Enjoy: These cookies are best enjoyed fresh but can be stored for later!
What to Serve Chickpea Cookies With
Chickpea cookies make a wonderful treat on their own, but pairing them with a few complementary dishes can elevate your snack time. Consider serving them with a glass of almond milk or your favorite herbal tea for a cozy afternoon treat. For an extra indulgent twist, try dolloping a spoonful of natural yogurt on the side, or even serve them alongside a fruit salad for a delightful brunch option.
Top Tips for Perfecting Chickpea Cookies
- Use a High-Quality Nut Butter: The flavor of the nut butter you choose will significantly affect the taste of the cookies. Opt for creamy and natural varieties without added sugars.
- Experiment with Add-ins: Don’t hesitate to get creative with add-ins! You can mix in chopped dark chocolate, shredded coconut, or spices like cinnamon to give a unique flavor to your cookies.
- Don’t Overbake: Keep a close eye on the baking time; these cookies can go from perfect to overdone quickly! Aim for a light golden color.
Storing and Reheating Tips
To extend the life of your chickpea cookies, store them in an airtight container at room temperature. They’ll stay fresh for about 3-5 days. If you’d like to enjoy them later, you can also freeze them for up to 3 months. Make sure to label your container with the date for easy reference.
When you’re ready to eat frozen cookies, simply let them thaw at room temperature for a few minutes, or heat them gently in the microwave for a few seconds to bring back that freshly baked taste.
Now that you have this amazing recipe, it’s time to gather your ingredients and make your very own batch of chickpea cookies! Enjoy the delightful blend of flavors and the smile they’ll bring to your face!

Chickpea Cookies
Ingredients
Method
- Preheat your oven to 350°F (175°C) and line a baking sheet with parchment paper.
- In a large mixing bowl, mash the drained and rinsed chickpeas with a fork or potato masher until smooth.
- Add peanut butter (or almond butter), honey (or maple syrup), vanilla extract, and baking soda. Stir until well combined.
- Fold in the oats and any optional toppings like chocolate chips, nuts, or dried fruit.
- Use a tablespoon to scoop out the dough and form small balls. Place them on the prepared baking sheet, flattening them slightly.
- Bake for about 10-12 minutes or until golden brown. Remove from the oven and allow to cool for a few minutes before transferring to a wire rack.
- These cookies are best enjoyed fresh but can be stored for later.
Leave a Reply