
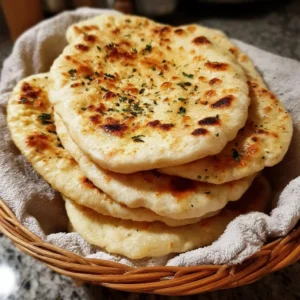
Pita Bread: A Delightfully Light and Flavorful Experience
When it comes to deliciously versatile baked goods, nothing hits quite like homemade Pita Bread. Light, fluffy, and perfect for dipping, stuffing, or wrapping, pita is truly a culinary wonder! Did you know that this Middle Eastern staple dates back to ancient civilizations? Imagine that—the nourishing bread that’s gracing tables across the world has a history steeped in tradition! What makes pita truly special is its ability to easily adapt to your culinary creations, whether you’re making savory wraps filled with fresh veggies, zesty meats, or rich dips like hummus. Best of all, it’s incredibly simple to make at home, meaning you can whip up a fresh batch in just over an hour, which is perfect for family dinners or casual get-togethers. If you’ve enjoyed our popular Flatbread recipe, you’re going to love this Pita Bread too! So, roll up your sleeves and let’s get started on this delightful journey of baking!
What is Pita Bread?
So, what’s the scoop on Pita Bread, you ask? The name might sound fancy, but this bread is about as down-to-earth as it gets! Pita is a round flatbread that hails from the Middle East, traditionally characterized by its signature pocket. Ever wonder how a piece of dough turns into a fluffy pocket of goodness? Well, it’s all magic and science combined! This bread-making marvel has been around for centuries, and you know what they say: “The way to a man’s heart is through his stomach.” Pita bread is definitely a tasty vehicle for all those scrumptious fillings and dips! Why not give this delightful recipe a try? It might just earn you a place in someone’s heart—or at least in their stomach!
Why You’ll Love This Pita Bread:
You’re about to fall head over heels for this Pita Bread! First off, it’s ridiculously easy to make, even for kitchen novices. It combines simplicity with culinary excellence, saving you money that you’d otherwise spend on store-bought options! Just imagine producing fresh, warm pitas that make every meal feel special. Plus, you have endless topping possibilities! Fill your pita pockets with anything from roasted veggies to grilled chicken, spicy falafel, or your favorite Mediterranean spreads. If you adore making homemade bread but haven’t yet tried making naan, this is a fantastic next step! Ready to embark on a tasty adventure? You won’t regret it!
How to Make Pita Bread:
Quick Overview
Making Pita Bread is both easy and rewarding! With just a few household ingredients, you can transform simple dough into delightful pockets of wonder. The best part? It typically takes about 1 hour and 15 minutes to prepare, with most of that time being hands-off! Get ready for a satisfying and delicious outcome that’s sure to elevate your meals!
Key Ingredients for Pita Bread:
- 2 cups all-purpose flour (plus extra for dusting)
- 1 teaspoon salt
- 1 tablespoon sugar
- 1 teaspoon active dry yeast
- ¾ cup warm water
- 1 tablespoon olive oil
Step-by-Step Instructions:
- Activate Yeast: In a small bowl, combine warm water, sugar, and yeast. Stir lightly and let it sit for 5 to 10 minutes or until it becomes frothy.
- Mix Dry Ingredients: In a large mixing bowl, combine the flour and salt.
- Combine Mixtures: Once the yeast is activated, pour it into the flour mixture along with the olive oil.
- Knead Dough: Mix until a dough forms, then knead on a floured surface for about 5-7 minutes until smooth and elastic.
- First Rise: Place the dough in a greased bowl, cover it with a damp cloth, and let it rise in a warm place for about 1 hour, or until it doubles in size.
- Shape Pitas: Punch down the dough and divide it into 8 equal pieces. Roll each piece into a ball, then flatten each ball into a disc about ¼ inch thick.
- Second Rise: Cover the discs with a towel and let them rest for about 30 minutes.
- Preheat Oven: Preheat your oven to 475°F (245°C) and place a baking stone or inverted baking sheet inside.
- Bake Pitas: Carefully transfer the discs onto the hot baking stone and bake for about 5-7 minutes, or until they puff up and get lightly golden.
- Cool: Remove from the oven and let them cool slightly before enjoying!
What to Serve Pita Bread With:
Now that you have your freshly baked Pita Bread, what should you serve it with? Here are a few delectable pairings to consider:
- Humus and Veggies: Perfect for dipping, offer a medley of colorful veggies alongside creamy hummus.
- Tzatziki Sauce: This cool and tangy cucumber yogurt sauce makes a fantastic dip.
- Grilled Meats: Stuff your pita with marinated grilled chicken, lamb, or beef for a hearty meal.
- Falafel: These crispy, spiced balls add a wonderful texture and flavor that lends a Middle Eastern flair.
Top Tips for Perfecting Pita Bread:
- Don’t Skip the Rise: Allow the dough to rise fully for the best texture and puffiness.
- Keep it Hot: Baking the pitas on a preheated stone or sheet ensures they puff up beautifully.
- Experiment with Flavors: Add herbs or spices to the dough for a unique twist on traditional pita.
- Use Flour Sparingly: Too much flour when kneading can make the pitas become dense rather than light and fluffy.
Storing and Reheating Tips:
After you bake your pita bread, you may have some leftovers. Here’s how to store and reheat them optimally:
- Storing: Place leftover pitas in an airtight container or resealable bag at room temperature for up to 2 days. For longer storage, you can refrigerate them for up to a week or freeze them for up to 3 months.
- Reheating: To reheat, simply wrap the pitas in a damp paper towel and microwave for about 10-15 seconds. Alternatively, you can rewarm them in a skillet over low heat for added crispiness.
Now that you have all the details on making your very own Pita Bread, you’re set to create something delightful in your kitchen! Enjoy the flavors, textures, and the joy of sharing your creations with loved ones. Happy baking!

Pita Bread
Ingredients
Method
- In a small bowl, combine warm water, sugar, and yeast. Stir lightly and let it sit for 5 to 10 minutes or until it becomes frothy.
- In a large mixing bowl, combine the flour and salt.
- Once the yeast is activated, pour it into the flour mixture along with the olive oil.
- Mix until a dough forms, then knead on a floured surface for about 5-7 minutes until smooth and elastic.
- Place the dough in a greased bowl, cover it with a damp cloth, and let it rise in a warm place for about 1 hour, or until it doubles in size.
- Punch down the dough and divide it into 8 equal pieces. Roll each piece into a ball, then flatten each ball into a disc about ¼ inch thick.
- Cover the discs with a towel and let them rest for about 30 minutes.
- Preheat your oven to 475°F (245°C) and place a baking stone or inverted baking sheet inside.
- Carefully transfer the discs onto the hot baking stone and bake for about 5-7 minutes, or until they puff up and get lightly golden.
- Remove from the oven and let them cool slightly before enjoying!
Leave a Reply