
A Sweet Treat Awaits!
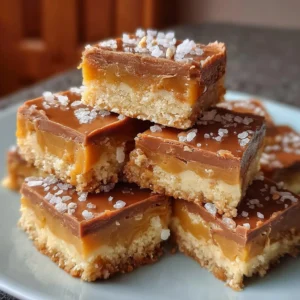
If you’re on the hunt for a quick, creamy, and utterly delightful dessert, look no further than Butterscotch Bliss Bars! These bars are a symphony of rich butterscotch flavor and just the right amount of sweetness, creating a heavenly treat that’s hard to resist. I remember the first time I tried these bars at a family gathering – it was love at first bite! The warm, buttery aroma took over the kitchen, and soon, everyone was clamoring for the recipe. Butterscotch Bliss Bars are incredibly simple to make, perfect for busy weeknights or weekend get-togethers. They blend easily in a single bowl and can be whipped up in under an hour, leaving you plenty of time to spend with the family (or enjoy a well-deserved Netflix binge!).
If you’re a fan of chewy treats like my Chocolate Chip Cookie Bars, you’ll fall head over heels for these Butterscotch Bliss Bars! So roll up your sleeves, grab your apron, and let’s dive into this blissful experience together!
What are Butterscotch Bliss Bars?
So, what’s in a name? Why “Butterscotch Bliss Bars,” you ask? Well, it’s like the stars aligned and decided to bless our taste buds with this delicious creation! One bite and boom – bliss! The term “butterscotch” evokes dreams of sweet, creamy caramel, and who can resist that? It’s like saying, “The way to a woman’s heart is through her stomach!” These bars embody the ooey-gooey, buttery indulgence that beckons you with every crumb. And yep, they practically whisper, “Please eat me!” So, what are you waiting for? Grab your mixing bowl and let’s get started on these bars of joy!
Why You’ll Love Butterscotch Bliss Bars
You’ll absolutely adore Butterscotch Bliss Bars for multiple reasons. First off, the main highlight is that delicious pairing of creamy butterscotch and chewy texture that leaves every bite feeling like a warm hug. Second, making these bars at home is a wallet-friendly choice, allowing you to indulge your cravings without the bakery price tag! Plus, the simplicity of the ingredients means you probably already have most of them in your pantry. Finally, what makes these bars truly special is the option to elevate them with delectable toppings, such as crushed nuts or a drizzle of chocolate. If you’re on the hunt for more delightful bars, don’t miss my Turtle Brownie Bars—they’re just as heavenly! So, roll up those sleeves and make some Butterscotch Bliss Bars today!
How to Make Butterscotch Bliss Bars
Quick Overview
Making Butterscotch Bliss Bars is a breeze! With just a handful of ingredients and a few easy steps, you’ll have a treat that satisfies your sweet tooth in no time. This recipe takes about 45 minutes from start to finish—perfect for when you need a last-minute dessert or treat for your next family gathering.
Key Ingredients for Butterscotch Bliss Bars
Before we dive into the delicious procedure, here’s everything you’ll need to make these heavenly bars:
- 1 cup of unsalted butter, softened
- 1 ½ cups of brown sugar, packed
- 2 eggs
- 2 teaspoons of vanilla extract
- 2 cups of all-purpose flour
- 1 teaspoon of baking powder
- 1 teaspoon of salt
- 1 cup of butterscotch chips
- Optional toppings: chopped nuts, chocolate drizzle
Step-by-Step Instructions
- Preheat the oven to 350°F (175°C) and grease a 9×13-inch baking pan.
- In a large mixing bowl, cream together the softened butter and brown sugar until light and fluffy, about 2-3 minutes.
- Add the eggs and vanilla extract, beating until well combined.
- In a separate bowl, whisk together the flour, baking powder, and salt.
- Gradually add the dry ingredients to the wet ingredients, mixing until fully incorporated.
- Fold in the butterscotch chips gently, ensuring they are evenly distributed throughout the batter.
- Spread the batter evenly in the prepared baking pan. If desired, sprinkle cleaned and chopped nuts on top for extra crunch.
- Bake for 20-25 minutes or until a toothpick inserted into the center comes out with a few crumbs.
- Let the bars cool in the pan for about 10 minutes, then lift them out using parchment paper and cool completely on a wire rack before cutting them into squares.
What to Serve Butterscotch Bliss Bars With
Butterscotch Bliss Bars are fantastic on their own, but why not elevate your dessert experience? They pair beautifully with a scoop of vanilla ice cream, making for a sensational sundae. You could also serve them alongside a warm cup of coffee or tea for that perfect afternoon pick-me-up. For a fun twist, sprinkle some sea salt on top of your bars to enhance their sweet profile, or try them with a rich chocolate sauce drizzled over the top. The possibilities are endless!
Top Tips for Perfecting Butterscotch Bliss Bars
To ensure your Butterscotch Bliss Bars turn out perfectly every time, here are some top tips:
- Don’t overmix the batter. Too much mixing can lead to dense bars.
- Experiment with mix-ins! Feel free to add in chocolate chips, nuts, or dried fruit for extra texture and flavor.
- Check for doneness. Oven temperatures can vary, so start checking for a toothpick test a few minutes before the recommended baking time.
Storing and Reheating Tips
If you happen to have leftovers (though I doubt you will!), simply store your Butterscotch Bliss Bars in an airtight container at room temperature for up to four days. For longer storage, you can freeze them! Layer them between parchment paper in an airtight container and freeze for up to three months. When you’re ready to enjoy them, allow them to thaw at room temperature, or warm them in the microwave for about 10-15 seconds to bring back that gooey goodness.
Now that you’re equipped with all the knowledge to create these delightful treats, what are you waiting for? Get cooking and treat yourself to the delectable experience that is Butterscotch Bliss Bars! Enjoy every indulgent bite!

Butterscotch Bliss Bars
Ingredients
Method
- Preheat the oven to 350°F (175°C) and grease a 9x13-inch baking pan.
- In a large mixing bowl, cream together the softened butter and brown sugar until light and fluffy, about 2-3 minutes.
- Add the eggs and vanilla extract, beating until well combined.
- In a separate bowl, whisk together the flour, baking powder, and salt.
- Gradually add the dry ingredients to the wet ingredients, mixing until fully incorporated.
- Fold in the butterscotch chips gently, ensuring they are evenly distributed throughout the batter.
- Spread the batter evenly in the prepared baking pan. If desired, sprinkle cleaned and chopped nuts on top for extra crunch.
- Bake for 20-25 minutes or until a toothpick inserted into the center comes out with a few crumbs.
- Let the bars cool in the pan for about 10 minutes, then lift them out using parchment paper and cool completely on a wire rack before cutting them into squares.
Leave a Reply