
Royal Icing and Flood Icing recipe is the perfect way to decorate cookies, cakes, and pastries with professional-quality results. Royal icing creates a smooth, glossy finish that hardens beautifully, while flood icing is a thinner version used for filling in designs. Whether you’re decorating sugar cookies for the holidays or adding intricate details to a cake, this recipe will give you bakery-style results with ease.
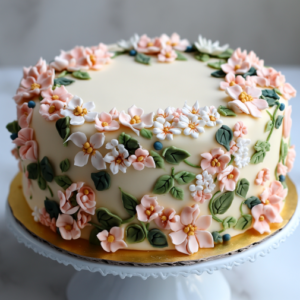

With just a few simple ingredients and the right consistency, you’ll be able to pipe outlines, create delicate decorations, and flood cookies with a flawless finish. If you’ve ever wanted to achieve stunningly decorated baked goods, this Royal Icing and Flood Icing guide will show you exactly how!
Kitchen Equipment Needed
- Electric mixer (hand or stand mixer)
- Mixing bowls
- Measuring cups and spoons
- Piping bags or squeeze bottles
- Toothpicks (for spreading flood icing)
Ingredients Overview
- Powdered Sugar: The base for a smooth, sweet icing.
- Egg Whites or Meringue Powder: Helps the icing harden properly.
- Water or Lemon Juice: Adjusts consistency for piping or flooding.
Ingredients
For Royal Icing (Stiff Consistency for Piping & Borders)
- 3 cups powdered sugar, sifted
- 2 tablespoons meringue powder (or 2 egg whites)
- 5-6 tablespoons water (adjust as needed)
- 1 teaspoon vanilla extract (or almond extract)
- Gel food coloring (optional)
For Flood Icing (Thin Consistency for Filling & Smoothing)
- 1 cup prepared royal icing
- 1-2 teaspoons water (adjust for a thinner consistency)
Directions
Step 1: Make the Royal Icing
- In a mixing bowl, beat powdered sugar and meringue powder (or egg whites) on low speed.
- Add water one tablespoon at a time until the icing is thick but smooth.
- Beat on medium-high speed for 3-5 minutes until the icing forms stiff peaks.
- Add vanilla extract and mix for another minute.
Step 2: Adjust for Piping or Flood Icing
- For Piping & Borders: Use as is for a stiff consistency. Transfer to a piping bag and use a small tip for outlining cookies or creating details.
- For Flood Icing: Thin the royal icing by adding 1 teaspoon of water at a time until it reaches a smooth, flowing consistency. When drizzled with a spoon, it should settle back into itself within 5-10 seconds.
Step 3: Decorate Your Cookies
- Pipe an outline around the cookie with royal icing.
- Fill inside the outline with flood icing, using a toothpick to spread evenly.
- Let the icing dry for 6-8 hours at room temperature until hardened.
Prep Time
10 minutes
Total Time
10 minutes
Nutrition (per serving, ~1 tablespoon)
- Calories: ~30
- Sugar: ~7g
- Fat: 0g
Expert Tips
- For a Glossy Finish: Add a teaspoon of corn syrup to the icing.
- To Prevent Clogging: Keep a damp cloth over the piping tip when not in use.
- For Vibrant Colors: Use gel food coloring instead of liquid.
FAQs
How long does royal icing take to dry?
It takes 6-8 hours at room temperature or 2 hours in front of a fan.
Can I store royal icing?
Yes! Keep it in an airtight container at room temperature for 1 day or refrigerate for up to 1 week.
What’s the difference between royal icing and flood icing?
Royal icing is thicker for piping, while flood icing is thinner for filling in designs.
Storing & Freezing
- Storing: Keep in an airtight container in the fridge for 1 week. Re-whisk before using.
- Freezing: Not recommended, as icing may separate.


Substitutions & Variations
- Egg-Free: Use meringue powder instead of egg whites.
- Flavor Options: Add lemon, almond, or peppermint extract for variety.
- Metallic Shine: Brush dried icing with edible gold or silver dust.
Royal Icing and Flood Icing
Ingredients
Equipment
Method
- #### **Step 1: Make the Royal Icing**
- In a mixing bowl, beat powdered sugar and meringue powder (or egg whites) on low speed.
- Add water one tablespoon at a time until the icing is thick but smooth.
- Beat on medium-high speed for **3-5 minutes** until the icing forms stiff peaks.
- Add vanilla extract and mix for another minute.
- #### **Step 2: Adjust for Piping or Flood Icing**
- - **For Piping & Borders**: Use as is for a stiff consistency. Transfer to a piping bag and use a small tip for outlining cookies or creating details.
- - **For Flood Icing**: Thin the royal icing by adding 1 teaspoon of water at a time until it reaches a smooth, flowing consistency. When drizzled with a spoon, it should settle back into itself within **5-10 seconds**.
- #### **Step 3: Decorate Your Cookies**
- Pipe an outline around the cookie with royal icing.
- Fill inside the outline with flood icing, using a toothpick to spread evenly.
- Let the icing dry for **6-8 hours** at room temperature until hardened.
Leave a Reply