
No-Bake Oreo Cheesecake
When you’re craving something sweet and creamy but don’t want to heat up the kitchen, this No-Bake Oreo Cheesecake has your back. Imagine sinking your fork into a velvety slice of cheesecake that’s studded with crunchy bits of Oreo cookies, offering a delightful contrast in texture with every bite. It’s like a party in your mouth! Fun fact: did you know that Oreos have been delighting taste buds since 1912? This no-bake treat is perfect for family gatherings, where everyone can indulge without the hassle of baking.
What sets this recipe apart is its simplicity—no oven needed! And just like my popular Chocolate Chip Cookie Dough Dip, this dessert is a guaranteed crowd-pleaser, especially among those who claim they aren’t usually dessert lovers. Don’t you want to impress your family and friends with something both easy and scrumptious? Let’s dive into how you can create this delicious No-Bake Oreo Cheesecake right in your own kitchen.
What is No-Bake Oreo Cheesecake?
So what’s the deal with this No-Bake Oreo Cheesecake anyway? I mean, who decided to combine the creamy magic of cheesecake with those classic, crunched-up Oreo cookies? Someone clearly had their priorities straight! The story actually goes that “the way to a man’s heart is through his stomach”—and nothing says love like a homemade cheesecake that requires zero baking skills! If this sounds like something your loved ones would relish, you’re in for a fun adventure in the kitchen. Grab those Oreos and let’s get this delicious dessert rolling!
Why You’ll Love This No-Bake Oreo Cheesecake
This No-Bake Oreo Cheesecake is the perfect dessert to make for any occasion. Firstly, the rich, creamy filling paired with the crunchy cookie crust is a match made in heaven, making each bite an explosion of flavors and textures. Plus, if you’re looking to save some money, there’s no need to splurge at a fancy bakery—this cheesecake is a budget-friendly way to treat your loved ones.
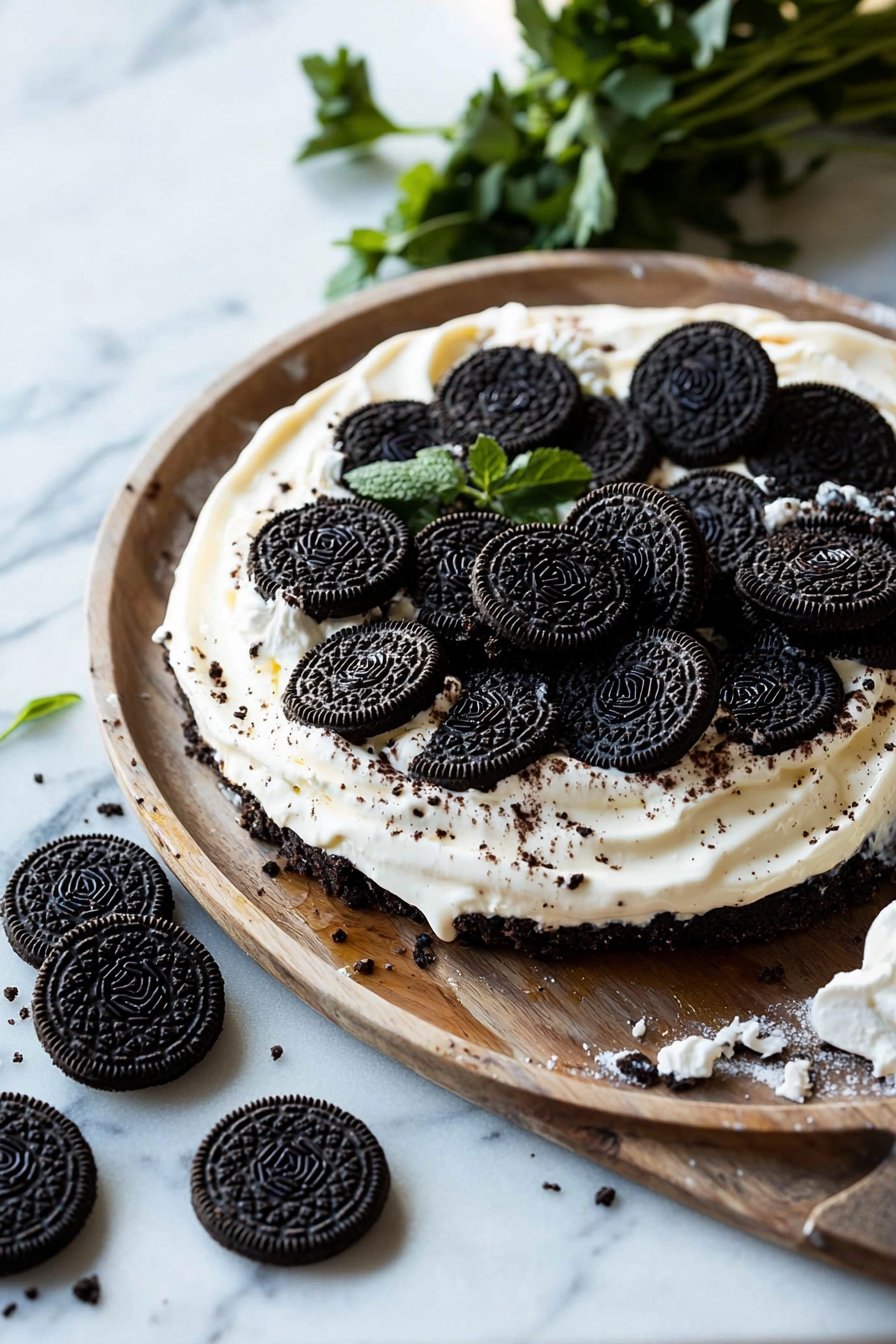
And did I mention the toppings? You can sprinkle on extra crushed Oreo cookies or even drizzle some chocolate sauce for a decadent touch. It’s like dessert on overdrive! If you love a good classic cheesecake but want something even more delightful, this No-Bake Oreo Cheesecake is calling your name. Now, who wouldn’t want to whip this up for their next family gathering?
How to Make No-Bake Oreo Cheesecake
Quick Overview
Making a No-Bake Oreo Cheesecake is not only straightforward but also incredibly satisfying. The creamy texture of the cheesecake filling coupled with the crunchy Oreo base is a delicious fusion. This scrumptious dessert can be prepared in just about 20-30 minutes, making it an efficient choice for busy home cooks.
Ingredients
For this No-Bake Oreo Cheesecake, you will need:
- 24 Oreo cookies, crushed
- 1/2 cup unsalted butter, melted
- 16 oz cream cheese, softened
- 1 cup powdered sugar
- 1 teaspoon vanilla extract
- 1 cup whipped cream (or Cool Whip)
- Additional Oreo cookies for topping
Ensure that all your ingredients are Halal and meet your dietary needs.
Step-by-Step Instructions
- Prepare the Crust: In a mixing bowl, combine the crushed Oreo cookies and melted butter until well mixed. Press this mixture into the bottom of a 9-inch springform pan, creating an even layer. Set it in the refrigerator while you prepare the cheesecake filling.
- Make the Cheesecake Filling: In another large bowl, beat the softened cream cheese until it’s smooth. Gradually add in the powdered sugar and vanilla extract, mixing well until combined.
- Fold in the Whipped Cream: Gently fold in the whipped cream (or Cool Whip) to the cream cheese mixture. Be careful not to deflate the whipped cream too much; you want to keep that light, airy texture.
- Combine: Now, gently fold in half of the additional crushed Oreo cookies into the cheesecake mixture for added crunch.
- Assemble the Cheesecake: Pour the cheesecake filling over the chilled Oreo crust, smoothing it out evenly. Top it with the remaining crushed Oreo cookies for decoration.
- Chill: Place the entire cheesecake in the refrigerator for at least 4 hours, preferably overnight. This step allows it to set and makes it easier to slice.
- Serve: Once set, carefully remove the sides of the springform pan. Slice, serve, and enjoy with your family!
Top Tips for Perfecting No-Bake Oreo Cheesecake
- Cream Cheese: Ensure your cream cheese is at room temperature to avoid lumps in the filling.
- Whipped Cream: If making your own whipped cream, beat it until stiff peaks form for the best texture.
- Substitutes: You can use low-fat cream cheese for a lighter option or dairy-free alternatives to accommodate specific dietary preferences. Just make sure any substitutes remain Halal.
- Timing: The longer you chill the cheesecake, the firmer it will be. If you’re short on time, a minimum of 4 hours will suffice, but overnight is best.
Storing and Reheating Tips
To store your No-Bake Oreo Cheesecake, cover it with plastic wrap or place it in an airtight container to prevent it from absorbing any odors from the fridge. It will last up to 5 days in the refrigerator.
If you want to freeze it, wrap it well to protect it from freezer burn. It can be frozen for up to 2 months. When you’re ready to enjoy it again, simply take it out and let it thaw in the refrigerator overnight. Do not refreeze after thawing, to maintain its creamy texture and delicious flavor.
Relish every bite of this No-Bake Oreo Cheesecake, where simplicity meets delectable flavors. Gather your loved ones and serve up this crowd-pleaser at your next family gathering!
FAQ
Need more information? Here are some common questions about No-Bake Oreo Cheesecake:
1. Can I use other cookies instead of Oreos?
Absolutely! Feel free to substitute with any of your favorite cookies to create a unique flavor.
2. What if I don’t have a springform pan?
You can also use a regular pie dish; just be careful when slicing.
3. How do I ensure my cheesecake has a smooth texture?
Make sure your cream cheese is softened properly, and mix gently when folding in the whipped cream.
Get ready to impress your family with this delightful dessert that is sure to become a household favorite!
No-Bake Oreo Cheesecake
Ingredients
Method
- In a mixing bowl, combine the crushed Oreo cookies and melted butter until well mixed. Press this mixture into the bottom of a 9-inch springform pan, creating an even layer. Set it in the refrigerator while you prepare the cheesecake filling.
- In another large bowl, beat the softened cream cheese until it’s smooth. Gradually add in the powdered sugar and vanilla extract, mixing well until combined.
- Gently fold in the whipped cream (or Cool Whip) to the cream cheese mixture. Be careful not to deflate the whipped cream too much; you want to keep that light, airy texture.
- Gently fold in half of the additional crushed Oreo cookies into the cheesecake mixture for added crunch.
- Pour the cheesecake filling over the chilled Oreo crust, smoothing it out evenly. Top it with the remaining crushed Oreo cookies for decoration.
- Place the entire cheesecake in the refrigerator for at least 4 hours, preferably overnight. This step allows it to set and makes it easier to slice.
- Once set, carefully remove the sides of the springform pan. Slice, serve, and enjoy with your family!
Leave a Reply