
Easy Sushi Balls: A Delightful Family Treat
Are you ready to embark on a flavor adventure with Easy Sushi Balls? The delightful combination of slightly sticky sushi rice, flavorful fillings, and a crispy outer layer creates a snack that’s utterly irresistible. Just imagine sinking your teeth into a perfectly molded ball, filled with fresh vegetables and your choice of delightful toppings, each bite bursting with umami goodness. This recipe isn’t just about sushi; it’s about simplicity and the joy of making something delicious together as a family.
Did you know that sushi has its roots in preservation methods that relied on fermented fish? Sushi has transformed tremendously since then, evolving into the delight we experience today. Compared to other sushi recipes that might require intricate rolling or extravagant prep, these Easy Sushi Balls are perfect for casual family gatherings or cozy winter evenings. If you’ve tried our famous Vegetable Sushi Wraps, you’ll find that this dish is just as simple, yet equally fun and satisfying to make. Let’s dive into this culinary experience!
What is Easy Sushi Balls?
Easy Sushi Balls—sounds funny, right? You might wonder if they were named after someone who couldn’t quite master the art of sushi rolling. What if I told you that a friend’s toddler once called them “sushi hugs”? It’s quite fitting, isn’t it? The way to a man’s heart is through his stomach, and these sushi hugs are sure to win over anyone, whether it’s your little ones or your dinner guests! Want to impress your family with a fun dish that requires minimal fuss? Grab your ingredients, roll up your sleeves, and let’s get started. You won’t regret it!
Why You’ll Love This Easy Sushi Balls
There are countless reasons that make Easy Sushi Balls a fantastic addition to your meal rotation. For starters, they can serve as a main dish that brings everyone together around the table, each customizing their own little sushi ball. With the freedom to choose your toppings and fillings, you’ll find a delightful blend of flavors that can transport you straight to a cozy sushi bar.
Another fantastic benefit is cost savings! Making this dish at home allows you to control the quality of ingredients while saving money compared to dining out. Plus, you can easily adjust the portions to cater to a larger family gathering without stress.
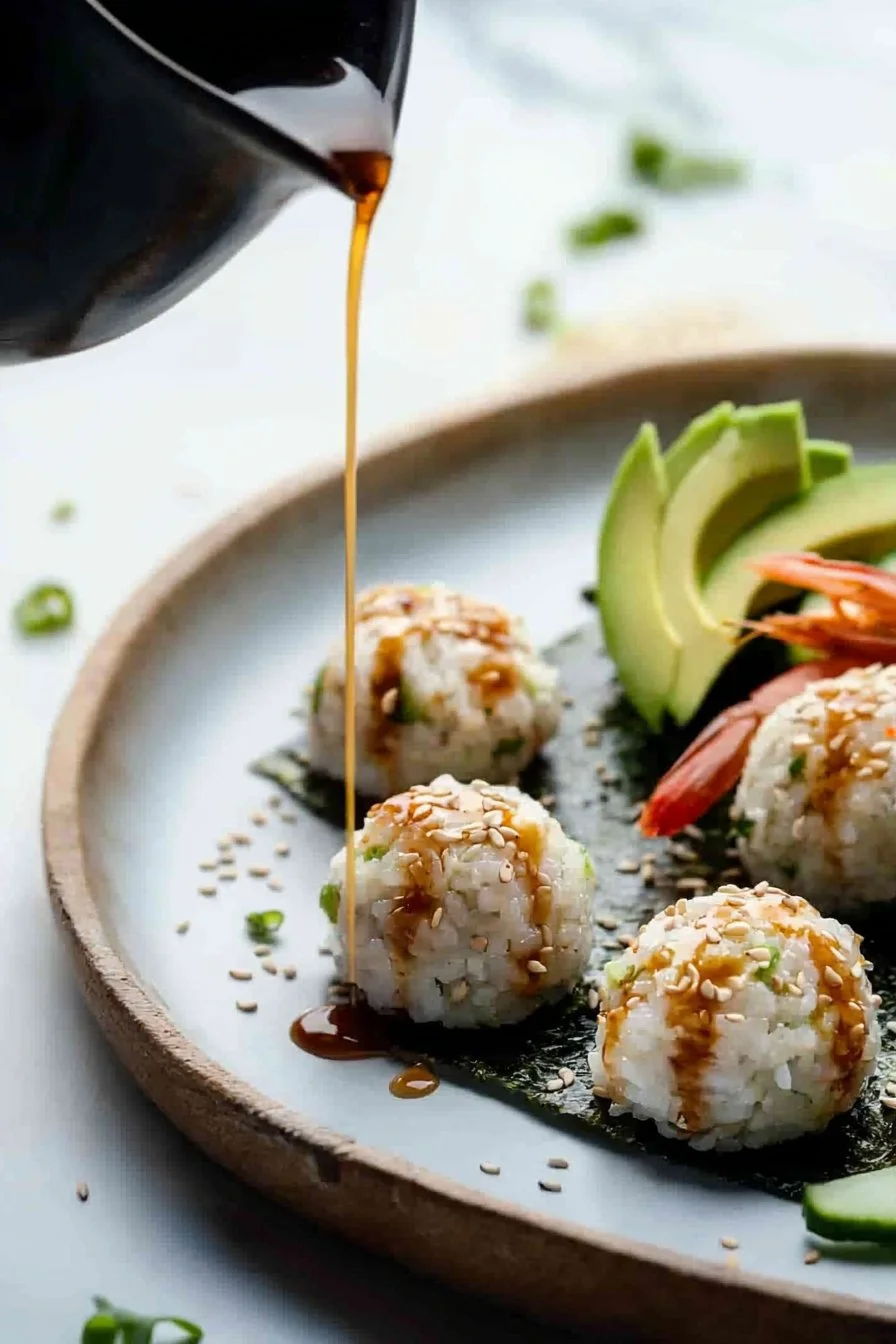
Finally, let’s talk about those toppings! Picture warm sushi rice topped with creamy avocado, crisp cucumber, and an irresistible drizzle of halal soy sauce. Delicious, right? If you love our beloved Sushi Bowls, you are sure to be enamored by these Easy Sushi Balls too. Ready to dive into your very own sushi-making adventure?
How to Make Easy Sushi Balls
Quick Overview
Creating Easy Sushi Balls is straightforward and incredibly satisfying. The combination of the slightly sticky rice paired with crunchy toppings creates a unique texture that you will absolutely enjoy. Prepare to spend about 40 minutes in total for prep and cooking, which is totally worth the delightful outcome.
Ingredients for Easy Sushi Balls
- 2 cups sushi rice
- 2 ½ cups water
- 3 tablespoons rice vinegar
- 1 tablespoon sugar
- 1 teaspoon salt
- 1 sheet nori (seaweed), cut into strips
- 1 cucumber, diced
- 1 avocado, diced
- 1 cup cooked fish or shrimp (optional)
- Sesame seeds for topping
- Soy sauce for dipping
Note: Make sure that all ingredients, especially any proteins, are halal-certified for full compliance.
Step-by-Step Instructions
- Prepare the Sushi Rice: Rinse the sushi rice under cold water until the water runs clear. This removes excess starch and prevents the rice from becoming too sticky.
- Cook the Rice: In a medium saucepan, combine the rinsed, drained rice and 2 ½ cups of water. Bring it to a boil, then reduce the heat, cover, and let it simmer on low for about 20 minutes, or until all water is absorbed. Remove from heat and let it sit, covered, for 10-15 minutes.
- Season the Rice: While the rice is cooling, whisk together the rice vinegar, sugar, and salt in a small bowl. Once the rice has cooled slightly, gently fold this mixture into the rice, ensuring it’s evenly coated.
- Form the Sushi Balls: Wet your hands to prevent sticking. Take about a handful of the seasoned sushi rice and press it into a ball shape. Use a small piece of nori, if desired, as a wrap.
- Add Fillings and Toppings: Add the diced cucumber, avocado, and optional cooked fish or shrimp into the center of each rice ball. Top with sesame seeds.
- Serve and Enjoy: Arrange your sushi balls on a platter. Serve with soy sauce for dipping, and enjoy the fun of customizing each bite!
Top Tips for Perfecting Easy Sushi Balls
- Substitutions: Don’t have nori? Use lettuce leaves for a fresh wrap. You can also replace fish with your favorite halal protein or even tofu for a vegetarian option.
- Timing: Ensure that the rice has cooled before shaping; hot rice can be challenging to work with and may not hold its shape well.
- Avoid Common Mistakes: Make sure not to pack the rice too tightly; keeping it loose will ensure a light and airy texture.
Storing and Reheating Tips
If you have leftover Easy Sushi Balls, store them in an airtight container in the refrigerator. They should be consumed within 2 days for the best taste and texture. For reheating, it’s best to leave the sushi balls at room temperature for a short while before enjoying them. Avoid using a microwave as that can make the rice dry and lose its delightful sticky quality.
Now that you’ve learned how to make these fabulous Easy Sushi Balls, get ready to impress your family and friends with your newfound culinary skills! Happy cooking!
FAQs
- Can I make these sushi balls vegetarian?
Absolutely! Just skip the cooked fish or shrimp, and load up on your favorite veggies and tofu for a delicious vegetarian treat. - How can I add more flavor to the sushi balls?
Experiment with different sauces, like spicy mayo or teriyaki sauce, to enhance the flavor of your sushi balls. - What is the best rice to use?
Make sure to use short-grain sushi rice for that perfect sticky texture. Other rice varieties won’t yield the same result. - Can I freeze sushi balls?
It’s best to enjoy sushi balls fresh; however, you can freeze the rice (without toppings) and shape them later. Reheat them carefully in a microwave or on the stove. - What can I serve with sushi balls?
Pair these delicious sushi balls with a fresh side salad or some light miso soup for a complete meal.
Easy Sushi Balls
Ingredients
Method
- Rinse the sushi rice under cold water until the water runs clear to remove excess starch.
- In a medium saucepan, combine the rinsed, drained rice and 2 ½ cups of water. Bring it to a boil, then reduce heat, cover, and simmer on low for about 20 minutes.
- Remove from heat and let sit, covered, for 10-15 minutes.
- In a small bowl, whisk together the rice vinegar, sugar, and salt. Gently fold this mixture into the cooled rice.
- Wet your hands to prevent sticking, then take a handful of the seasoned sushi rice and press it into a ball shape.
- Add diced cucumber, avocado, and optional cooked fish or shrimp into the center of each rice ball.
- Top with sesame seeds and arrange on a platter.
- Serve with soy sauce for dipping and enjoy!
Leave a Reply