
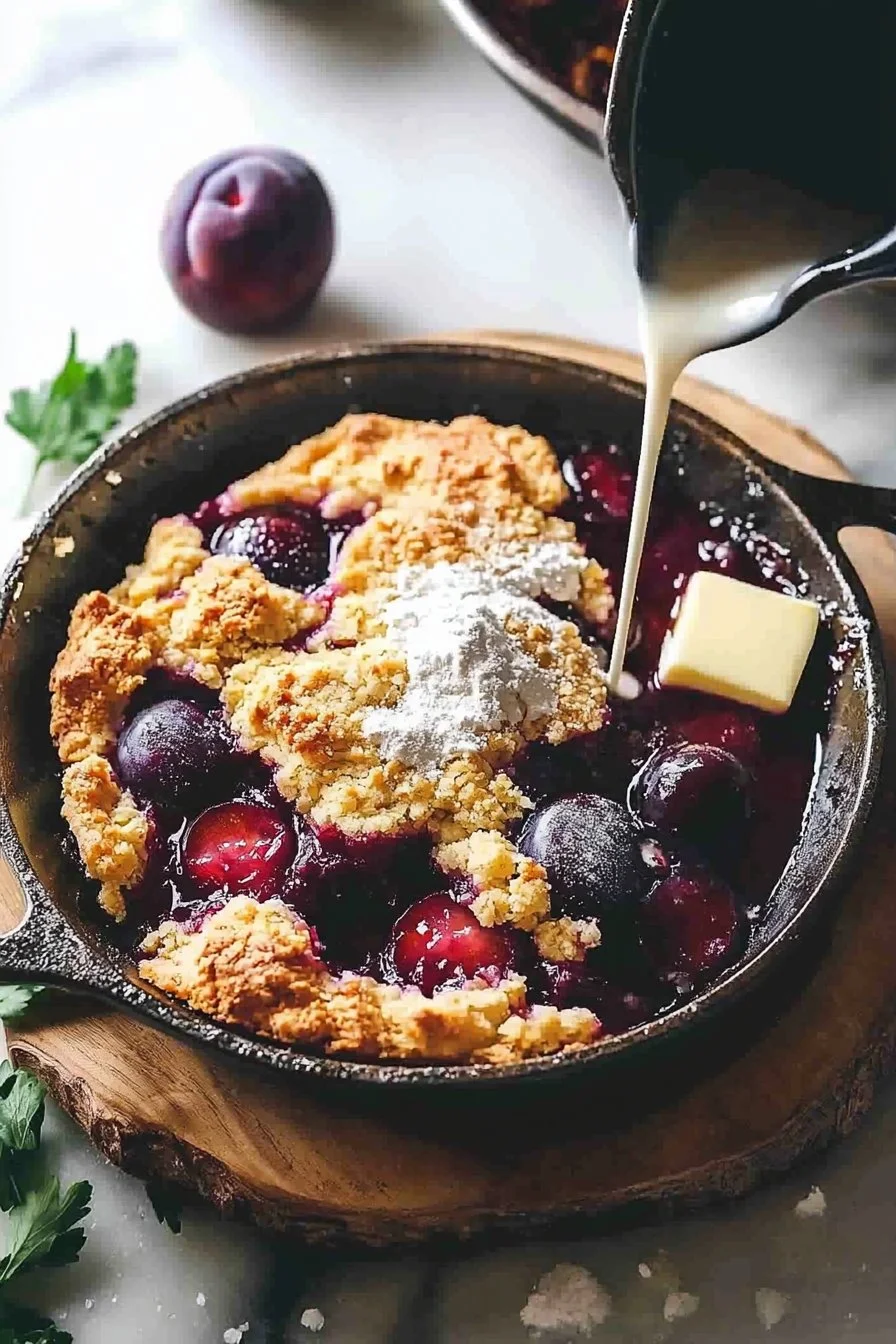
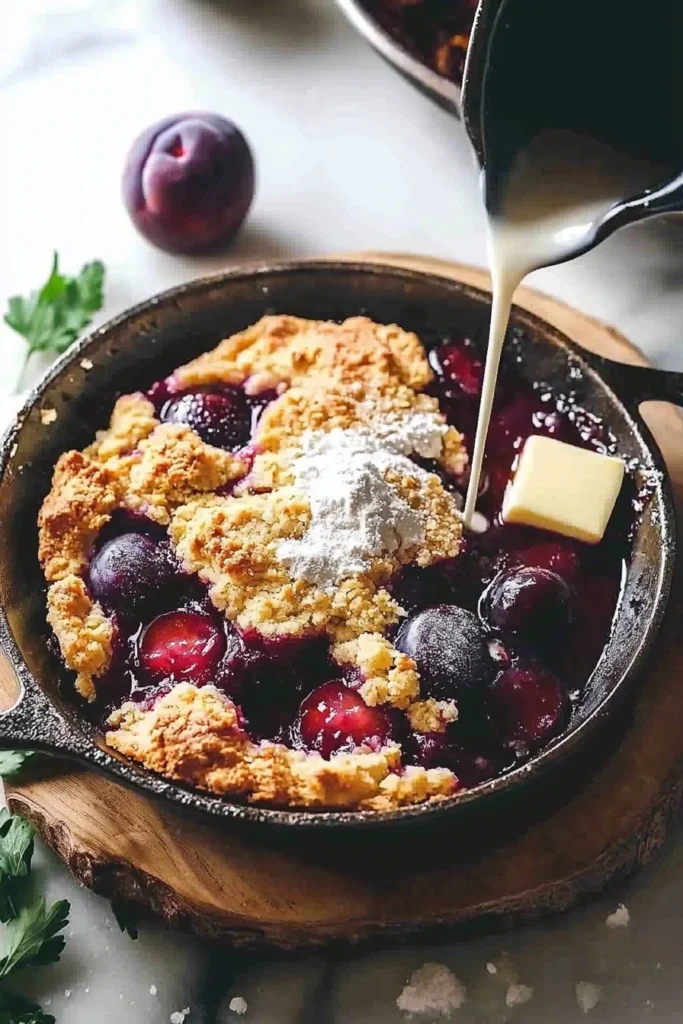
Easy Skillet Plum Cobbler
When life gives you plums, what do you do? You whip up a delightful Easy Skillet Plum Cobbler, of course! This warm, comforting dessert is a perfect blend of sweet, juicy plums and buttery, crispy topping, creating a texture that’s simply divine. Imagine the sweet, tart burst of fresh plums mingling with a crumbly topping—every bite is a delightful dance of flavors that transports you straight to a sunny orchard. This recipe is also a family favorite, and its simplicity makes it an easy go-to for anyone from novice bakers to seasoned pros.
On a cozy evening with your loved ones gathered around, this cobbler will surely become the highlight of your dinner table. Trust me, it’s a perfect dessert that even rivals other popular treats like classic apple pie. The way to a man’s heart is through his stomach, but with this Easy Skillet Plum Cobbler, you’ll win over everyone at the table!
What is Easy Skillet Plum Cobbler?
Picture this: you’re at home, and you suddenly realize you have a bunch of ripe plums on your counter. You might think, “What should I do with them? Make a jam? Nah!” Enter the Easy Skillet Plum Cobbler, the unsung hero of dessert dishes! You could say this cobbler is the royal name for all things fruit and bread! Why call it ‘skillet’? Because you’re crafting this masterpiece in just one pan, making cleanup a breeze. This is one of those dishes that, true to the saying, ‘the way to a man’s heart is through his stomach.’ You can easily gather your friends or family around to enjoy this simple, delightful dessert. Your taste buds will thank you, and your heart will sing, so grab those plums and let’s cobble something delicious!
Why You’ll Love This Easy Skillet Plum Cobbler
For those cozy family gatherings or quiet evenings at home, this Easy Skillet Plum Cobbler stands out as a comforting highlight. The blend of sweet plums and crunchy topping creates an incredible dessert that feels gourmet without the fuss. Plus, making this cobbler at home saves you money while delivering a flavor explosion that outshines store-bought desserts.
Imagine indulging in warm, spiced plums, creamy vanilla ice cream melting into the dish. While it’s reminiscent of a peach cobbler, the plums provide a unique tartness that elevates the flavor profile. So go ahead, gather your ingredients, and give this cobbler a warm place in your heart (and your kitchen)!
How to Make Easy Skillet Plum Cobbler
Quick Overview
The beauty of this Easy Skillet Plum Cobbler lies in its simplicity and satisfying nature. Within just 10 minutes of prep time and about 30 minutes of baking, you’ll yield a dessert that’s filled with juicy plums and topped off with a golden-brown, slightly crisp layer. Perfectly warm and inviting, this treat is a showstopper for both beginners and experienced cooks.
Ingredients for Easy Skillet Plum Cobbler
- 4 cups of plums (sliced, pitted, and fresh)
- ½ cup of sugar (adjust based on the sweetness of the plums)
- ¾ cup of all-purpose flour
- 2 tsp of baking powder
- ½ tsp of salt
- 1 cup of milk
- ¼ cup of unsalted butter (melted)
- 1 tsp of ground cinnamon (optional but recommended for enhanced flavor)
Step-by-Step Instructions
- Preheat your oven to 350°F (175°C) to ensure even baking.
- Begin by washing your plums thoroughly. Halve them, remove the pits, and slice them into wedges. Place the sliced plums into a mixing bowl.
- Add ¼ cup of sugar to the plums and toss gently to coat. Set aside to allow juices to mingle.
- In a separate bowl, whisk together the flour, remaining sugar, baking powder, salt, and cinnamon until well combined.
- Pour the milk and melted butter into your dry ingredients, mixing until just incorporated; be careful not to overmix!
- In a medium-sized skillet (cast iron works best), spread the sliced plums evenly across the bottom. Pour the batter over the plums, ensuring even coverage.
- Bake in the preheated oven for about 30-35 minutes, or until the top is golden brown and a toothpick inserted into the center comes out clean.
- Remove from the oven, allow to cool slightly, and serve warm, perhaps with a scoop of vanilla ice cream!
Top Tips for Perfecting Easy Skillet Plum Cobbler
- Substitutions: If plums aren’t in season, feel free to use other fruits like peaches or apples for a different spin!
- Timing: Always keep an eye on the cobbler towards the end of the baking time to avoid overcooking.
- Common Mistakes: Ensure your baking powder is fresh for the best rise. Also, don’t forget to toss the fruits with sugar; it enhances the flavor and creates luscious juices!
Storing and Reheating Tips
If you have leftovers (though they might be hard to come by because of how delicious this is!), here’s how you can store and enjoy them later. Allow the Easy Skillet Plum Cobbler to cool completely before transferring it to an airtight container. Refrigerate it for up to 3 days.
To reheat, place portions in the oven at 350°F (175°C) for about 10 minutes, or simply warm individual servings in the microwave for about 30 seconds to 1 minute. For that fresh-out-of-the-oven taste, reheating in the oven is preferred, as it restores the crisp top.
Now that you have all the tips and tricks, it’s time to get baking! Enjoy every warm, delicious bite of your Easy Skillet Plum Cobbler, and share it with loved ones for that special touch!
Easy Skillet Plum Cobbler
Ingredients
Method
- Preheat your oven to 350°F (175°C) to ensure even baking.
- Wash your plums thoroughly, halve them, remove the pits, and slice them into wedges. Place the sliced plums into a mixing bowl.
- Add ¼ cup of sugar to the plums and toss gently to coat. Set aside to allow juices to mingle.
- In a separate bowl, whisk together the flour, remaining sugar, baking powder, salt, and cinnamon until well combined.
- Pour the milk and melted butter into your dry ingredients, mixing until just incorporated; be careful not to overmix!
- In a medium-sized skillet (cast iron works best), spread the sliced plums evenly across the bottom.
- Pour the batter over the plums, ensuring even coverage.
- Bake in the preheated oven for about 30-35 minutes, or until the top is golden brown and a toothpick inserted into the center comes out clean.
- Remove from the oven, allow to cool slightly, and serve warm, perhaps with a scoop of vanilla ice cream!
Leave a Reply