
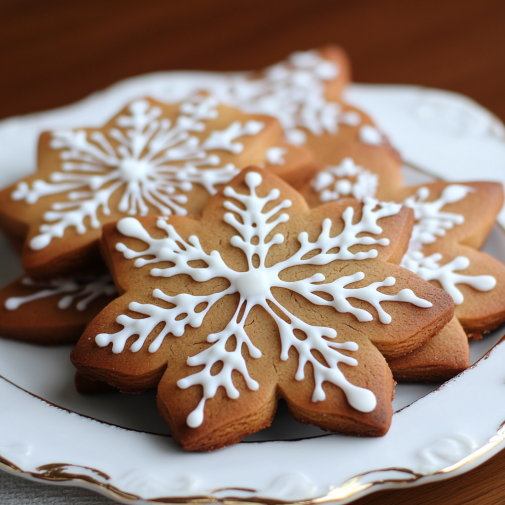
There’s nothing more festive than Gingerbread Snowflake Cookies, beautifully decorated and full of warm spices like ginger, cinnamon, and cloves. These cookies have a soft yet slightly crisp texture, making them perfect for decorating with royal icing or powdered sugar.
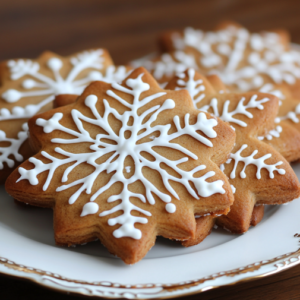
Not only are these cookies delicious, but they also make great edible gifts, holiday treats, or fun baking projects with kids. Whether you’re baking for Christmas or just craving that cozy gingerbread flavor, these snowflake-shaped cookies are sure to impress!
Kitchen Equipment Needed
- Mixing bowls
- Hand or stand mixer
- Measuring cups and spoons
- Rolling pin
- Snowflake cookie cutters
- Baking sheet
- Parchment paper
- Cooling rack
- Piping bag (for icing, optional)
Ingredients Overview
- Molasses & Brown Sugar: Adds deep caramelized sweetness.
- Warm Spices: Ginger, cinnamon, cloves, and nutmeg bring warmth.
- Butter: Keeps the cookies rich and flavorful.
- Royal Icing (Optional): Used to decorate with snowflake patterns.
Ingredients
For the Gingerbread Cookies
- 3 cups all-purpose flour
- 1 tablespoon ground ginger
- 2 teaspoons ground cinnamon
- 1/2 teaspoon ground cloves
- 1/2 teaspoon ground nutmeg
- 1/2 teaspoon salt
- 3/4 teaspoon baking soda
- 1/2 cup unsalted butter, softened
- 1/2 cup brown sugar, packed
- 1/2 cup molasses
- 1 egg
- 1 teaspoon vanilla extract
For the Royal Icing (Optional)
- 2 cups powdered sugar
- 2 tablespoons milk (or water)
- 1/2 teaspoon vanilla extract
- 1 tablespoon light corn syrup (for shine)
Directions
Step 1: Prepare the Dough
- In a medium bowl, whisk together flour, ginger, cinnamon, cloves, nutmeg, salt, and baking soda.
- In a large mixing bowl, beat butter and brown sugar until light and fluffy (about 2 minutes).
- Mix in molasses, egg, and vanilla extract, scraping down the sides as needed.
- Gradually add the dry ingredients, mixing until a smooth dough forms.
Step 2: Chill the Dough
- Divide dough into two discs, wrap in plastic, and chill for at least 1 hour (or up to overnight).
Step 3: Roll & Cut the Cookies
- Preheat oven to 350°F (175°C) and line a baking sheet with parchment paper.
- On a lightly floured surface, roll out dough to 1/4-inch thickness.
- Cut into snowflake shapes using cookie cutters.
Step 4: Bake & Cool
- Place cookies on the baking sheet 1 inch apart.
- Bake for 8-10 minutes, or until edges are firm but centers are still soft.
- Let cool on the sheet for 5 minutes, then transfer to a wire rack.
Step 5: Make the Icing & Decorate
- Whisk together powdered sugar, milk, vanilla, and corn syrup until smooth.
- Transfer to a piping bag and decorate cookies with snowflake patterns.
- Let icing set for 30 minutes before stacking or storing.
Prep Time
15 minutes (plus chilling time)
Cook Time
10 minutes
Total Time
1 hour 25 minutes
Nutrition (per cookie, ~20 cookies)
- Calories: ~140
- Fat: ~4g
- Carbohydrates: ~22g
- Protein: ~2g
Expert Tips
- For Crispier Cookies: Roll dough thinner and bake an extra 1-2 minutes.
- For Softer Cookies: Add 1 extra tablespoon of molasses and slightly underbake.
- For Perfect Snowflake Patterns: Use a fine piping tip and let the icing set completely.
FAQs
Can I make these cookies ahead of time?
Yes! The dough can be refrigerated for up to 3 days or frozen for up to 3 months.
How do I store decorated cookies?
Store in an airtight container for up to 5 days at room temperature.
Can I use store-bought icing?
Yes! White icing gel or pre-made royal icing works great for decorating.
Storing & Freezing
- Storing: Keep at room temperature for up to 5 days in an airtight container.
- Freezing: Freeze baked cookies for up to 3 months, separating layers with parchment paper.

Substitutions & Variations
- Gluten-Free: Use a 1:1 gluten-free flour blend.
- Extra Spiced: Add a pinch of black pepper for a bolder flavor.
- Chocolate Drizzle: Instead of icing, drizzle with melted white chocolate.
Gingerbread Snowflake Cookies
Ingredients
Equipment
Method
- #### **Step 1: Prepare the Dough**
- In a medium bowl, whisk together **flour, ginger, cinnamon, cloves, nutmeg, salt, and baking soda**.
- In a large mixing bowl, beat **butter and brown sugar** until light and fluffy (**about 2 minutes**).
- Mix in **molasses, egg, and vanilla extract**, scraping down the sides as needed.
- Gradually add the **dry ingredients**, mixing until a smooth dough forms.
- #### **Step 2: Chill the Dough**
- Divide dough into two discs, wrap in plastic, and **chill for at least 1 hour** (or up to overnight).
- #### **Step 3: Roll & Cut the Cookies**
- Preheat oven to **350°F (175°C)** and line a **baking sheet with parchment paper**.
- On a lightly floured surface, roll out dough to **1/4-inch thickness**.
- Cut into **snowflake shapes** using cookie cutters.
- #### **Step 4: Bake & Cool**
- Place cookies on the baking sheet **1 inch apart**.
- Bake for **8-10 minutes**, or until edges are firm but centers are still soft.
- Let cool on the sheet for **5 minutes**, then transfer to a wire rack.
- #### **Step 5: Make the Icing & Decorate**
- Whisk together **powdered sugar, milk, vanilla, and corn syrup** until smooth.
- Transfer to a piping bag and decorate cookies with **snowflake patterns**.
- Let icing set for **30 minutes before stacking or storing**.
Leave a Reply