
Nothing compares to the luxurious creaminess of a cheesecake, especially when it’s a Mini No-Bake Cheesecake! Imagine a dessert that’s rich and velvety, yet light enough that you can savor every last bite without guilt. These mini treats are the epitome of indulgence, making them the perfect choice for family gatherings or cozy evenings at home.
I still remember the first time I made these for a family get-together. Watching my relatives dive into these bite-sized wonders, each one scrambling to finish before the next could get their hands on them, was a highlight of my dessert-making journey. Unlike a traditional cheesecake that requires hours in the oven, these mini delights come together effortlessly without any baking needed! If you’ve enjoyed making my fluffy chocolate mousse, you’ll find this recipe just as satisfying and equally impressive to serve to your guests.
Let’s dive into why you’ll absolutely adore these Mini No-Bake Cheesecakes!
What are Mini No-Bake Cheesecakes?
So, what exactly are these delightful creations we call Mini No-Bake Cheesecakes? It’s a bit of a mouthful, isn’t it? Perhaps a better name would be “Delightful Bites of Happiness”? After all, these creamy morsels are happiness in every bite. The joy of these mini cheesecakes is often found in their simplicity—like a culinary hug that says, “You’ve earned this!” They remind us that “the way to a man’s heart is through his stomach.”
Picture this: a group of friends gathered, and someone brings out these delectable treats from the fridge. Suddenly, everyone is smiling and giggling, sharing stories—all while fighting over the last piece. What could be more inviting? So, gather your ingredients, and let’s make these delightful mini cheesecakes that are sure to steal the show!
Why You’ll Love This Mini No-Bake Cheesecakes
There are countless reasons to fall in love with Mini No-Bake Cheesecakes, beginning with the extraordinary texture and flavor! The creamy filling pairs perfectly with a crunchy crust, creating a delightful contrast that dances on your palate. It’s like getting a spoonful of velvety happiness with every bite!
Cooking at home also saves you money—these mini cheesecakes are much friendlier on the wallet compared to the pricey alternatives at bakeries, not to mention they’re tailored to your taste preferences. Plus, the potential for flavorful toppings is endless! From fresh fruits to rich chocolate drizzles, each addition brings a new layer of flavor that makes every experience unique. If you love a good dessert, you’ll find these mini cheesecakes to be far superior to any store-bought option. So, roll up your sleeves, and let’s get baking (or rather, blending)!
How to Make Mini No-Bake Cheesecakes
Quick Overview
Making Mini No-Bake Cheesecakes is a breeze! With just a handful of ingredients and a little bit of patience, you’ll create a beautifully layered dessert that’s perfect for any occasion. The texture is wonderfully creamy, and the flavors are a delightful blend of sweet and tangy, leaving you craving more. Preparation takes just about 20 minutes, and the best part is, the chill time does all the work!
Ingredients
For your Mini No-Bake Cheesecakes, you’ll need the following ingredients:
- 8 oz cream cheese, softened
- 1/2 cup powdered sugar
- 1 tsp vanilla extract
- 1 cup whipped cream
- 1 cup graham cracker crumbs (about 10 whole crackers)
- Fruit toppings (optional, such as berries or sliced kiwi)
Feel free to get creative with the toppings!
Step-by-Step Instructions
- Prepare the Crust: Start by crushing the graham crackers into fine crumbs. This can be done in a food processor or by placing them in a zip-top bag and crushing them with a rolling pin. Mix the crumbs with a little melted butter (1-2 tablespoons) until it resembles wet sand.
- Form Crust: Line your mini cupcake pan or serving cups with paper liners for easy removal. Press the graham cracker mixture firmly into the bottom of each cup, creating an even layer that will serve as the base for your cheesecake.
- Make the Cheesecake Filling: In a mixing bowl, combine the softened cream cheese, powdered sugar, and vanilla extract. Use a hand mixer to beat the ingredients together until the mixture is smooth and creamy.
- Fold in Whipped Cream: Gently fold in the whipped cream until fully combined. Be careful not to overmix it, as you want to maintain that lovely light texture.
- Fill the Cups: Spoon the cheesecake mixture evenly over the crusts in your cupcake pan or cups, smoothing the tops with a spatula.
- Chill: Place the mini cheesecakes in the refrigerator to chill for at least 4 hours, or until firm. This is the hardest part—you’ll have to wait, but the results are worth it!
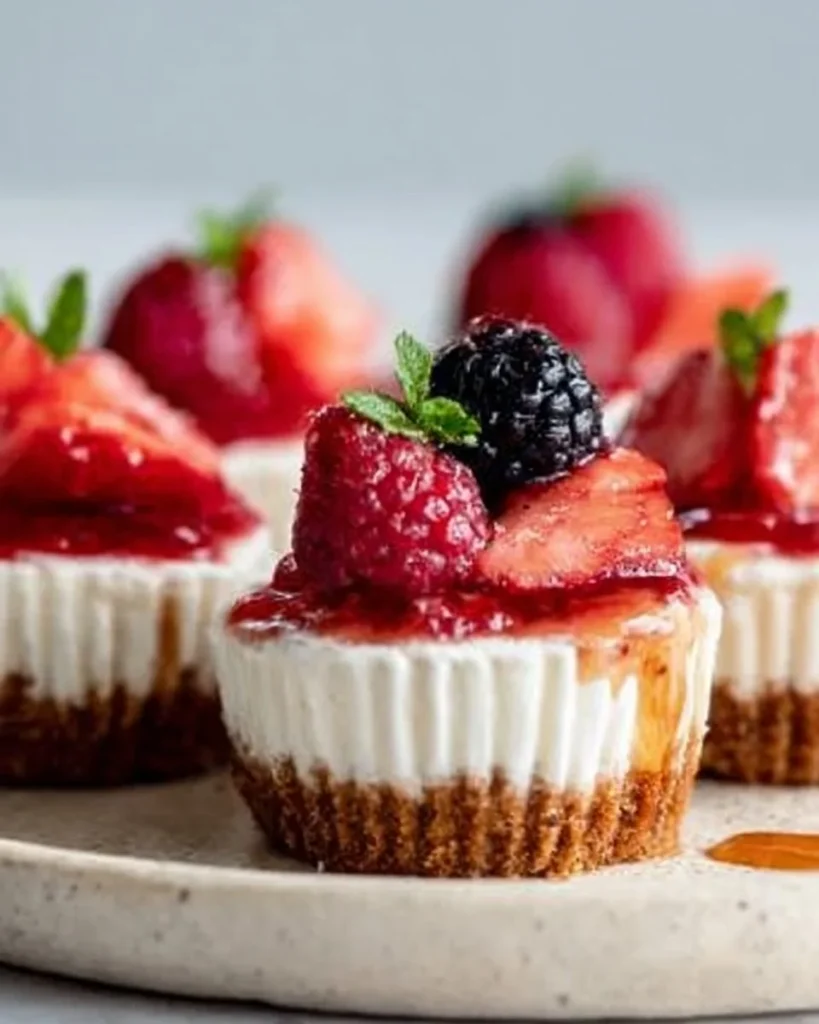
- Top & Serve: Before serving, add your choice of fresh fruit or toppings on each mini cheesecake for a colorful and fresh finish.
Top Tips for Perfecting Mini No-Bake Cheesecakes
- Substitutions: If you prefer a dairy-free option, you can use coconut cream instead of cream cheese for a lighter taste. Just make sure to adjust the sweetness to your liking.
- Timing: Make these a day ahead if you want to save time for your event. The longer they chill, the firmer and creamier they’ll become.
- Avoiding Mistakes: One common mistake is overbeating the cream cheese. Mix just until smooth before adding the whipped cream to maintain that airy texture.
Storing and Reheating Tips
These Mini No-Bake Cheesecakes can be stored in an airtight container in the refrigerator for up to a week. If you want to prepare them in advance, you can freeze them! Just wrap each mini cheesecake tightly in plastic wrap and place them in a freezer-safe container. They can last for about 2-3 months in the freezer. When you’re ready to enjoy them, let them thaw in the refrigerator overnight for the best texture.
Now, it’s your turn to get in the kitchen and whip up these Mini No-Bake Cheesecakes! They’re so simple and delicious, you’ll wonder why you hadn’t made them sooner. Happy baking!

FAQs
Q: Can I use different flavors of cream cheese?
Absolutely! You can experiment with flavored cream cheese, such as strawberry or chocolate, to mix things up. It’s an easy way to customize your cheesecakes!
Q: What other toppings would you recommend?
Fresh fruit, chocolate ganache, or even a caramel drizzle work wonderfully. Just let your imagination run wild!
Q: How can I make the crust gluten-free?
You can substitute graham crackers with gluten-free graham cracker crumbs or even crushed almonds or gluten-free cookies.
With a few simple ingredients and these easy-to-follow steps, you’re all set to impress your family and friends with your homemade Mini No-Bake Cheesecakes! Enjoy every bite!
Mini No-Bake Cheesecakes
Ingredients
Method
- Start by crushing the graham crackers into fine crumbs. This can be done in a food processor or by placing them in a zip-top bag and crushing them with a rolling pin.
- Mix the crumbs with a little melted butter (1-2 tablespoons) until it resembles wet sand.
- Line your mini cupcake pan or serving cups with paper liners for easy removal. Press the graham cracker mixture firmly into the bottom of each cup, creating an even layer that will serve as the base for your cheesecake.
- In a mixing bowl, combine the softened cream cheese, powdered sugar, and vanilla extract. Use a hand mixer to beat the ingredients together until the mixture is smooth and creamy.
- Gently fold in the whipped cream until fully combined. Be careful not to overmix it, as you want to maintain that lovely light texture.
- Spoon the cheesecake mixture evenly over the crusts in your cupcake pan or cups, smoothing the tops with a spatula.
- Place the mini cheesecakes in the refrigerator to chill for at least 4 hours, or until firm.
- Before serving, add your choice of fresh fruit or toppings on each mini cheesecake for a colorful and fresh finish.
Leave a Reply