
A Delectable Indulgence for Every Occasion
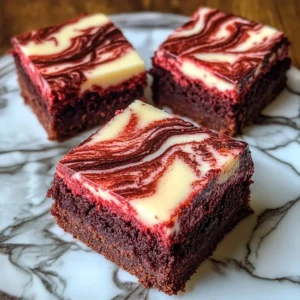
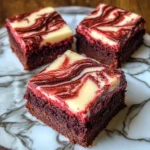
Are you ready to take your dessert game to an entirely new level? If so, allow me to introduce you to the show-stopping Marbled Red Velvet Cheesecake Brownies! These decadent brownies are a delightful fusion of rich, chocolatey brownie goodness, and luscious cream cheese, swirled beautifully for a striking visual appeal. Trust me, this dessert isn’t just pretty; it’s incredibly tasty, too!
Did you know that red velvet cake has Southern roots and was popularized in the 1920s? With its velvety texture and vibrant color, it’s no wonder this dessert has persisted as a classic favorite! You’ll love how simple it is to whip up this recipe, making it an ideal choice for family gatherings, celebrations, or even just a sweet treat after a long day. If you’re a fan of brownies (like our classic fudgy brownies) or any red velvet treats, you’re in for a real treat! So, grab your apron, and let’s dive into this indulgent dessert together!
What are Marbled Red Velvet Cheesecake Brownies?
Marbled Red Velvet Cheesecake Brownies? Quite the tongue twister, isn’t it? But that just adds to their charm! The name really captures the essence of what you’re about to enjoy—a stunningly marbled dessert that seamlessly combines two beloved cuisines: rich brownies and creamy cheesecake. So, why the fancy name? Well, you know what they say, “the way to a man’s heart is through his stomach,” and I’m here to tell you that this treat might just steal the show! Picture it—a dessert so good it has a name that makes it sound like a gourmet treat straight from a high-end bakery. So what are you waiting for? Let’s make some mouthwatering Marbled Red Velvet Cheesecake Brownies that will leave everyone impressed!
Why You’ll Love This Marbled Red Velvet Cheesecake Brownies
Let’s talk about why these Marbled Red Velvet Cheesecake Brownies deserve a special place in your dessert rotation! For starters, the main highlight of these brownies is the astounding flavor combination. Each bite offers a rich, chocolaty brownie layer with a hint of tangy cream cheese swirl, creating a symphony of flavor and texture that dances on your palate. And while you might think that such a delicious dessert must be pricey or difficult to recreate, I’m happy to tell you that making these at home will save you money and the hassle of navigating a crowded bakery.
Another unique aspect of these brownies is the fantastic cream cheese layer that complements the chocolate beautifully. You can even add delightful toppings like whipped cream, chocolate shavings, or fresh raspberries to elevate the experience further. If you like this creative combination, you might also enjoy our classic cheesecake brownie recipe. Believe me when I say that your friends and family will be begging for seconds! So roll up those sleeves, gather your ingredients, and let’s make these scrumptious brownies together!
How to Make Marbled Red Velvet Cheesecake Brownies
Quick Overview
Making Marbled Red Velvet Cheesecake Brownies is easier than you might think! In less than an hour, you can whip up these delicious treats packed with flavor and the comfort of homemade goodness. You’ll appreciate their rich taste and the eye-catching marbling that makes each bite feel like a special celebration!
Key Ingredients for Marbled Red Velvet Cheesecake Brownies
Here are the ingredients you will need to make these delightful brownies:
- For the Brownie Layer:
- ½ cup unsalted butter, melted
- 1 cup granulated sugar
- 2 large eggs
- 1 teaspoon vanilla extract
- 1 cup all-purpose flour
- ¼ cup unsweetened cocoa powder
- 1 teaspoon red food coloring
- ½ teaspoon baking powder
- Pinch of salt
- For the Cheesecake Layer:
- 8 oz cream cheese, softened
- ¼ cup granulated sugar
- 1 large egg
- 1 teaspoon vanilla extract
Make sure to gather everything before you get started for a seamless cooking experience!
Step-by-Step Instructions:
- Preheat the Oven: Begin by preheating your oven to 350°F (175°C). Grease a 9×9-inch baking pan or line it with parchment paper.
- Make the Brownie Batter: In a large bowl, combine the melted butter and granulated sugar. Stir until well mixed, then add in the eggs, one at a time, followed by the vanilla extract.
- Combine the Dry Ingredients: In another bowl, whisk together flour, cocoa powder, baking powder, and salt. Gradually fold this mixture into the wet ingredients until combined.
- Add the Red Coloring: Stir in the red food coloring until you achieve the desired color. The more you add, the deeper the red will be!
- Prepare the Cheesecake Layer: In a separate bowl, beat the softened cream cheese with granulated sugar until creamy. Add the egg and vanilla extract, mixing until smooth.
- Layer the Mixtures: Pour ¾ of the brownie batter into the prepared baking pan. Spoon the cheesecake mixture over the brownie layer, followed by the remaining brownie batter. Use a knife or skewer to swirl the two mixtures gently, creating that lovely marbled effect.
- Bake: Bake for 30-35 minutes, or until a toothpick inserted into the center comes out clean. Let the brownies cool in the pan for about 10 minutes before transferring to a wire rack to cool completely.
- Slice and Serve: Once cooled, slice your brownies into squares, serve them up, and enjoy the deliciousness!
What to Serve Marbled Red Velvet Cheesecake Brownies With
These Marbled Red Velvet Cheesecake Brownies would pair wonderfully with a scoop of vanilla ice cream, enhancing the flavors of each delightful bite. If you’re looking to add a refreshing touch, consider serving them with fresh berries, which add a beautiful contrast in color and taste. A drizzle of chocolate or cream cheese frosting on top can also elevate your dessert to the next level, bringing out that creamy goodness even more. Pair with a hot cup of coffee or a chilled glass of milk for a classic, comforting dessert experience!
Top Tips for Perfecting Marbled Red Velvet Cheesecake Brownies
To take your Marbled Red Velvet Cheesecake Brownies to perfection, here are some expert tips. First, do not overmix the brownie batter; a few lumps can lead to a more delicious texture. Also, if you want to tone down the sweetness, consider reducing the sugar in your cheesecake layer slightly, personalizing it to your taste. While baking, keep an eye on the brownies; every oven varies, and you want that perfect balance of fudgy and set! Lastly, if you have leftovers (which might be hard to believe), avoid cutting them until they are completely cool to maintain their structure.
Storing and Reheating Tips
If you happen to have any brownies left, storing them properly will keep them delicious for days! Place them in an airtight container in the refrigerator for up to 5 days. You can also freeze the brownies for up to 3 months. Just make sure to wrap them tightly in plastic wrap or aluminum foil. When you’re ready to enjoy them again, let them thaw in the fridge for a few hours or at room temperature for about 30 minutes. For a warmed-up treat, simply pop them in the microwave for about 10-15 seconds—just enough to make them gooey and irresistible!
Conclusion
There you go—a detailed journey through the wonderful world of Marbled Red Velvet Cheesecake Brownies! These delightful creations are not just a feast for the eyes but a treat for the taste buds. With simple ingredients and easy steps, you’re sure to impress family and friends with your baking skills. So, gather your loved ones and get ready to whip up this charming dessert that truly brings everyone together! Happy baking!
Marbled Red Velvet Cheesecake Brownies
Ingredients
Method
- Preheat your oven to 350°F (175°C). Grease a 9×9-inch baking pan or line it with parchment paper.
- In a large bowl, combine the melted butter and granulated sugar. Stir until well mixed, then add in the eggs one at a time, followed by the vanilla extract.
- In another bowl, whisk together flour, cocoa powder, baking powder, and salt. Gradually fold this mixture into the wet ingredients until combined.
- Stir in the red food coloring until you achieve the desired color.
- In a separate bowl, beat the softened cream cheese with granulated sugar until creamy. Add the egg and vanilla extract, mixing until smooth.
- Pour ¾ of the brownie batter into the prepared baking pan. Spoon the cheesecake mixture over the brownie layer, followed by the remaining brownie batter.
- Use a knife or skewer to swirl the two mixtures gently, creating the marbled effect.
- Bake for 30-35 minutes, or until a toothpick inserted into the center comes out clean.
- Let the brownies cool in the pan for about 10 minutes before transferring to a wire rack to cool completely.
- Once cooled, slice your brownies into squares, serve them up, and enjoy!
Leave a Reply